
A SaaS application answers two kinds of traffic from one hostname. The app shell (bundles, CSS, fonts) is identical for every tenant and belongs at the edge. The API behind it is dynamic, authenticated, and must never come from a cache.
This guide splits one CDN resource along that line. Target architecture: /assets/ cached and compressed at the edge; /api/ proxied to your origin on every request, carrying CORS headers and rate caps; HTTPS in front of both; Origin Shield behind the cached side.
Prerequisites
- An active CDN resource created for your application’s hostname. See Add Your First CDN Resource.
- Your domain pointed at the CDN and serving traffic through it. See Point Your Domain at the CDN.
- An SSL certificate on the resource. See Add SSL Certificates to Your CDN.
- An application whose static shell and API live under stable URL path prefixes, for example
/assets/and/api/. - Client Area access to the package.
Why Split the App from Its API
- Authenticated responses never cache: the API path proxies every request to the origin. A response meant for one user cannot reach another.
- The shell loads fast everywhere: identical-for-everyone content is what an edge cache serves best. Compression shrinks it further.
- Abuse stops before your origin: per-IP and per-URL rate caps absorb a misbehaving client at the edge.
Step 1: Plan the Path Split
Two behaviours cannot share one set of rules. The mechanism that separates them is locations: path-based routing rules that override cache, headers, ACL and rate limits per URL prefix. More specific prefixes win over the catch-all /; a resource holds up to 10.
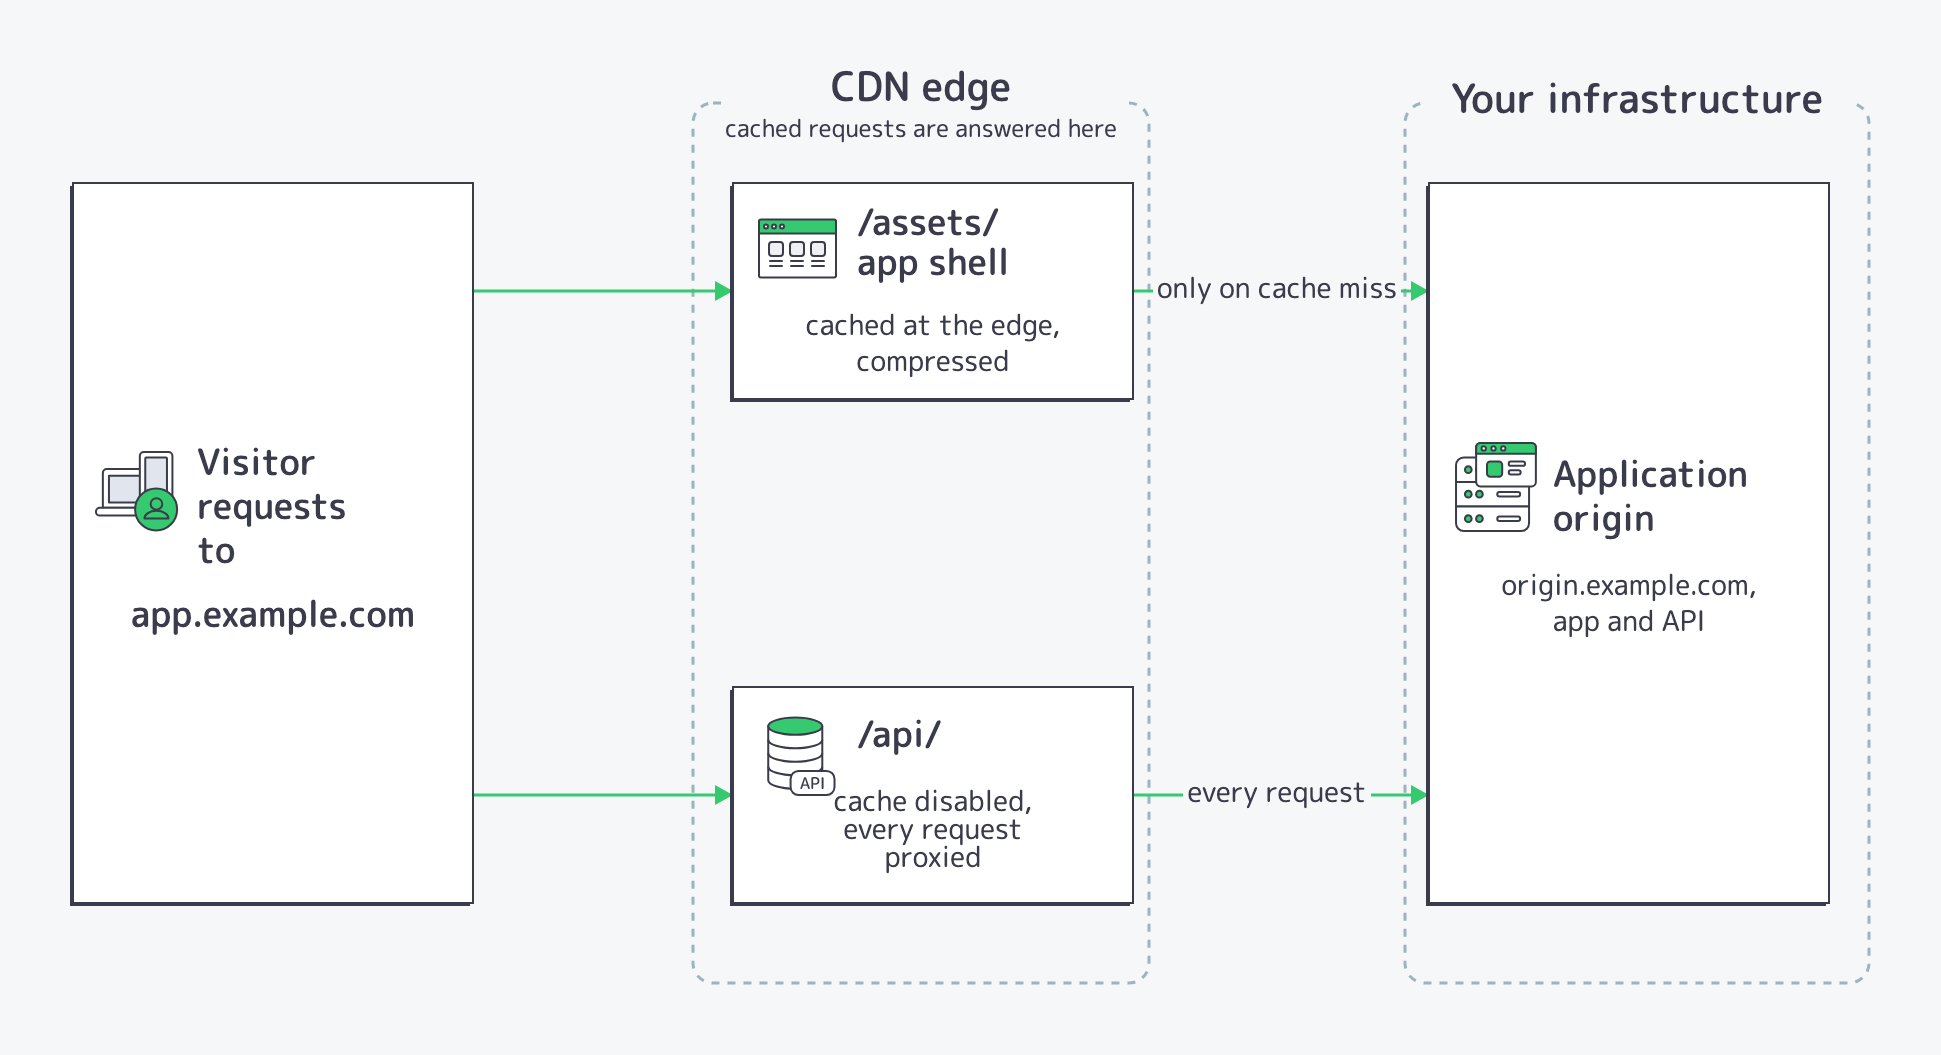
The boundary shows the benefit: shell requests end at the edge; only cache misses and API calls reach your infrastructure. Three rules express it:
| Path prefix | Treatment |
|---|---|
/assets/ |
The app shell. Cached at the edge and compressed. |
/api/ |
The API. Never cached; every request proxies to the origin, carrying CORS headers and rate caps. |
/ |
Everything else. Keeps the resource defaults. |
Swap in your own prefixes. The rest of the guide builds these rules in order.
Step 2: Put HTTPS in Front of Both
Browser sessions carry tokens to /api/, so the transport must be encrypted. In the Resources table, click the gear icon (Edit resource settings) on the resource’s row, then Advanced settings. In the Connection area, set the Protocol to HTTPS, or HTTP→HTTPS to redirect stray plain-HTTP requests once a valid certificate is live.
The trade-offs between the four modes are in Choosing a Protocol for Your CDN.
Step 3: Create the /assets/ and /api/ Locations
Open the Origins tab. In the Locations panel, click + Add a Location, enter /assets/, add a short description, and click Save. Repeat for /api/. The dialog is shown filled with another prefix; the fields are the same:
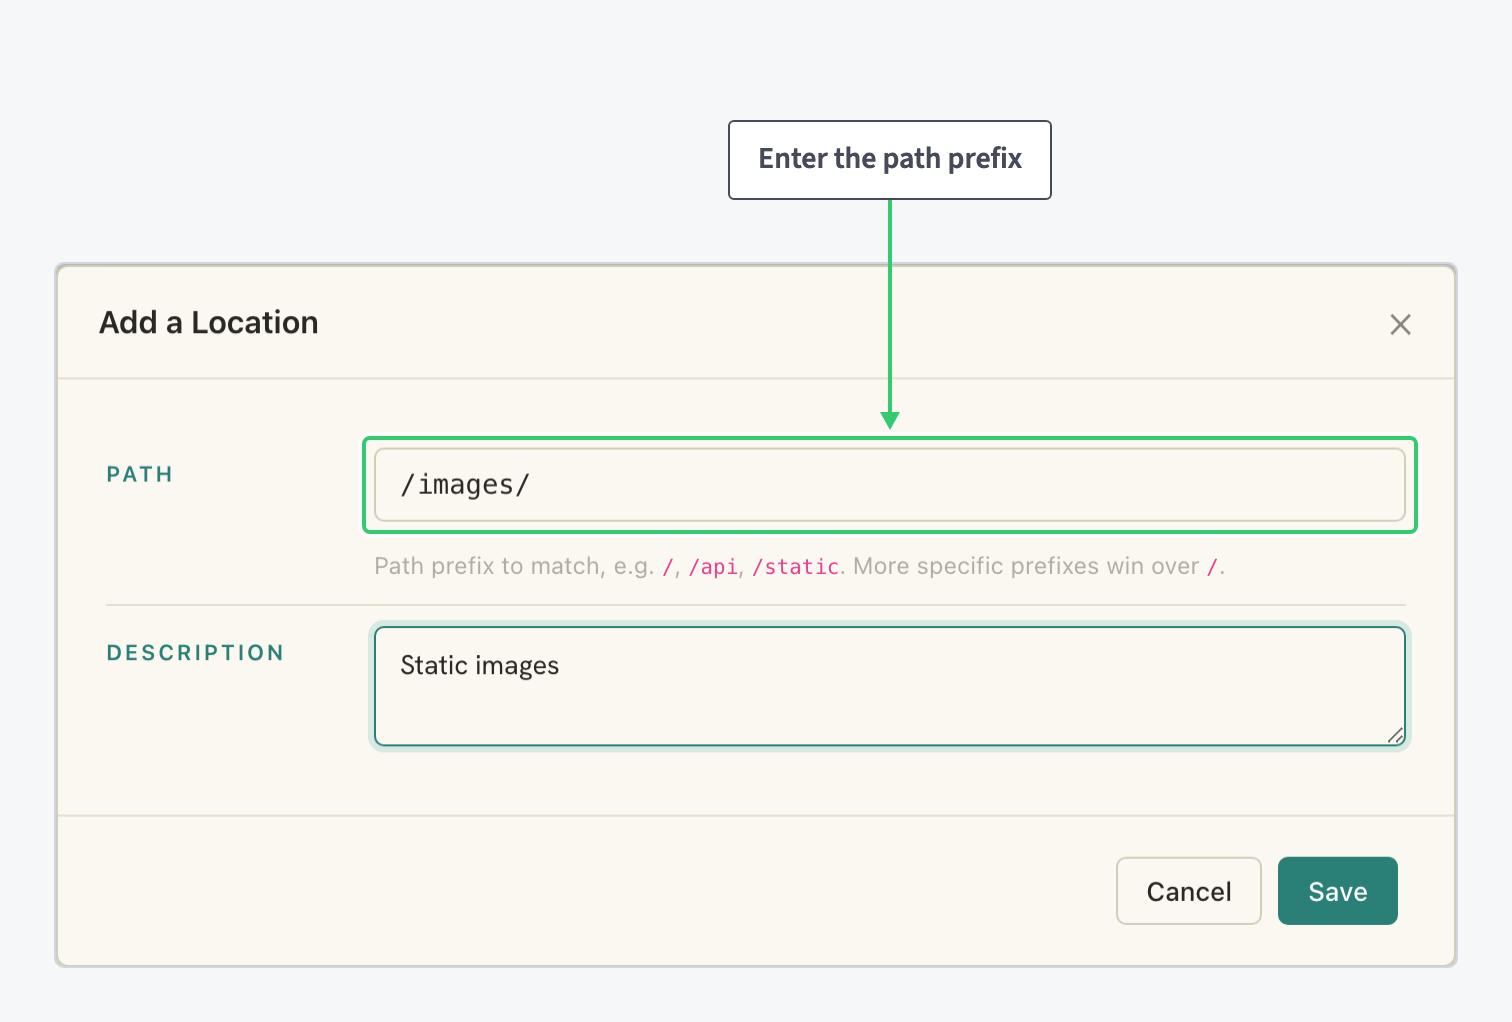
Both locations catch their traffic from now on; everything else follows the catch-all. Each keeps the default upstream, your application origin, which is correct for this setup. Full detail: Route and Configure a Specific URL Path on Your CDN.
Step 4: Disable Caching on the API Path
A cached API response is one user’s data waiting to be served to another. Rule it out structurally: click the /api/ location’s row to expand its card, switch on Disable Cache in the General section, and click the section’s Save. The location now proxies every request straight to the origin, the right treatment for dynamic APIs and authenticated endpoints.

Every token refresh, webhook and authenticated call is now a live round trip, no matter how aggressively the rest of the resource caches.
Step 5: Add CORS Headers on the API Path
Browsers block cross-origin API calls unless the response carries the right CORS headers. On the same card, find the Headers group and click + Add header:

Choose the type first. proxy_set_header modifies the request sent to your origin; add_header adds a header to the response sent to the visitor. CORS is response-side: pick add_header, name the header, set its value, Save.
There is no CORS preset; add each Access-Control-* header in its own dialog. The standard names, as an example:
| Header (example) | Typical value |
|---|---|
Access-Control-Allow-Origin |
The origin allowed to read the response, e.g. https://app.example.com |
Access-Control-Allow-Methods |
e.g. GET, POST, OPTIONS |
Access-Control-Allow-Headers |
Request headers the client may send, e.g. Content-Type, Authorization |
Access-Control-Max-Age |
Seconds a preflight response may be cached, e.g. 86400 |
Scoped to the /api/ location, these headers leave the rest of the site untouched. Full detail: Manage Response Headers and CORS on Your CDN.
Step 6: Rate-Limit the API at the Edge
One misbehaving client can overload an API. Cap it at the edge: still on the /api/ card, expand the Rate Limit row, switch on Enable, and set the per-IP limit:

| Setting | Value |
|---|---|
| Rate | The highest sustained request rate a legitimate client of your API should generate, per second or per minute. |
| Burst | Headroom above the rate for a short burst of parallel calls: queued, not rejected. Keep a small buffer so legitimate bursts never trip the limit. |
The advanced disclosure adds an independent per-URL cap, with its own Enable and the same fields: use it to protect an expensive endpoint like a search or an export route. Click the section’s Save; the caps bind /api/ traffic only. The resource-wide variant is covered in Restrict Access to Your CDN by IP, User Agent or Country.
Step 7: Compress the App Shell
The shell is text, and uncompressed text wastes every visitor’s bandwidth. On the General tab of the advanced view, expand Gzip in the Cache & Compression section, switch on Enable Gzip, and click the section’s Save:
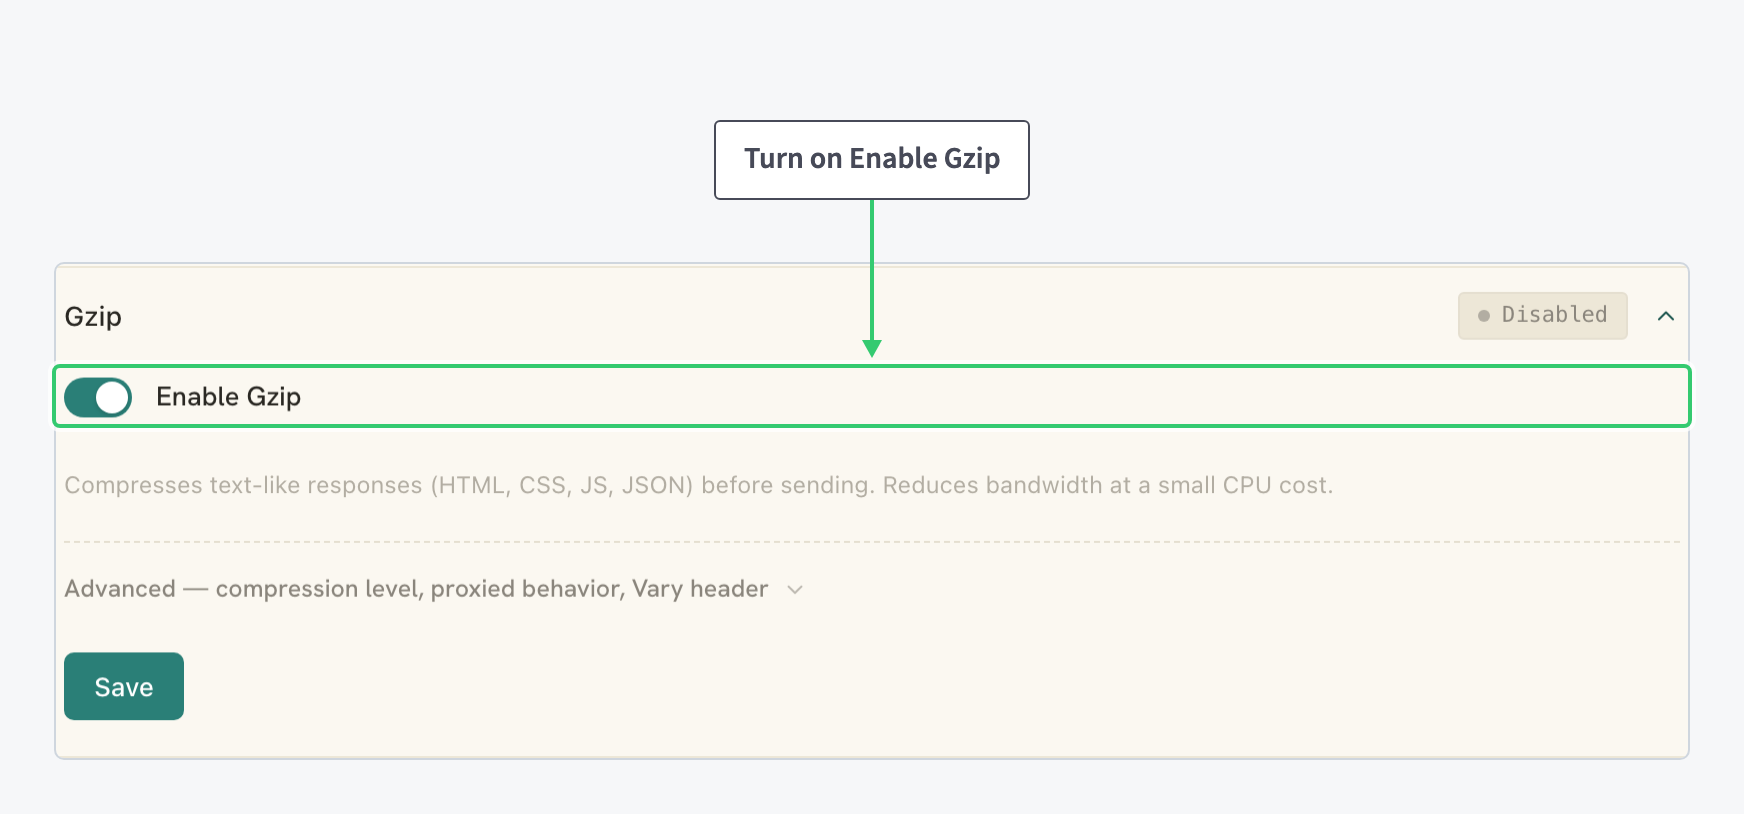
Repeat for Brotli. Brotli compresses tighter than Gzip, and newer browsers pick it when both run; keep the default compression levels, they are the right choice. Full detail: Enable Gzip and Brotli Compression on Your CDN.
One habit completes the shell configuration: when a deploy ships new bundles, purge /assets/ so the edge refetches them. Click the eraser icon (Clear cache) in the resource’s Actions column and type the folder’s relative path ending in /. Full detail: Purge a URL or Your Entire CDN Cache.
Step 8: Shield the Origin Behind the Cache
After a deploy, every edge misses on the same new bundle at once. Origin Shield routes those misses through one shared edge layer: your origin answers once, and the shield feeds the rest. On the advanced General page, click the Origin Shield toggle in the Connection area, then apply it with the resource form’s Save bar:
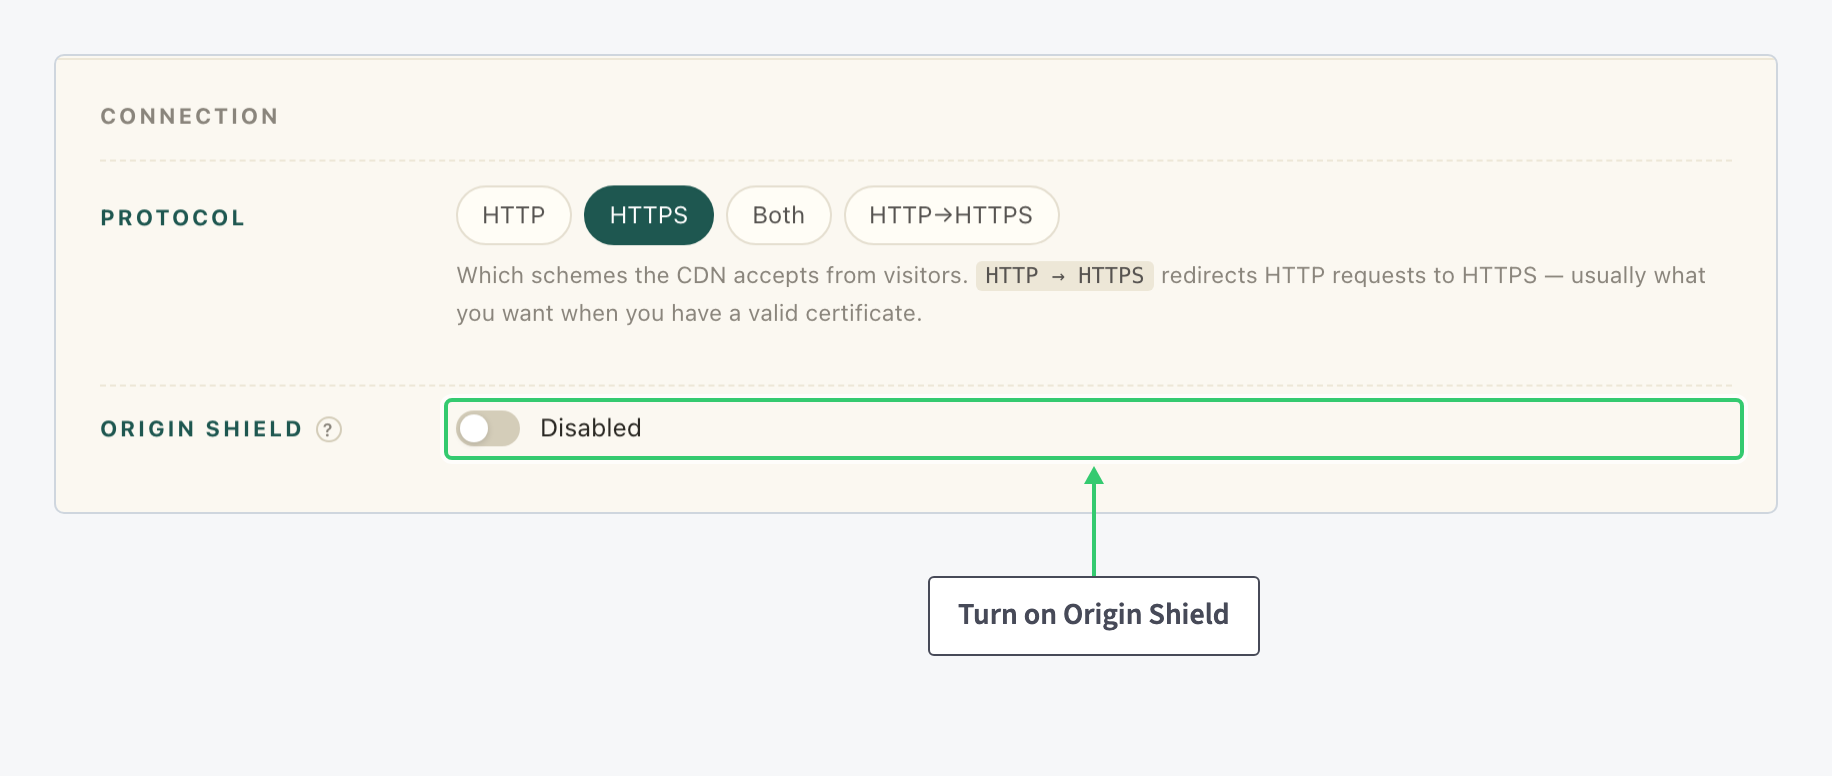
The benefit applies to the cached side of your split; the API path is untouched. Full detail: Enable Origin Shield Protection on Your CDN.
What You’ve Built
One hostname, two behaviours, each correct for its traffic. The app shell serves from the edge, compressed, with misses concentrated by Origin Shield. The API answers every request live from your origin, over HTTPS, carrying the CORS headers browsers require, behind rate caps that stop abuse before it reaches you.
The split has room to grow. A webhook path or a docs site is one more location. An expensive endpoint gets its own per-URL cap. If the static side moves to its own storage, the location’s upstream selector points there: see Add Multiple Origins and Failover to Your CDN.