
Every CDN resource that answers HTTPS needs a certificate. The panel gives you three ways to get one: a free Let’s Encrypt certificate issued and renewed for you, a self-signed certificate for testing, and an upload form for a certificate you already own.
The choice appears twice: once in the new resource wizard, and once on the resource’s SSL tab, where you can change it at any time. This tutorial walks through both places and through each of the three options.
Prerequisites
- A CDN resource. If you have not created one yet, start with Adding your first resource.
- A protocol that actually uses TLS:
HTTPS,BothorHTTP→HTTPS. See Choosing a protocol. - For the free certificate: your hostname pointed at the CDN with a CNAME record. See Pointing your domain at the CDN.
- For a custom certificate: the fullchain file (leaf certificate plus intermediate CA) and the matching private key, both in PEM format.
Step 1: Choose a certificate type in the wizard
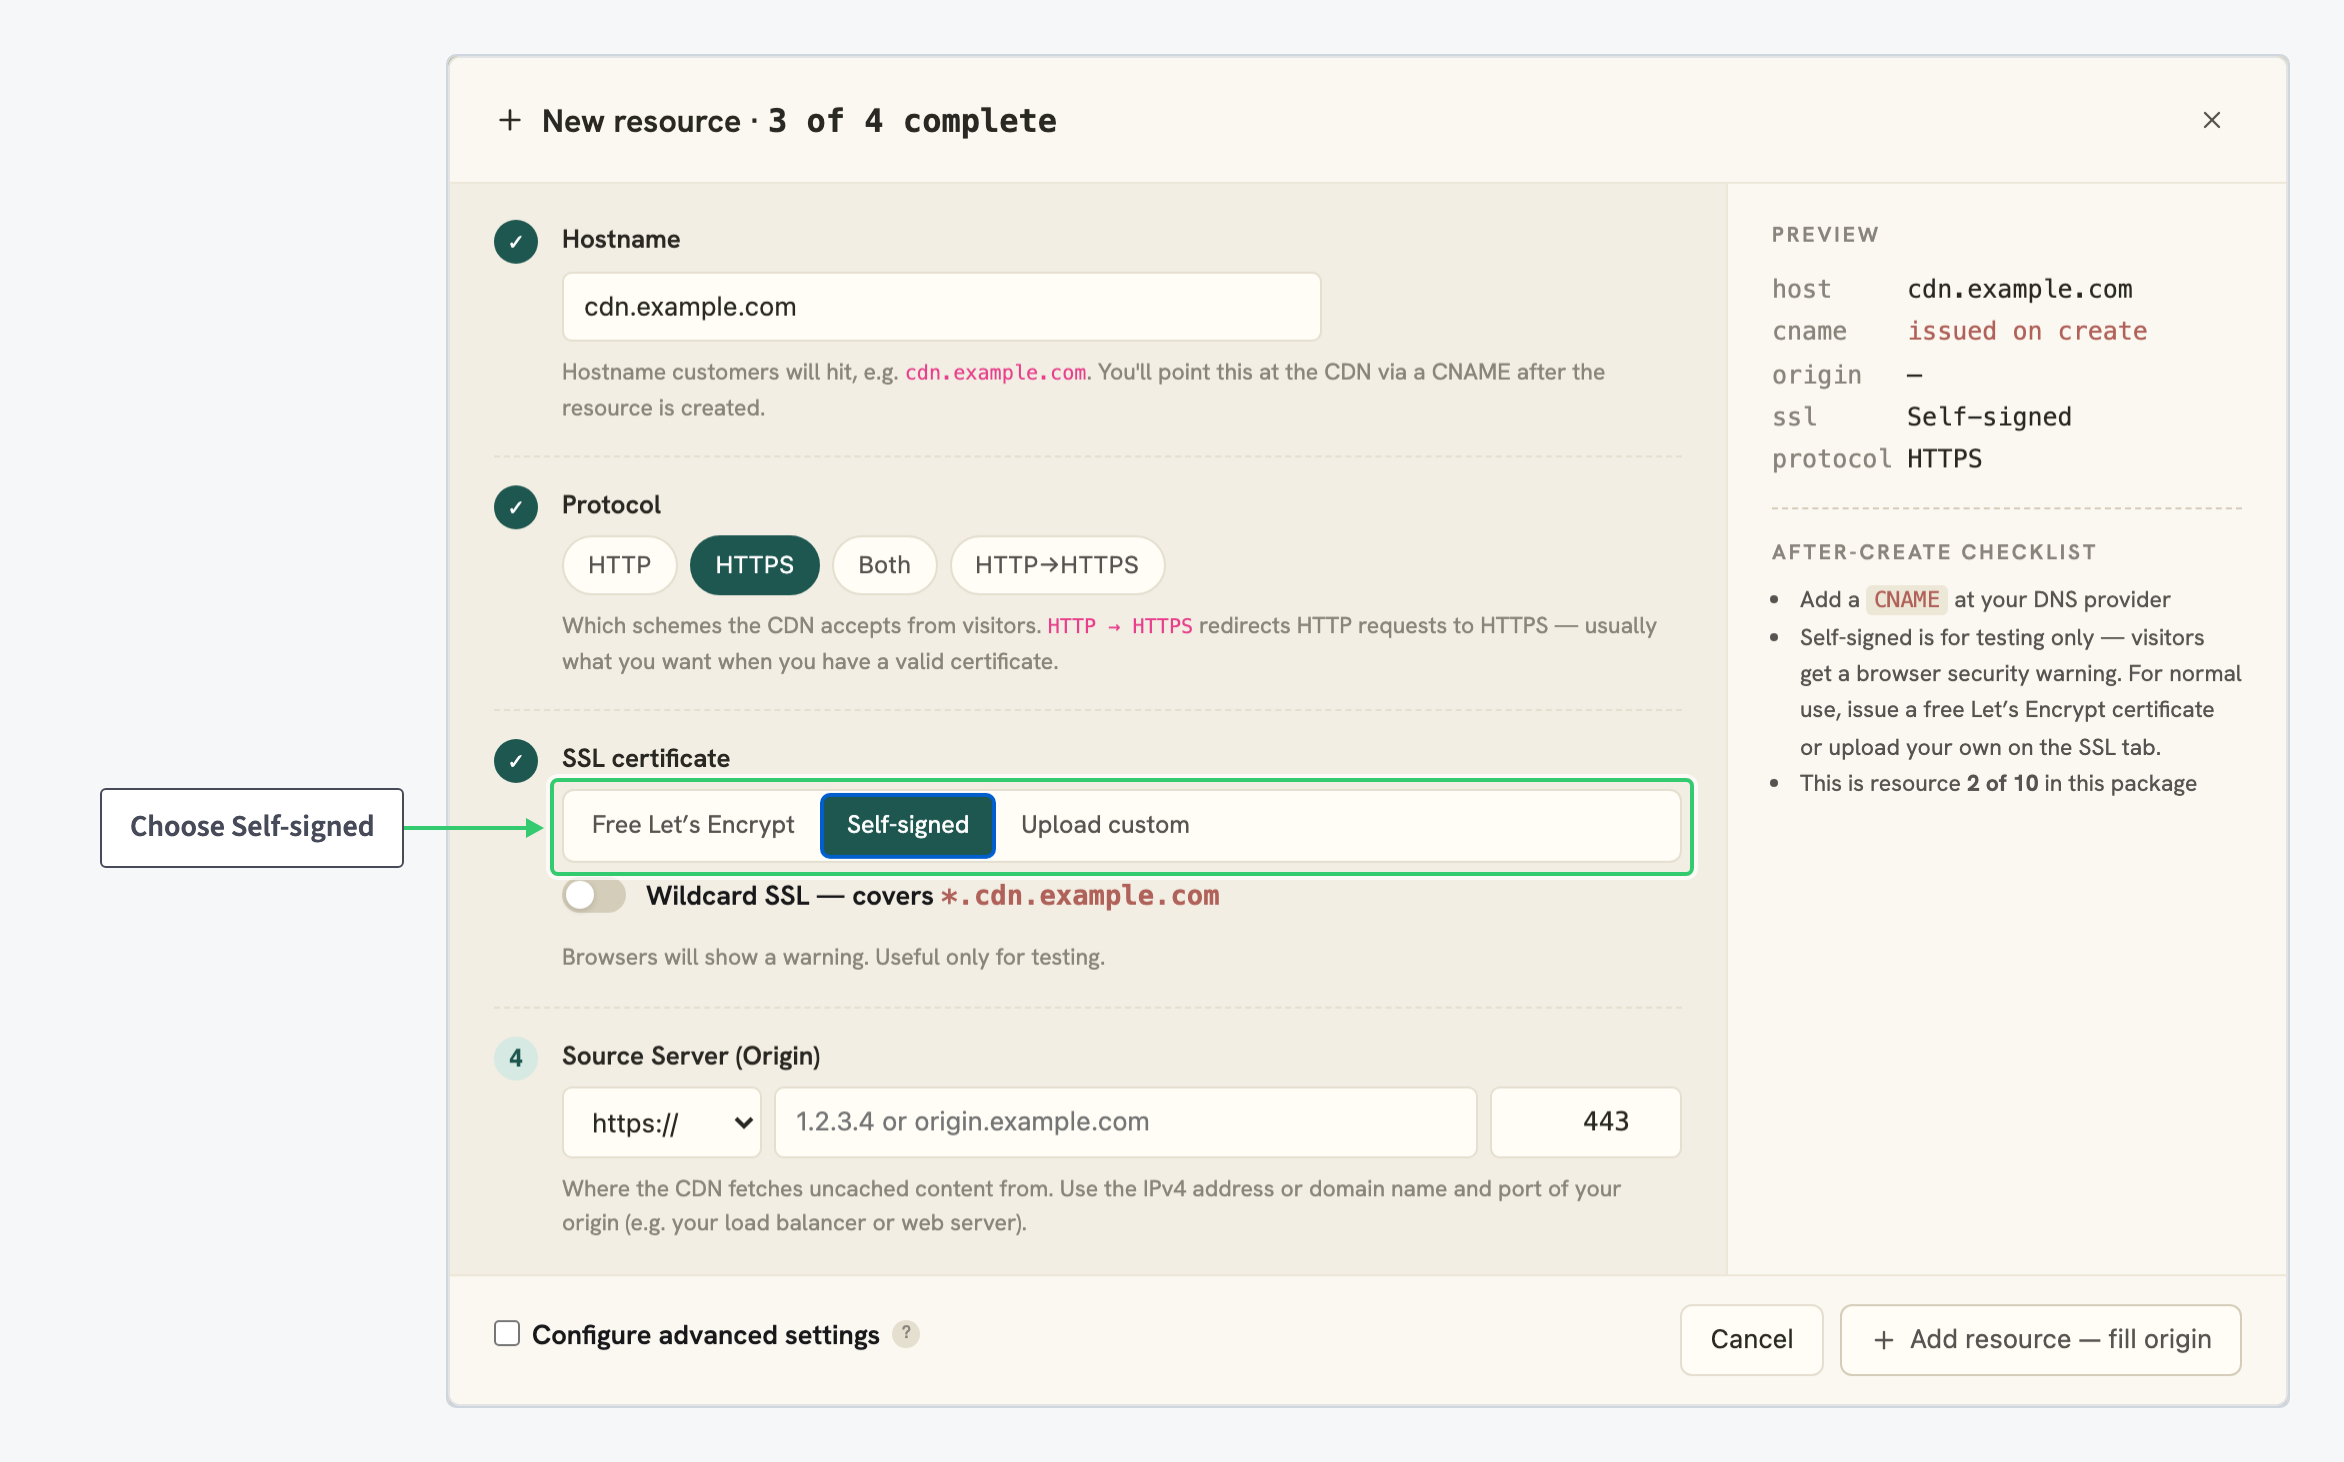
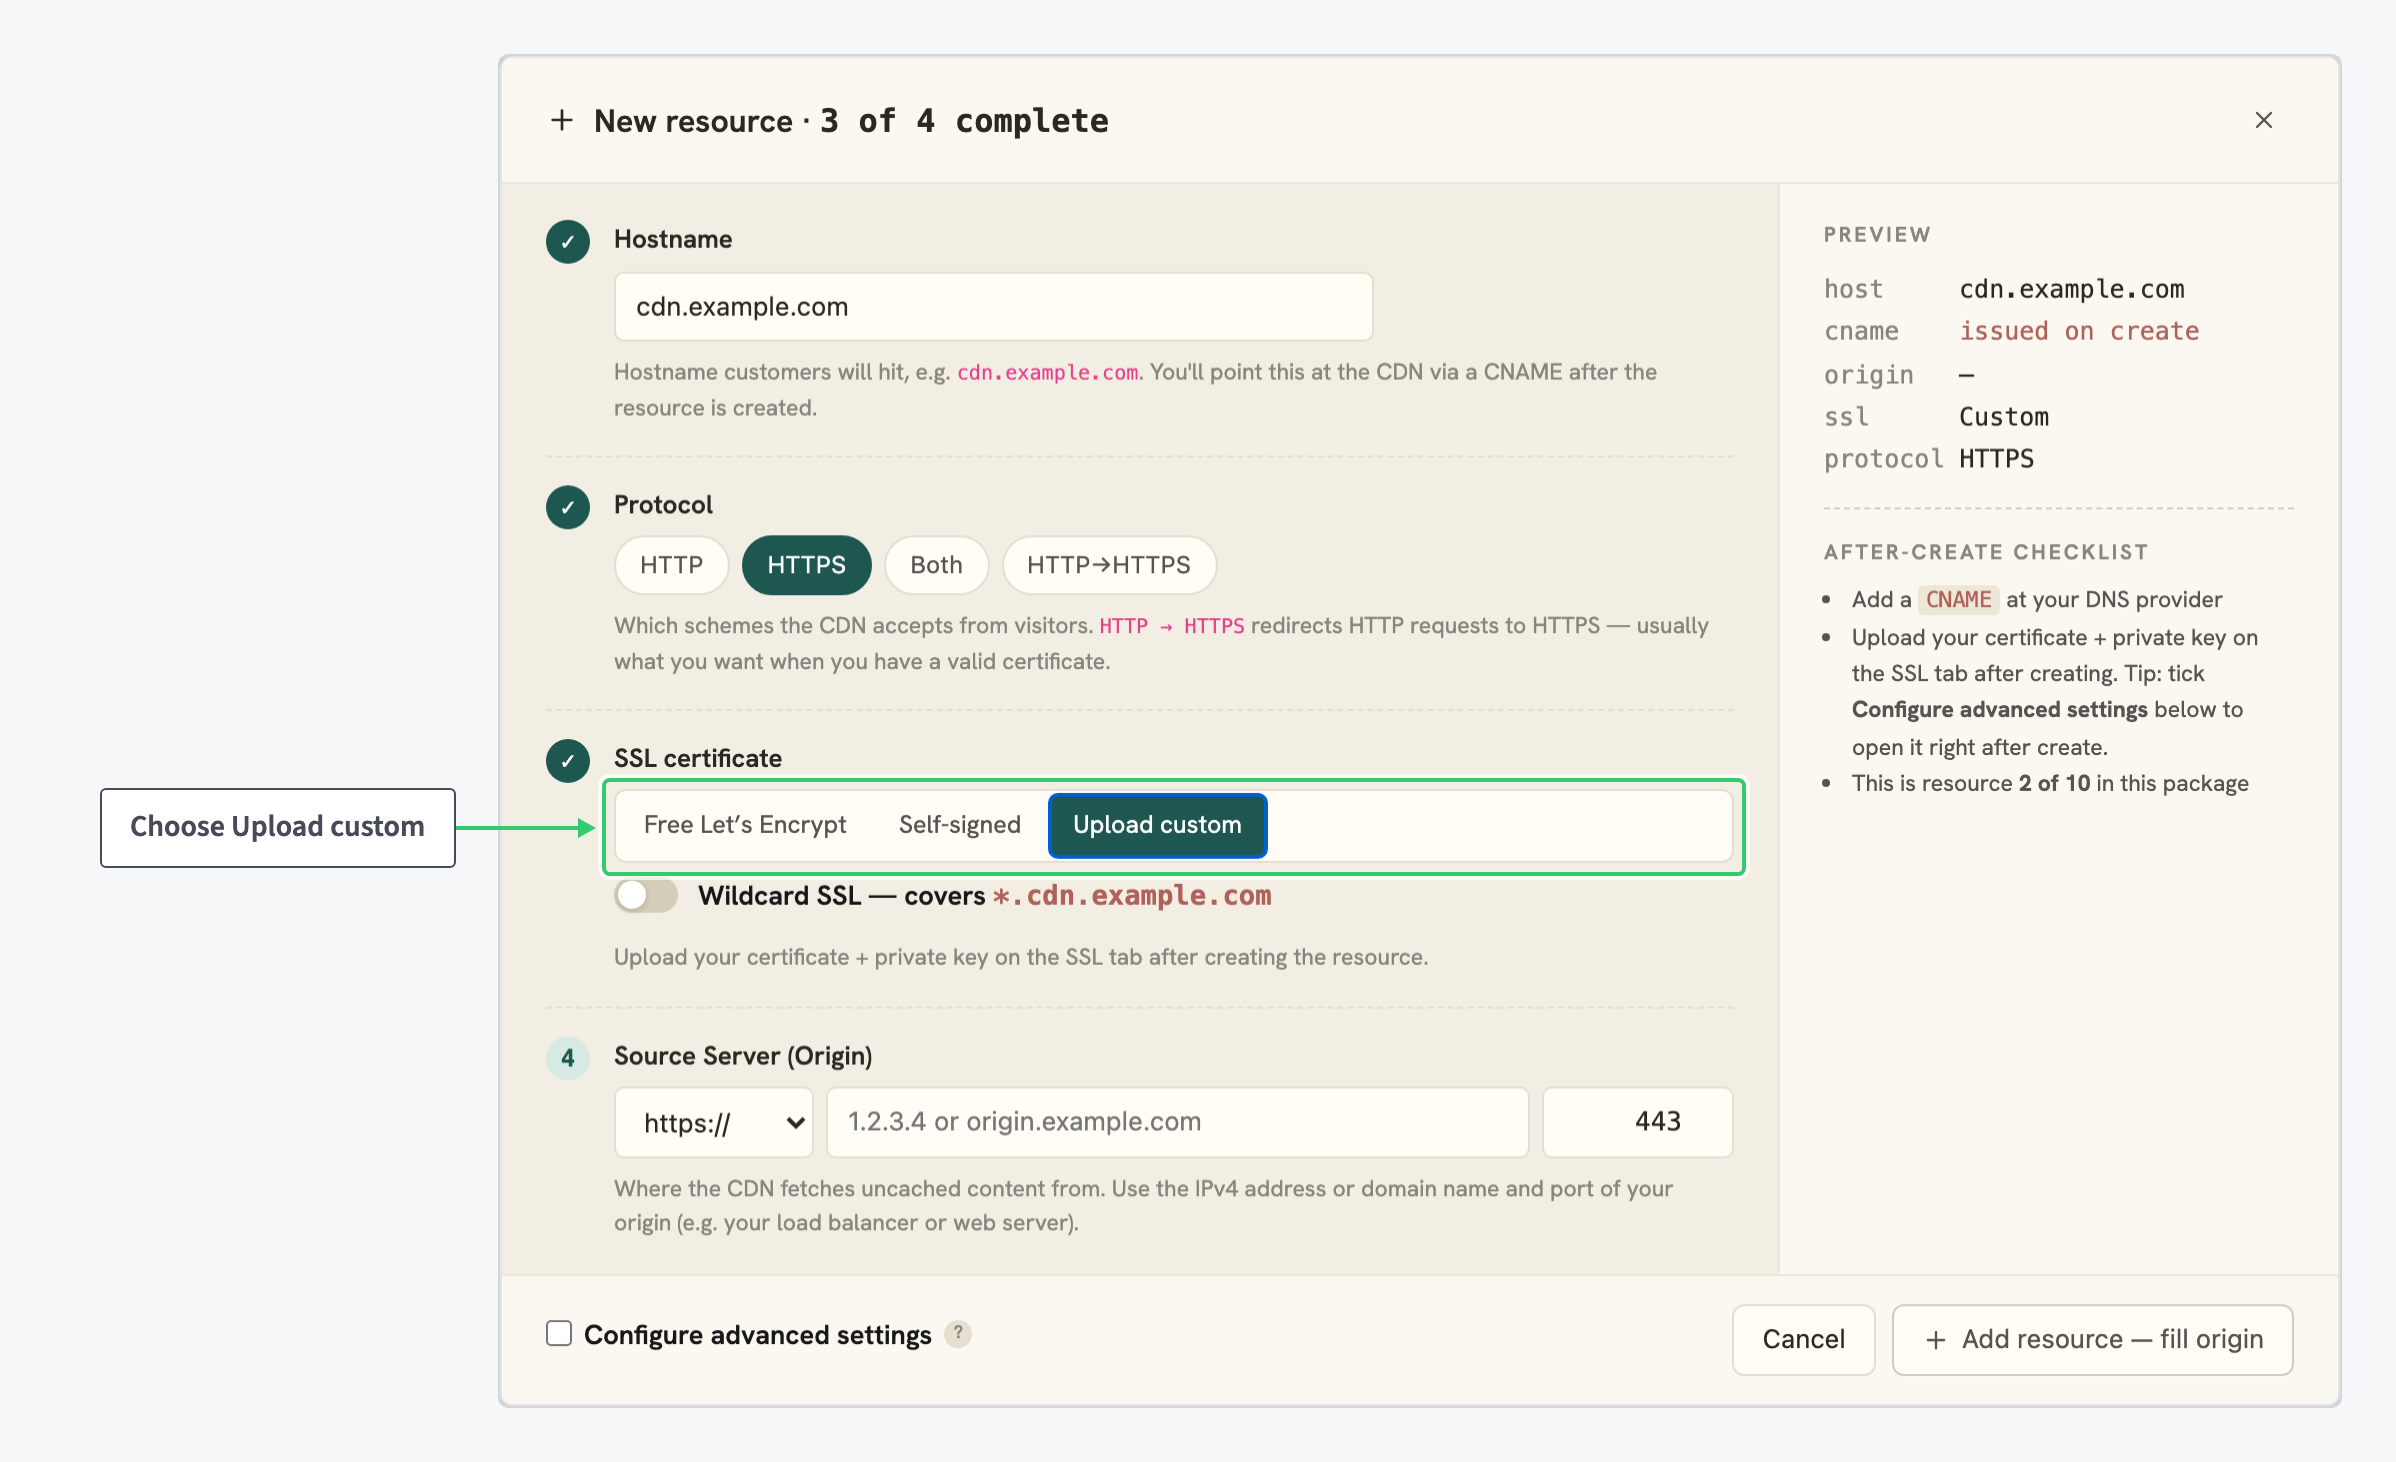
The new resource wizard has an SSL certificate section with three tabs. Free Let’s Encrypt is selected by default, and the Preview panel on the right reflects your choice under ssl.
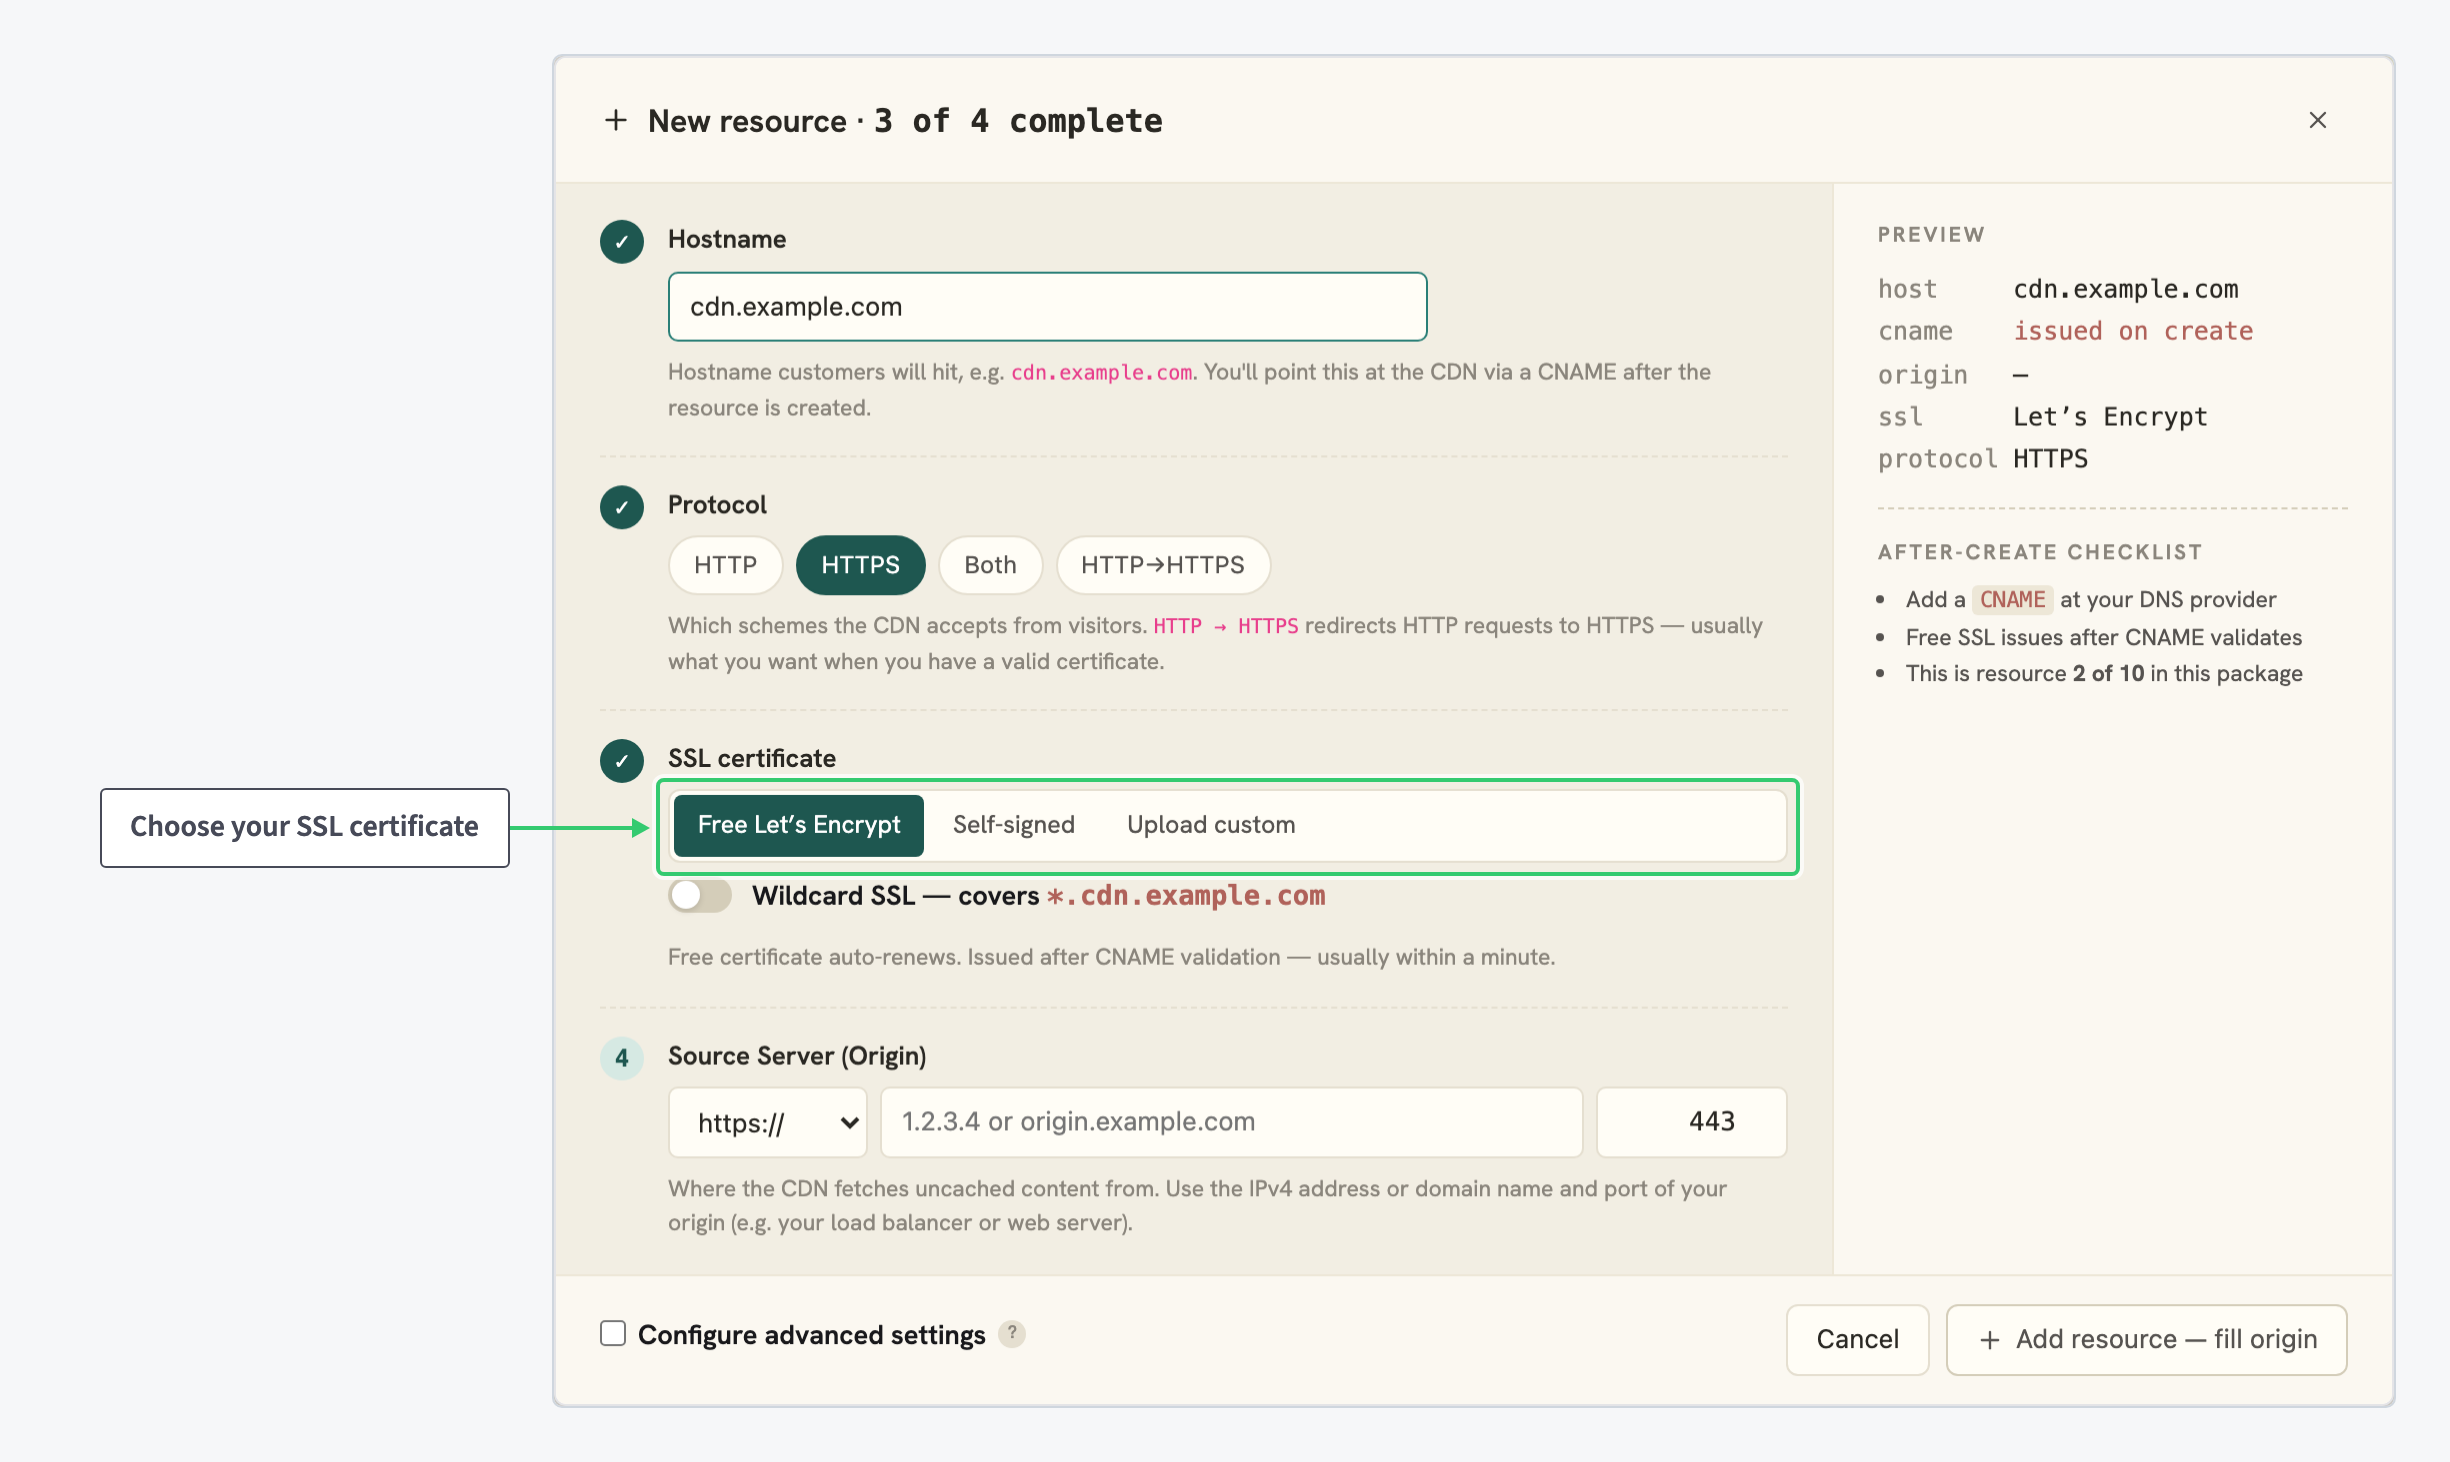
Here is what each tab means:
| Tab | What it means |
|---|---|
| Free Let’s Encrypt | The free certificate auto renews, and is issued after CNAME validation, usually within a minute |
| Self-signed | Browsers will show a warning, useful only for testing |
| Upload custom | You upload your certificate and private key on the SSL tab after creating the resource |
The Wildcard SSL toggle under the tabs asks for a certificate that also covers subdomains of your hostname, for example *.cdn.example.com.
Nothing here is final. Once the resource exists, its SSL tab lets you issue the free certificate or upload your own whenever you want.
Step 2: Open the SSL settings of an existing resource
In your package’s resource list, click the settings icon (Edit resource settings) in the resource row. The resource opens in simple view, where an SSL certificate card summarises what is protecting the hostname right now: the certificate type as a badge, its Issuer, its Valid window, and a one line status.
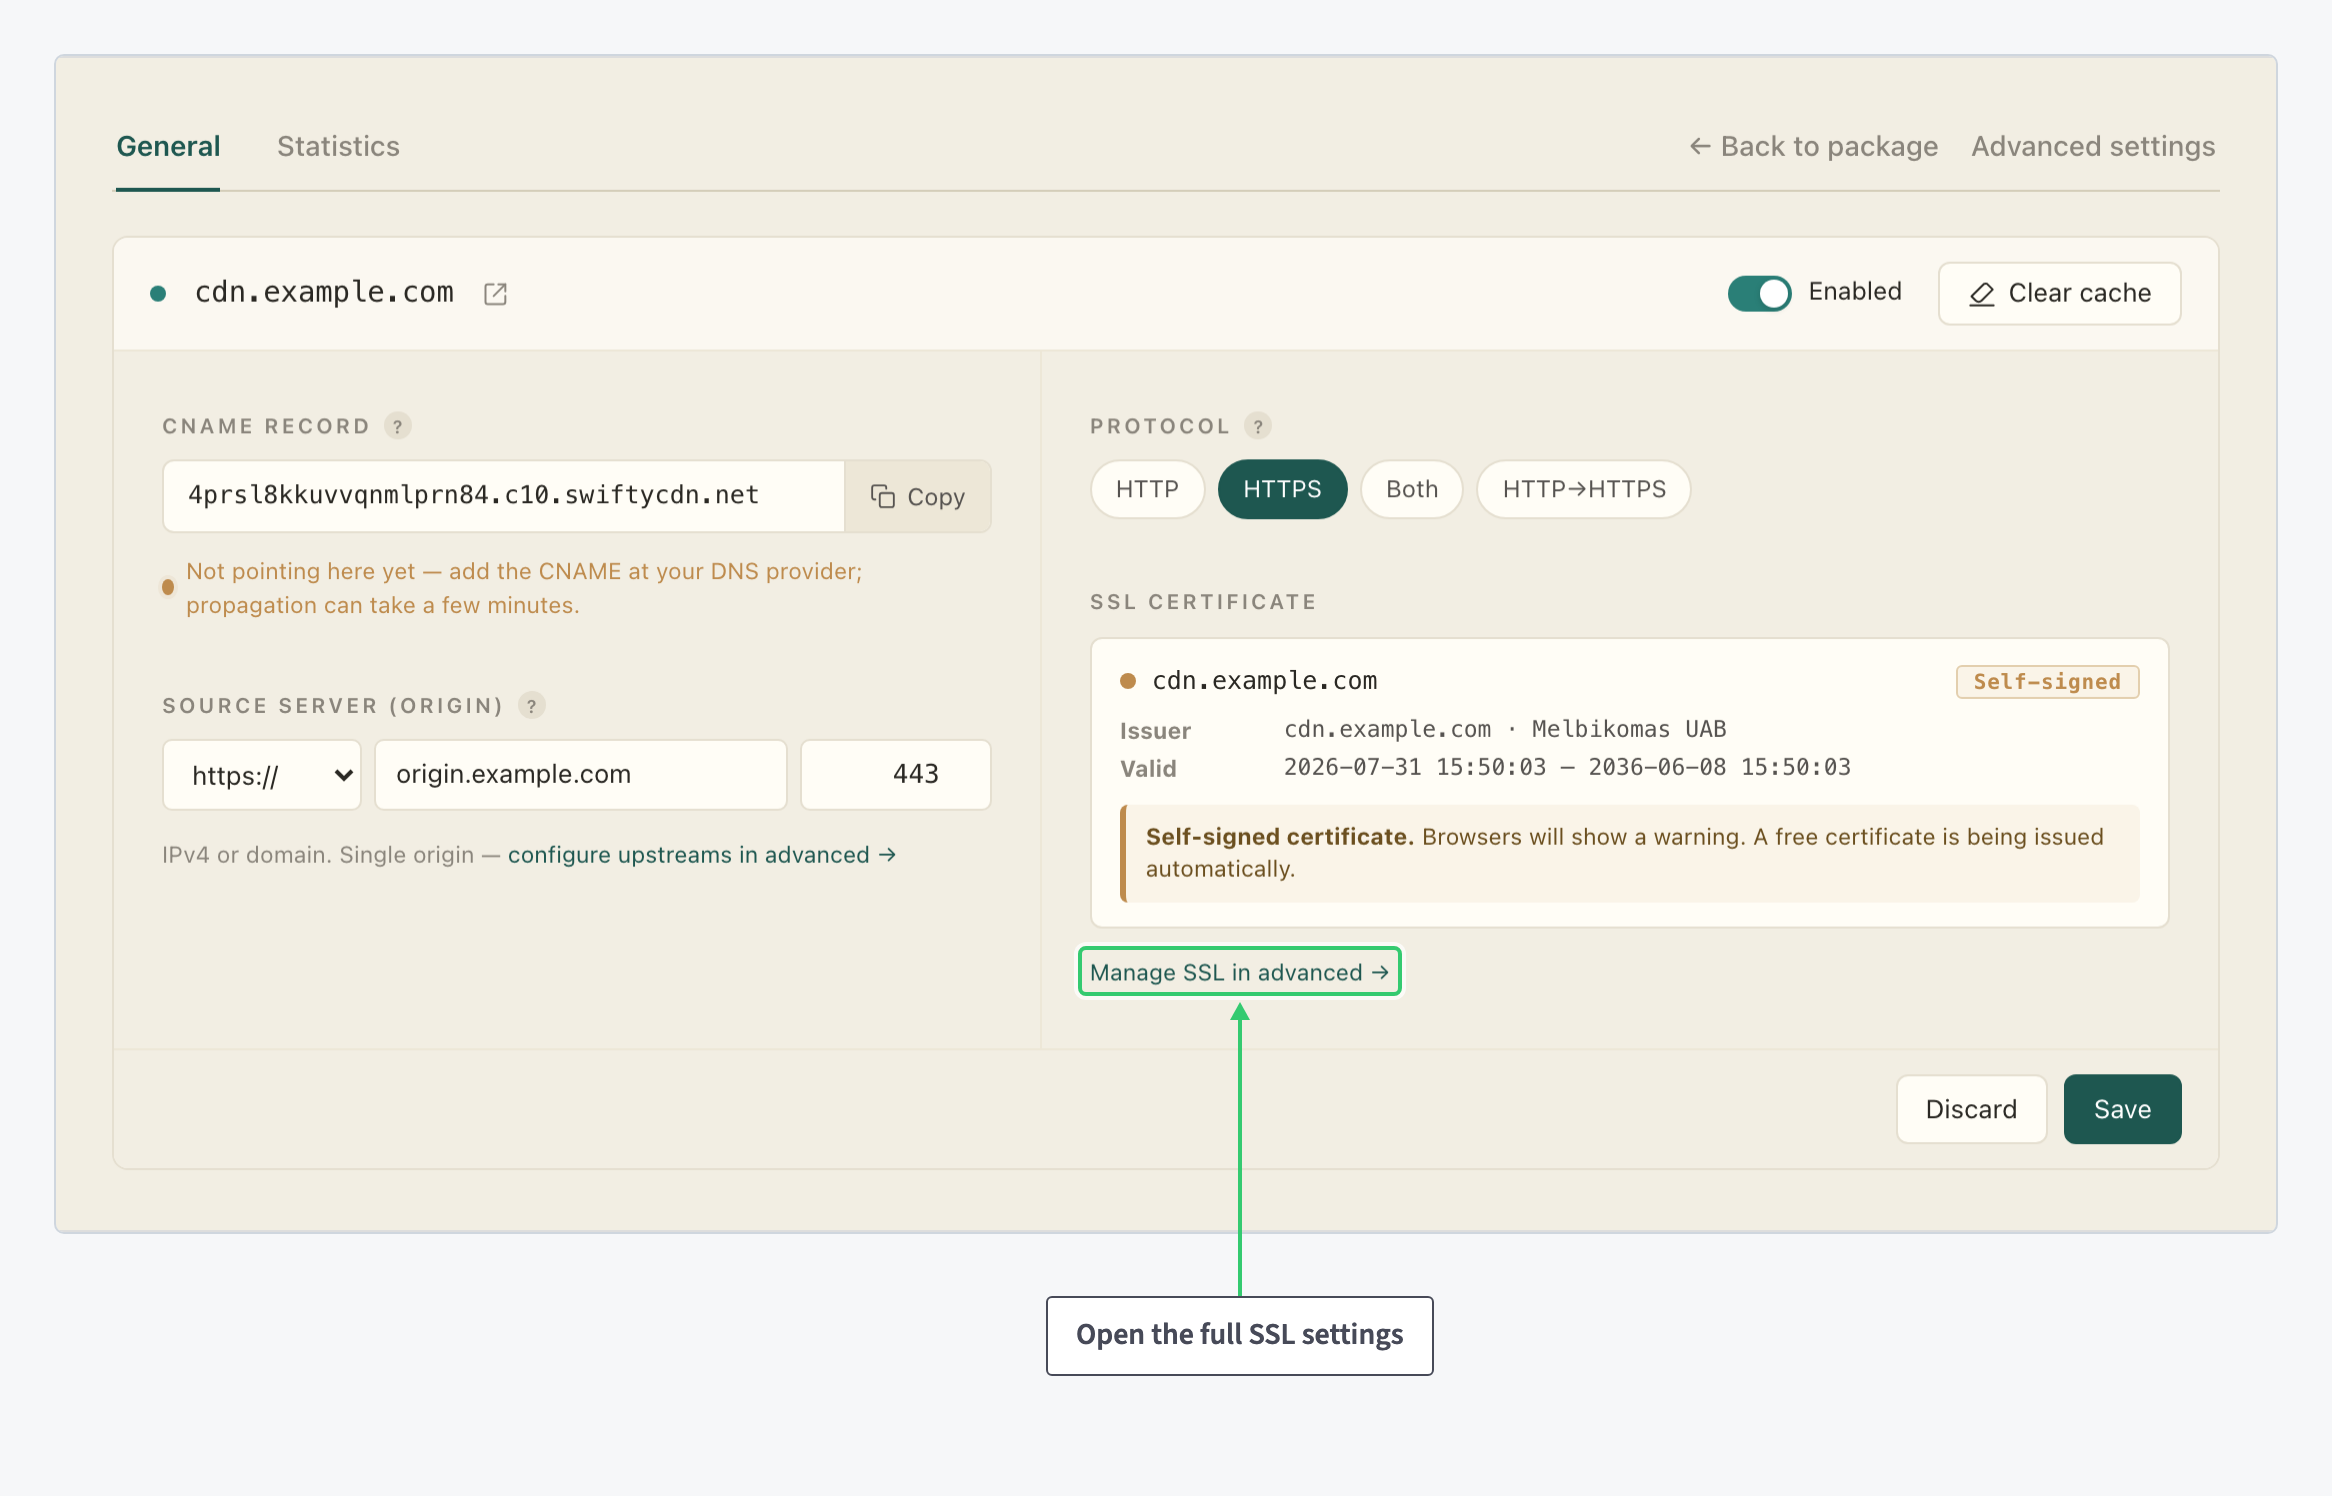
The card is a summary and carries no controls. To act on the certificate, click Manage SSL in advanced under the card, or Advanced settings in the top right corner and then the SSL tab.
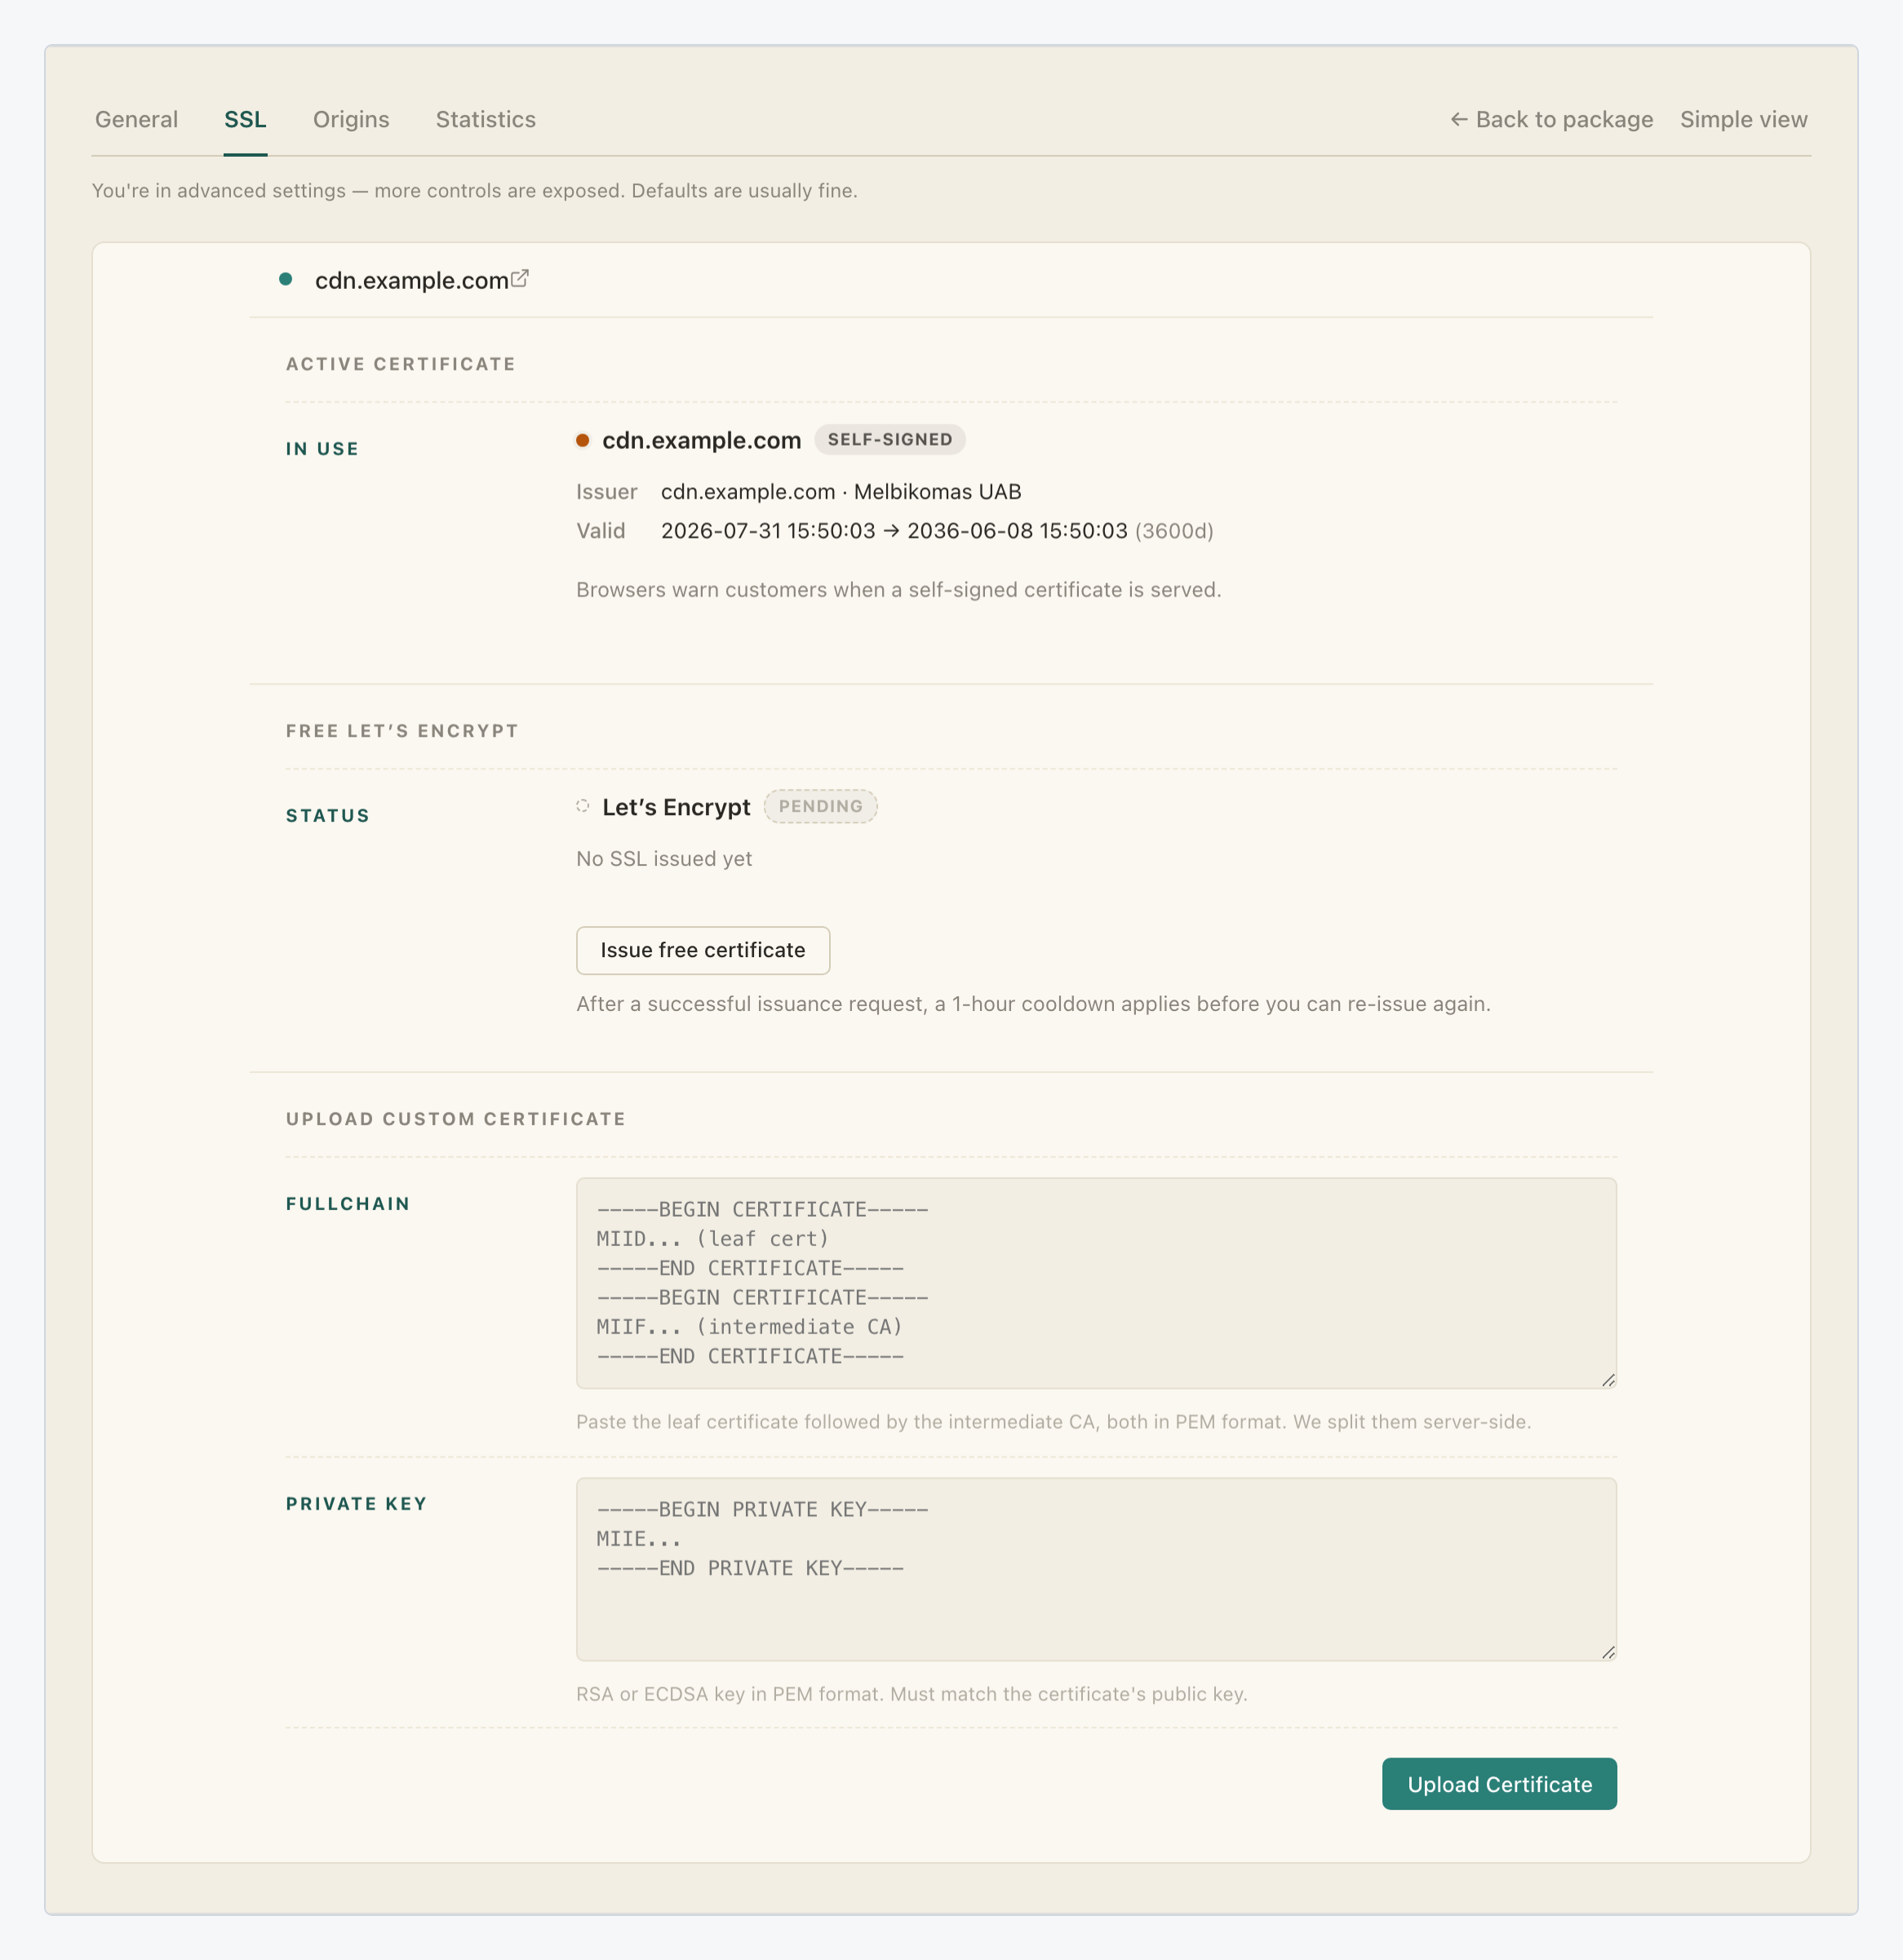
The SSL tab has three sections, and they map exactly onto the three options in the wizard:
- Active certificate: which certificate is served to visitors right now.
- Free Let’s Encrypt: the issuing status and the button that requests the free certificate.
- Upload custom certificate: the form for your own certificate and private key.
Step 3: Use the free Let’s Encrypt certificate
This is the default and the option most sites should use: it costs nothing, it is trusted by browsers, and it renews itself. The Free Let’s Encrypt section shows a Status row with the current state.
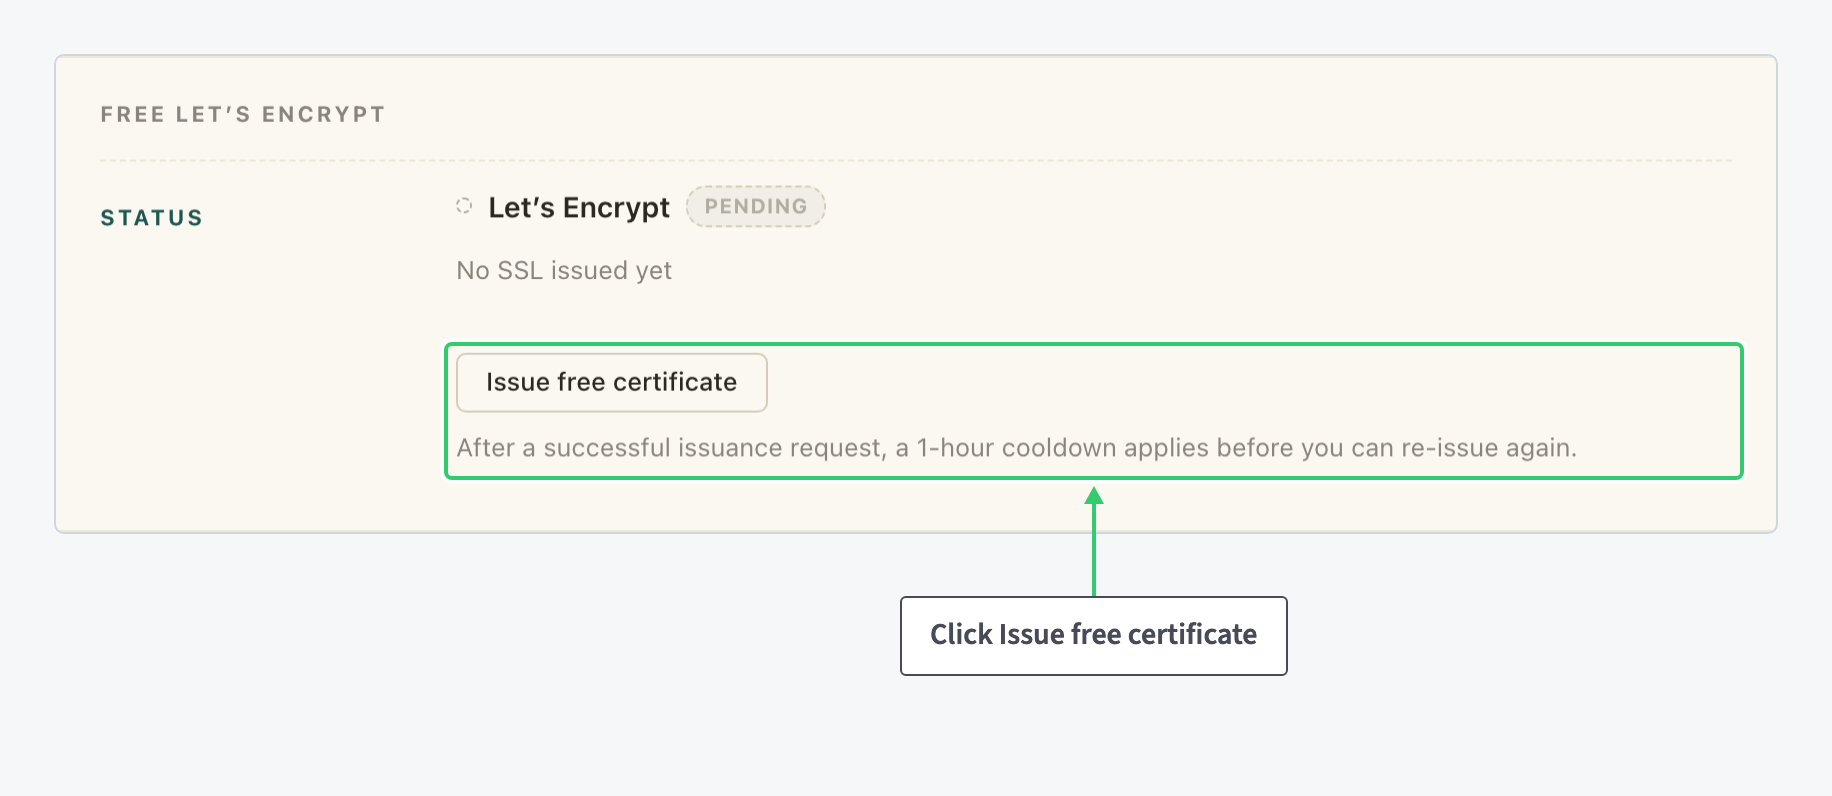
On the resource above, the status reads Let's Encrypt with a PENDING badge and the line No SSL issued yet, because the hostname is not pointing at the CDN yet. That is the normal state before DNS is in place: validation cannot complete until the CNAME record resolves to the CDN, so the free certificate cannot be issued.
To request it manually, click Issue free certificate. The line under the button spells out the limit: a one hour cooldown applies after a successful issuance request, so wait for the cooldown to end rather than reloading the page. If the status stays pending, check:
- The CNAME record for your hostname points at the CNAME target shown on the resource’s General tab, and has propagated.
- The hostname in the resource matches the name you are requesting the certificate for, including the
wwwprefix if you use one. - If you enabled Wildcard SSL, the certificate has to cover the subdomains as well, so give validation a little more time.
Step 4: Use the self-signed certificate
A self-signed certificate is generated by the CDN itself, so no external authority verifies it. Visitors get a browser security warning. In the wizard, the Self-signed tab states it plainly: browsers will show a warning, and it is useful only for testing.
Self-signed is also the fallback. Until a trusted certificate exists, the resource still has to answer HTTPS with something, so the panel serves a self-signed one. That is exactly what the Active certificate section shows on this resource: a SELF-SIGNED badge, an Issuer that is the hostname itself, a long Valid window, and the reminder that browsers warn customers when a self-signed certificate is served.

In simple view the same state is summarised as Self-signed certificate. followed by “Browsers will show a warning. A free certificate is being issued automatically.” Seeing a self-signed certificate on a brand new resource is therefore expected: it holds the connection open while Let’s Encrypt validation runs.
Pick it deliberately only for a staging hostname, an internal test, or a resource that will never be opened in a browser.
Step 5: Upload a custom certificate
Use this when you already have a certificate you must keep: an EV or OV certificate, a wildcard from your own authority, or one issued by your company’s internal CA.
Choosing Upload custom in the wizard does not ask for the files there. Upload the certificate and private key on the SSL tab after creating the resource, and tick Configure advanced settings so the tab opens right after creation.
On the SSL tab, fill the two fields of the Upload custom certificate section and click Upload Certificate.

The two fields expect the following content:
| Field | What to paste |
|---|---|
| Fullchain | The leaf certificate followed by the intermediate CA, both in PEM format. The panel splits them server side. |
| Private key | An RSA or ECDSA key in PEM format. It must match the certificate’s public key. |
Both fields expect the full PEM blocks, including the -----BEGIN CERTIFICATE----- and -----END CERTIFICATE----- lines, as the placeholders show. Paste the leaf first, then the intermediate: order matters. A chain missing its intermediate is the usual reason a certificate validates in your browser but fails on other clients.
The Active certificate section at the top of the tab always shows what is being served, so check there that your certificate is now active. A custom certificate does not renew itself, so put its expiry date in your calendar and upload the replacement through the same form before it lapses.
What you’ve set up
Your resource now serves the certificate you chose, and you know where to check it: the SSL certificate card in simple view for a quick look, the SSL tab for the full detail and the controls.
A free Let’s Encrypt certificate covers most sites with no maintenance at all, a self-signed certificate keeps a test resource reachable, and the upload form takes over when your organisation supplies its own certificate. If the terms on those screens are still unclear, Understanding the Building Blocks of Your CDN Product explains how resources, origins and certificates fit together.