
A resource is a hostname you serve through the CDN. Creating one takes a single four-part wizard: you choose the hostname your visitors will use, how they connect, which SSL certificate protects it, and where the CDN fetches your content from. This tutorial walks through each field and shows what to do right after the resource is created.
Prerequisites
- An active CDN package with a free resource slot. The counter next to the package name shows how many you have used, for example
1 / 10 resources. - The hostname you want visitors to use, such as
cdn.example.com. - The address of your origin server (IPv4 address or domain name), for example your web server or load balancer.
- Access to your domain’s DNS settings: after creation you will add a CNAME record. See Pointing your domain at the CDN.
Step 1: Open the new resource wizard
Open your CDN package and click Add Resource in the top right corner.
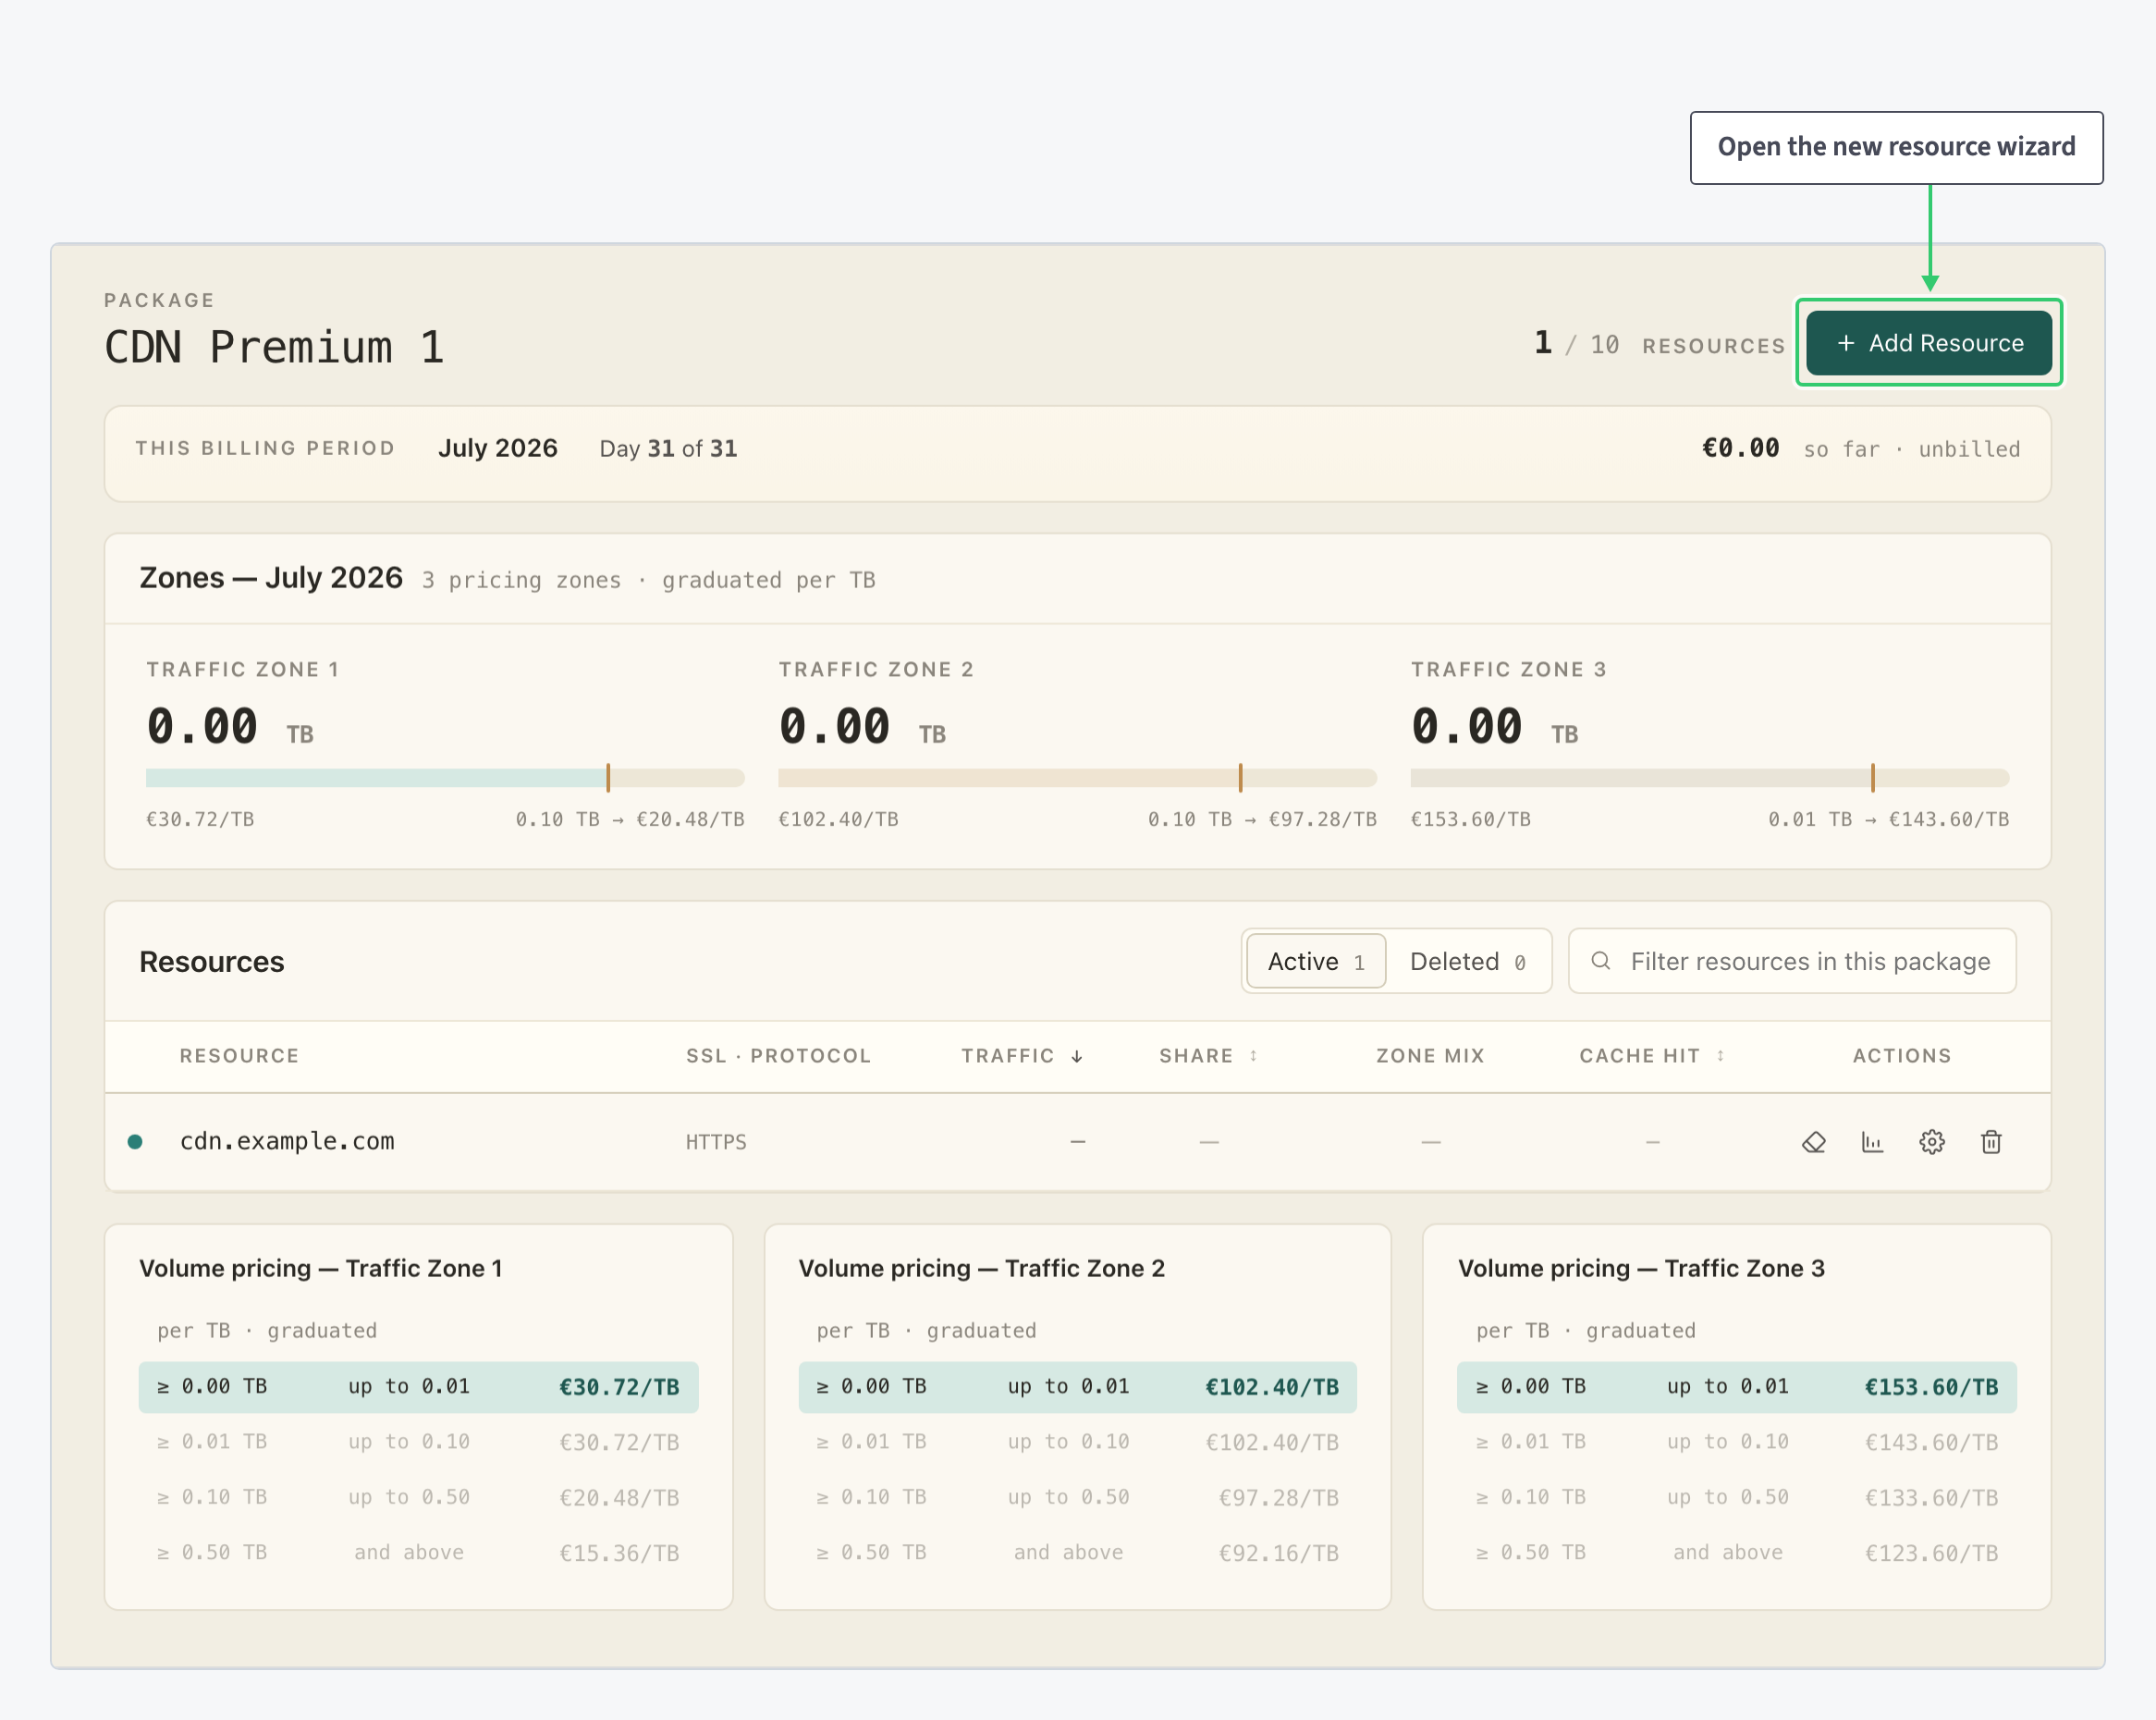
The wizard tracks your progress in its title (for example 2 of 4 complete) and the create button tells you which field is still missing, so you always know what is left to fill.
Step 2: Enter your hostname
Type the hostname your customers will request, for example cdn.example.com. This is the address you will point at the CDN with a CNAME record after the resource is created, so there is nothing to change at your DNS provider yet.
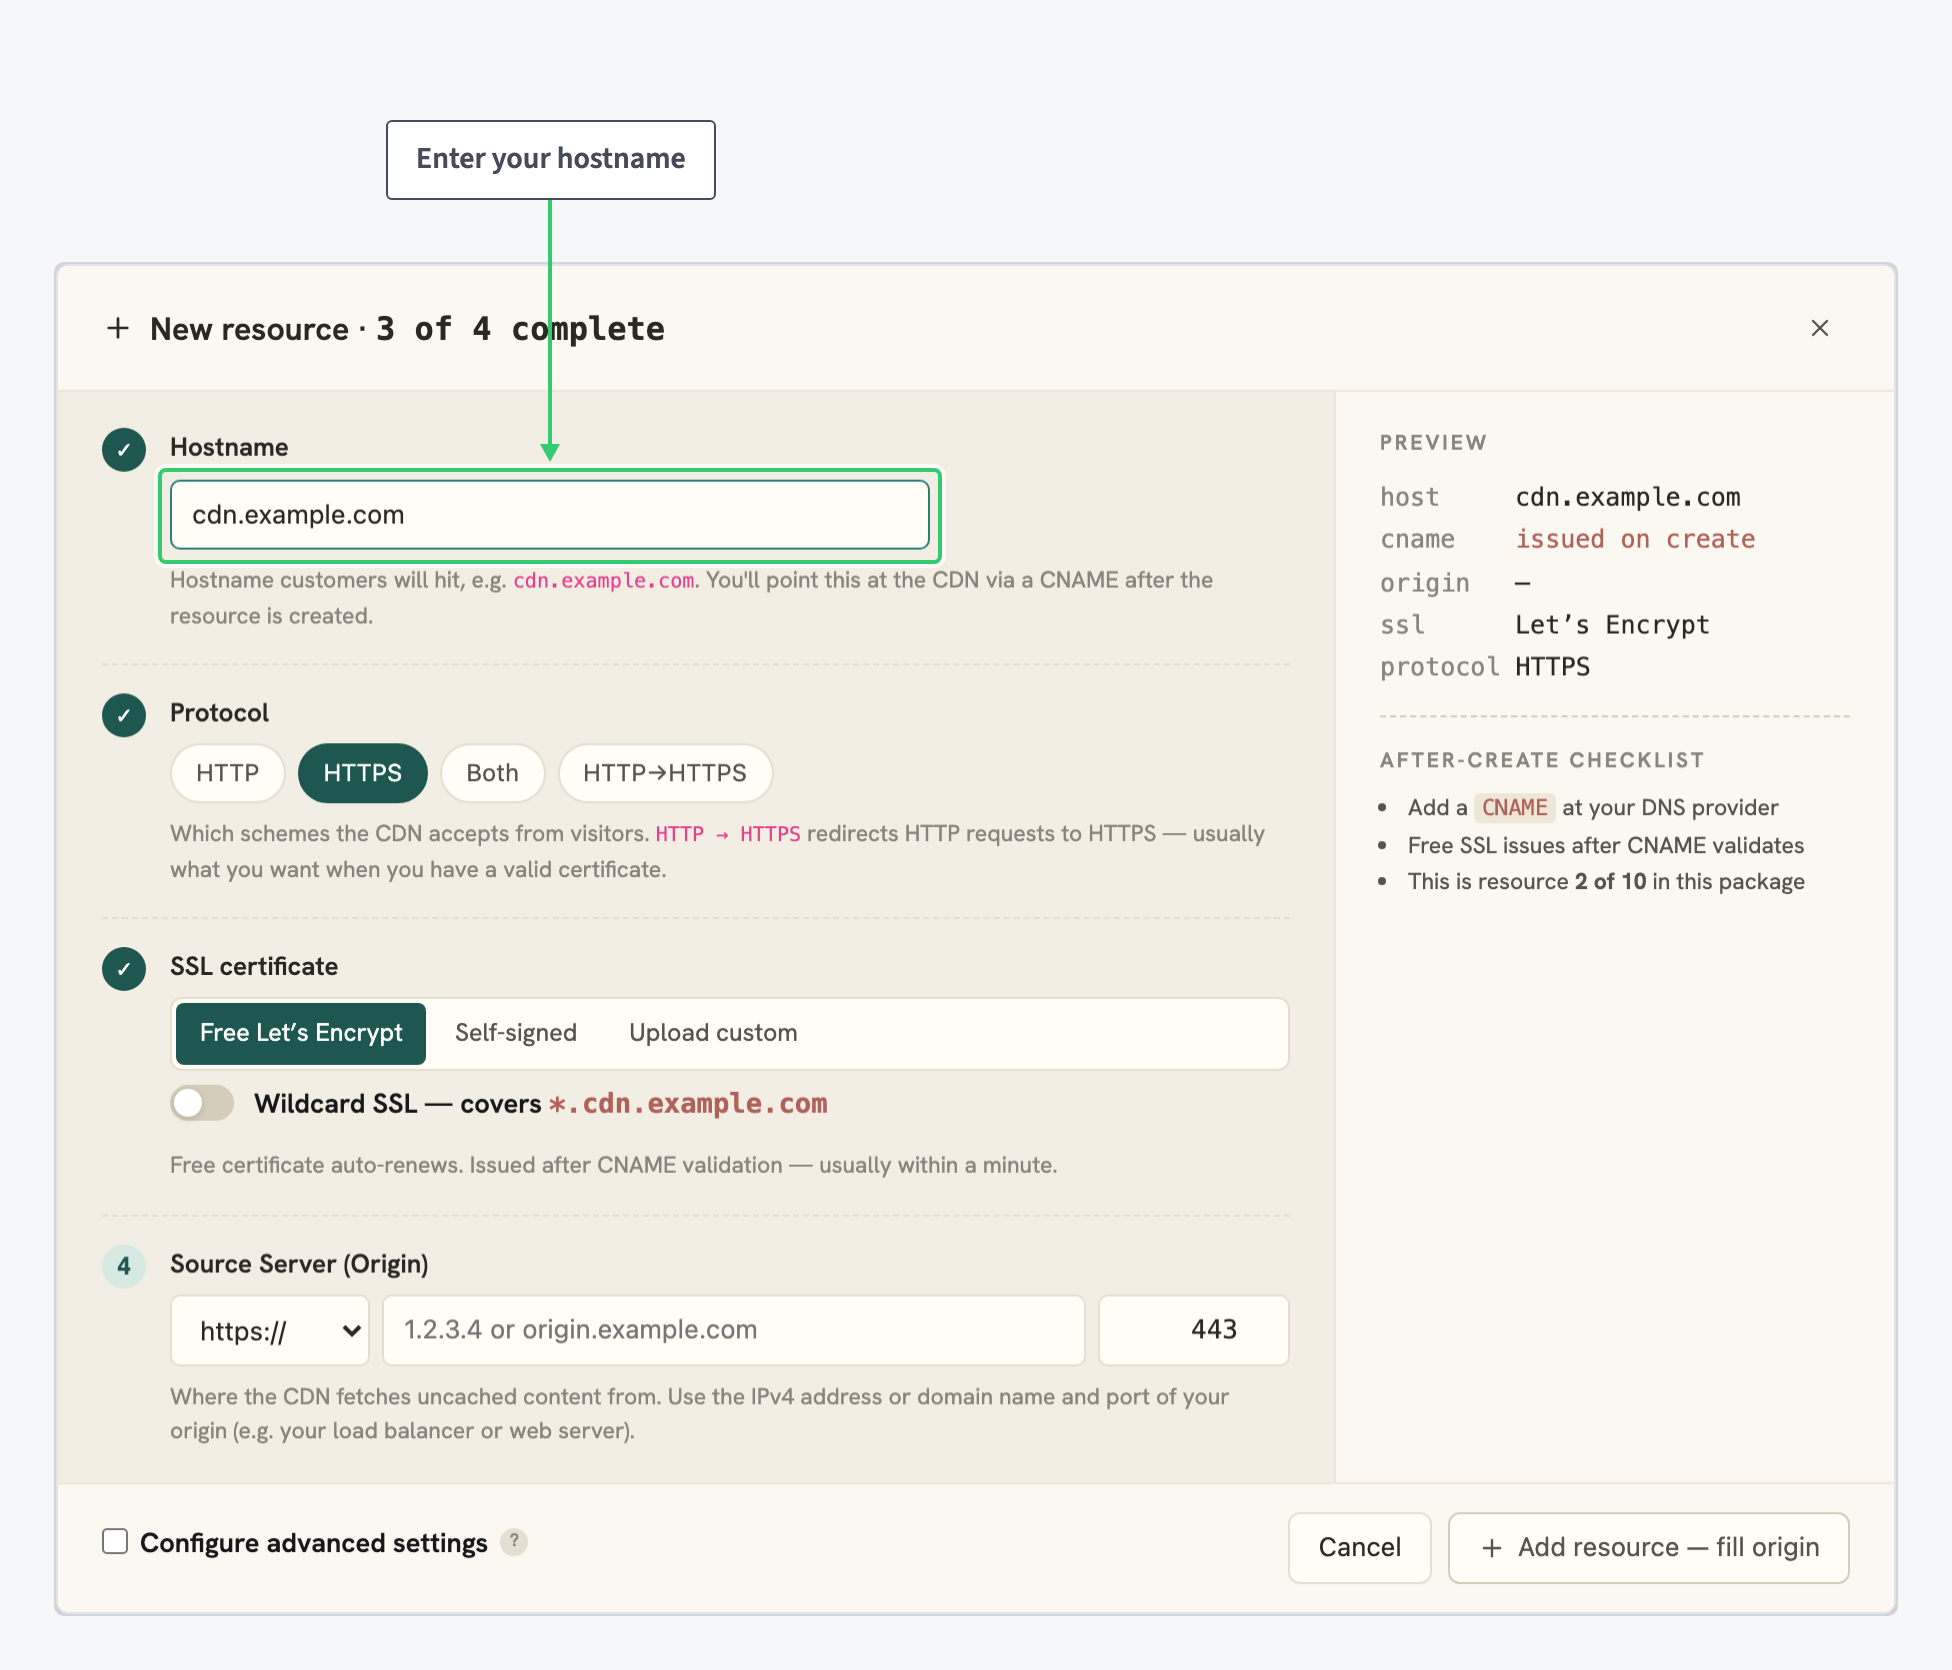
The Preview panel on the right updates as you type: it shows the host, the origin, the SSL choice and the protocol, and notes that the CNAME target is issued on create.
Step 3: Choose a protocol
The protocol defines which schemes the CDN accepts from visitors:
| Option | Behavior |
|---|---|
| HTTP | Plain HTTP only |
| HTTPS | Encrypted HTTPS only (default) |
| Both | Accepts HTTP and HTTPS |
| HTTP→HTTPS | Redirects HTTP requests to HTTPS, usually what you want once you have a valid certificate |
You pick this in the wizard’s Protocol section:
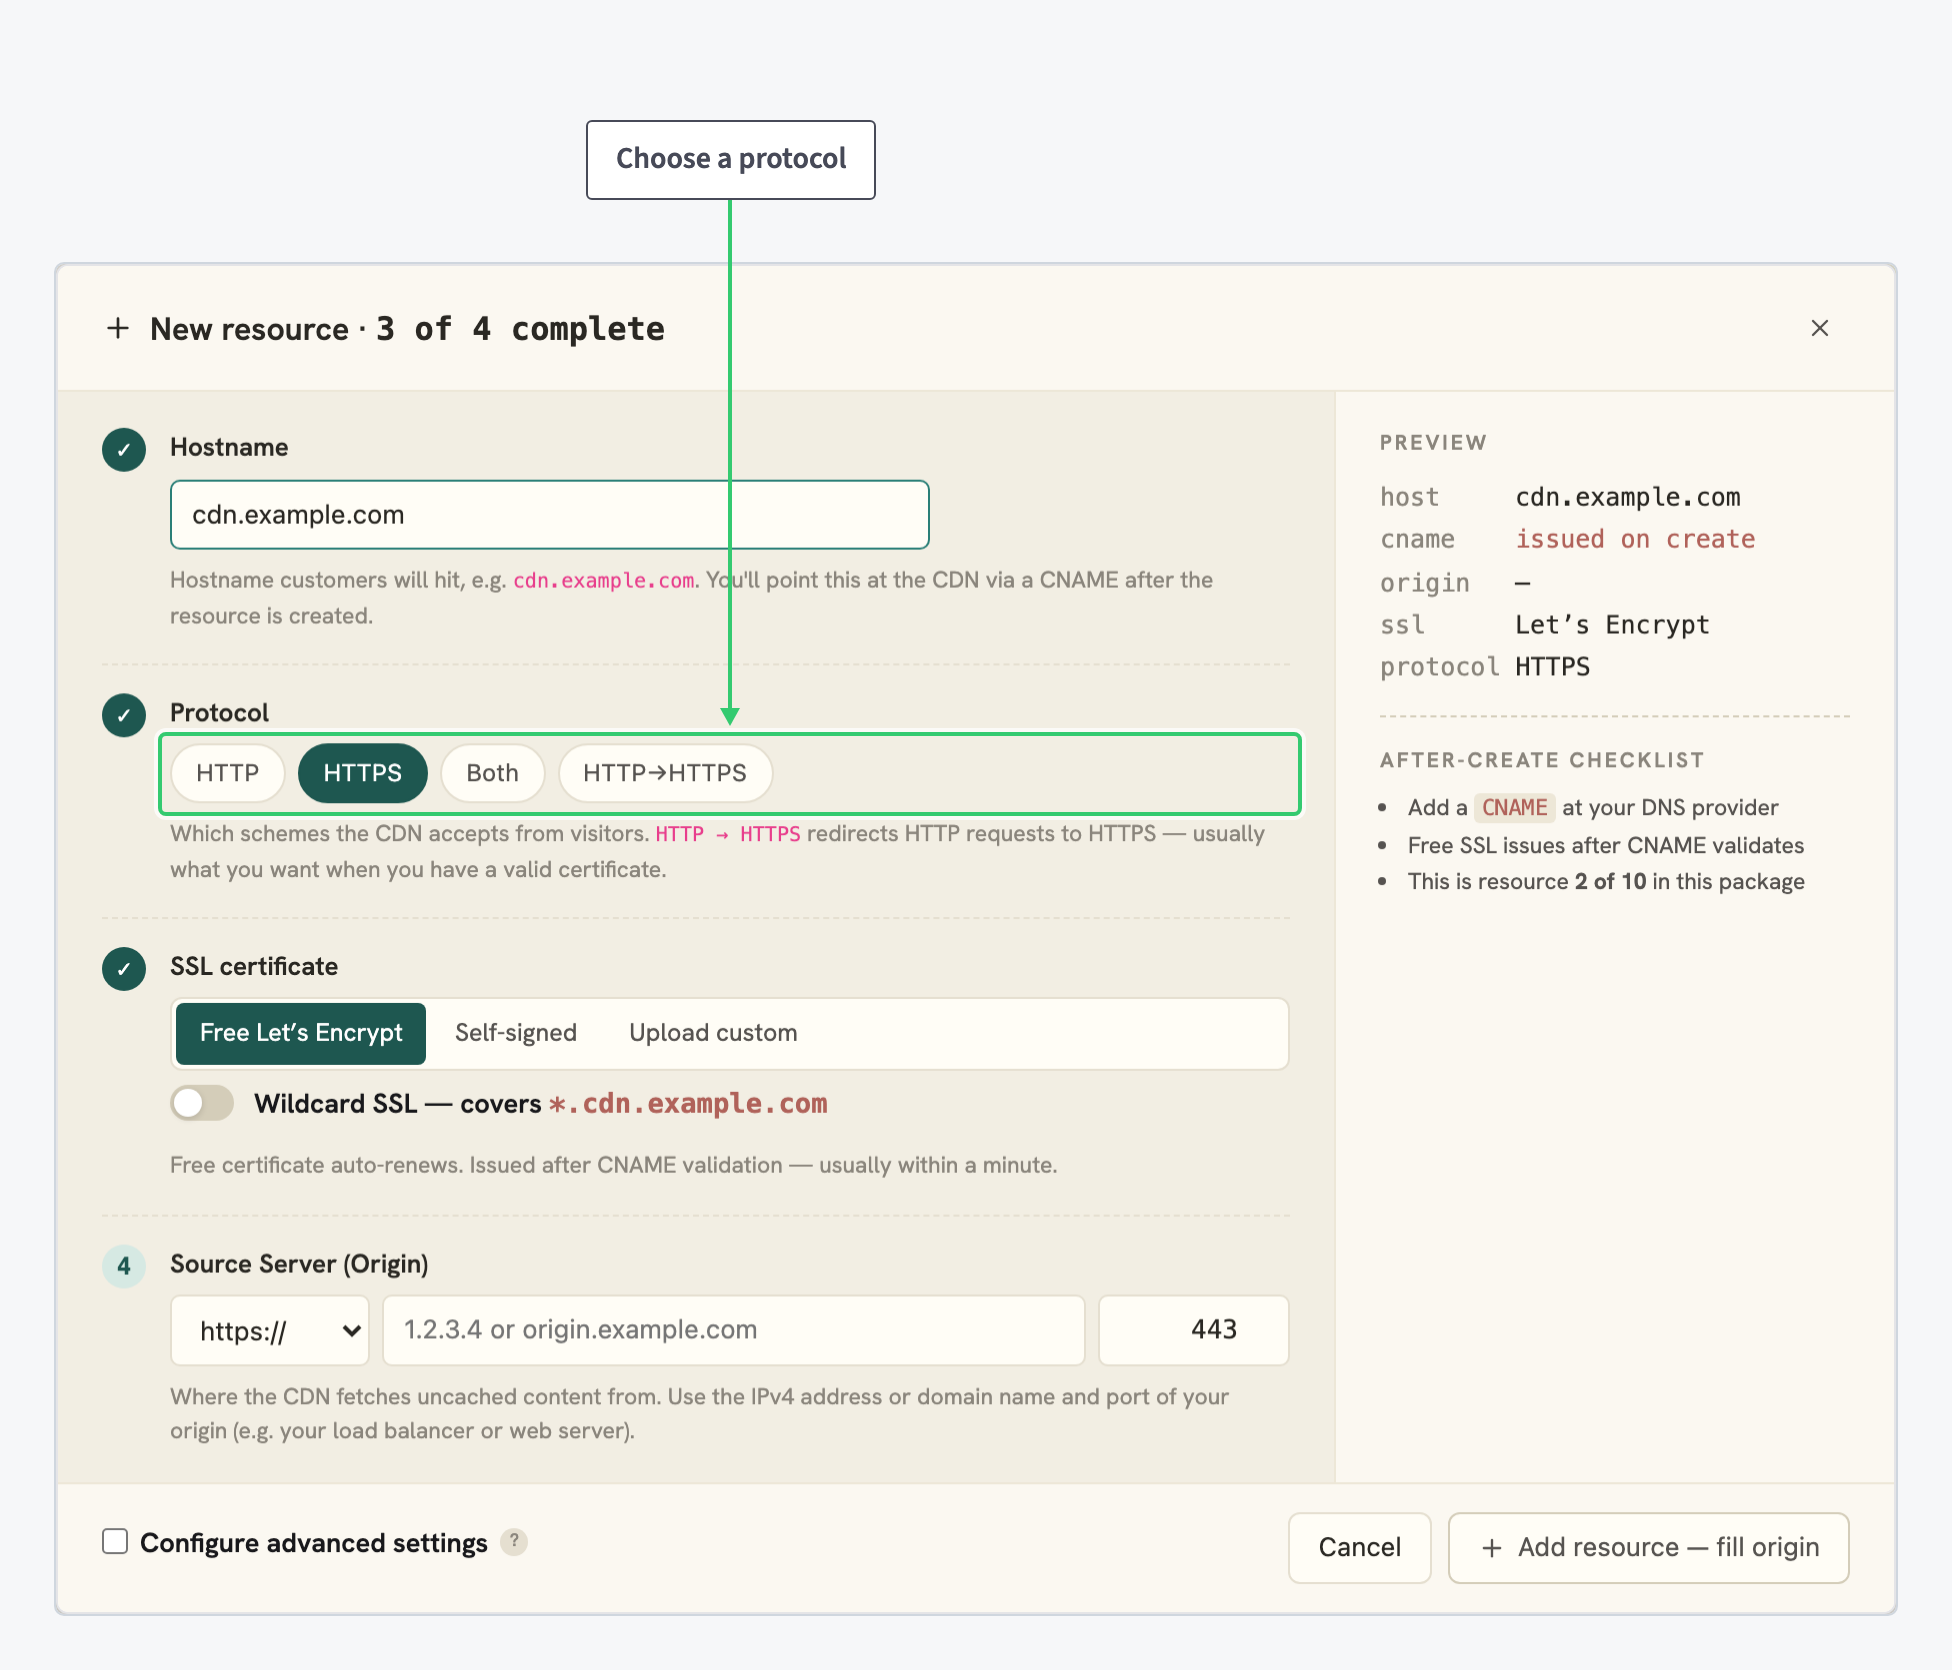
HTTPS is a safe starting point. You can change the protocol at any time in the resource settings; see Choosing a protocol for guidance on each option.
Step 4: Choose an SSL certificate
Three options are available. Free Let’s Encrypt is selected by default: the certificate is issued automatically after your CNAME validates, usually within a minute, and auto-renews after that. Toggle Wildcard SSL if the certificate should also cover subdomains (*.cdn.example.com).
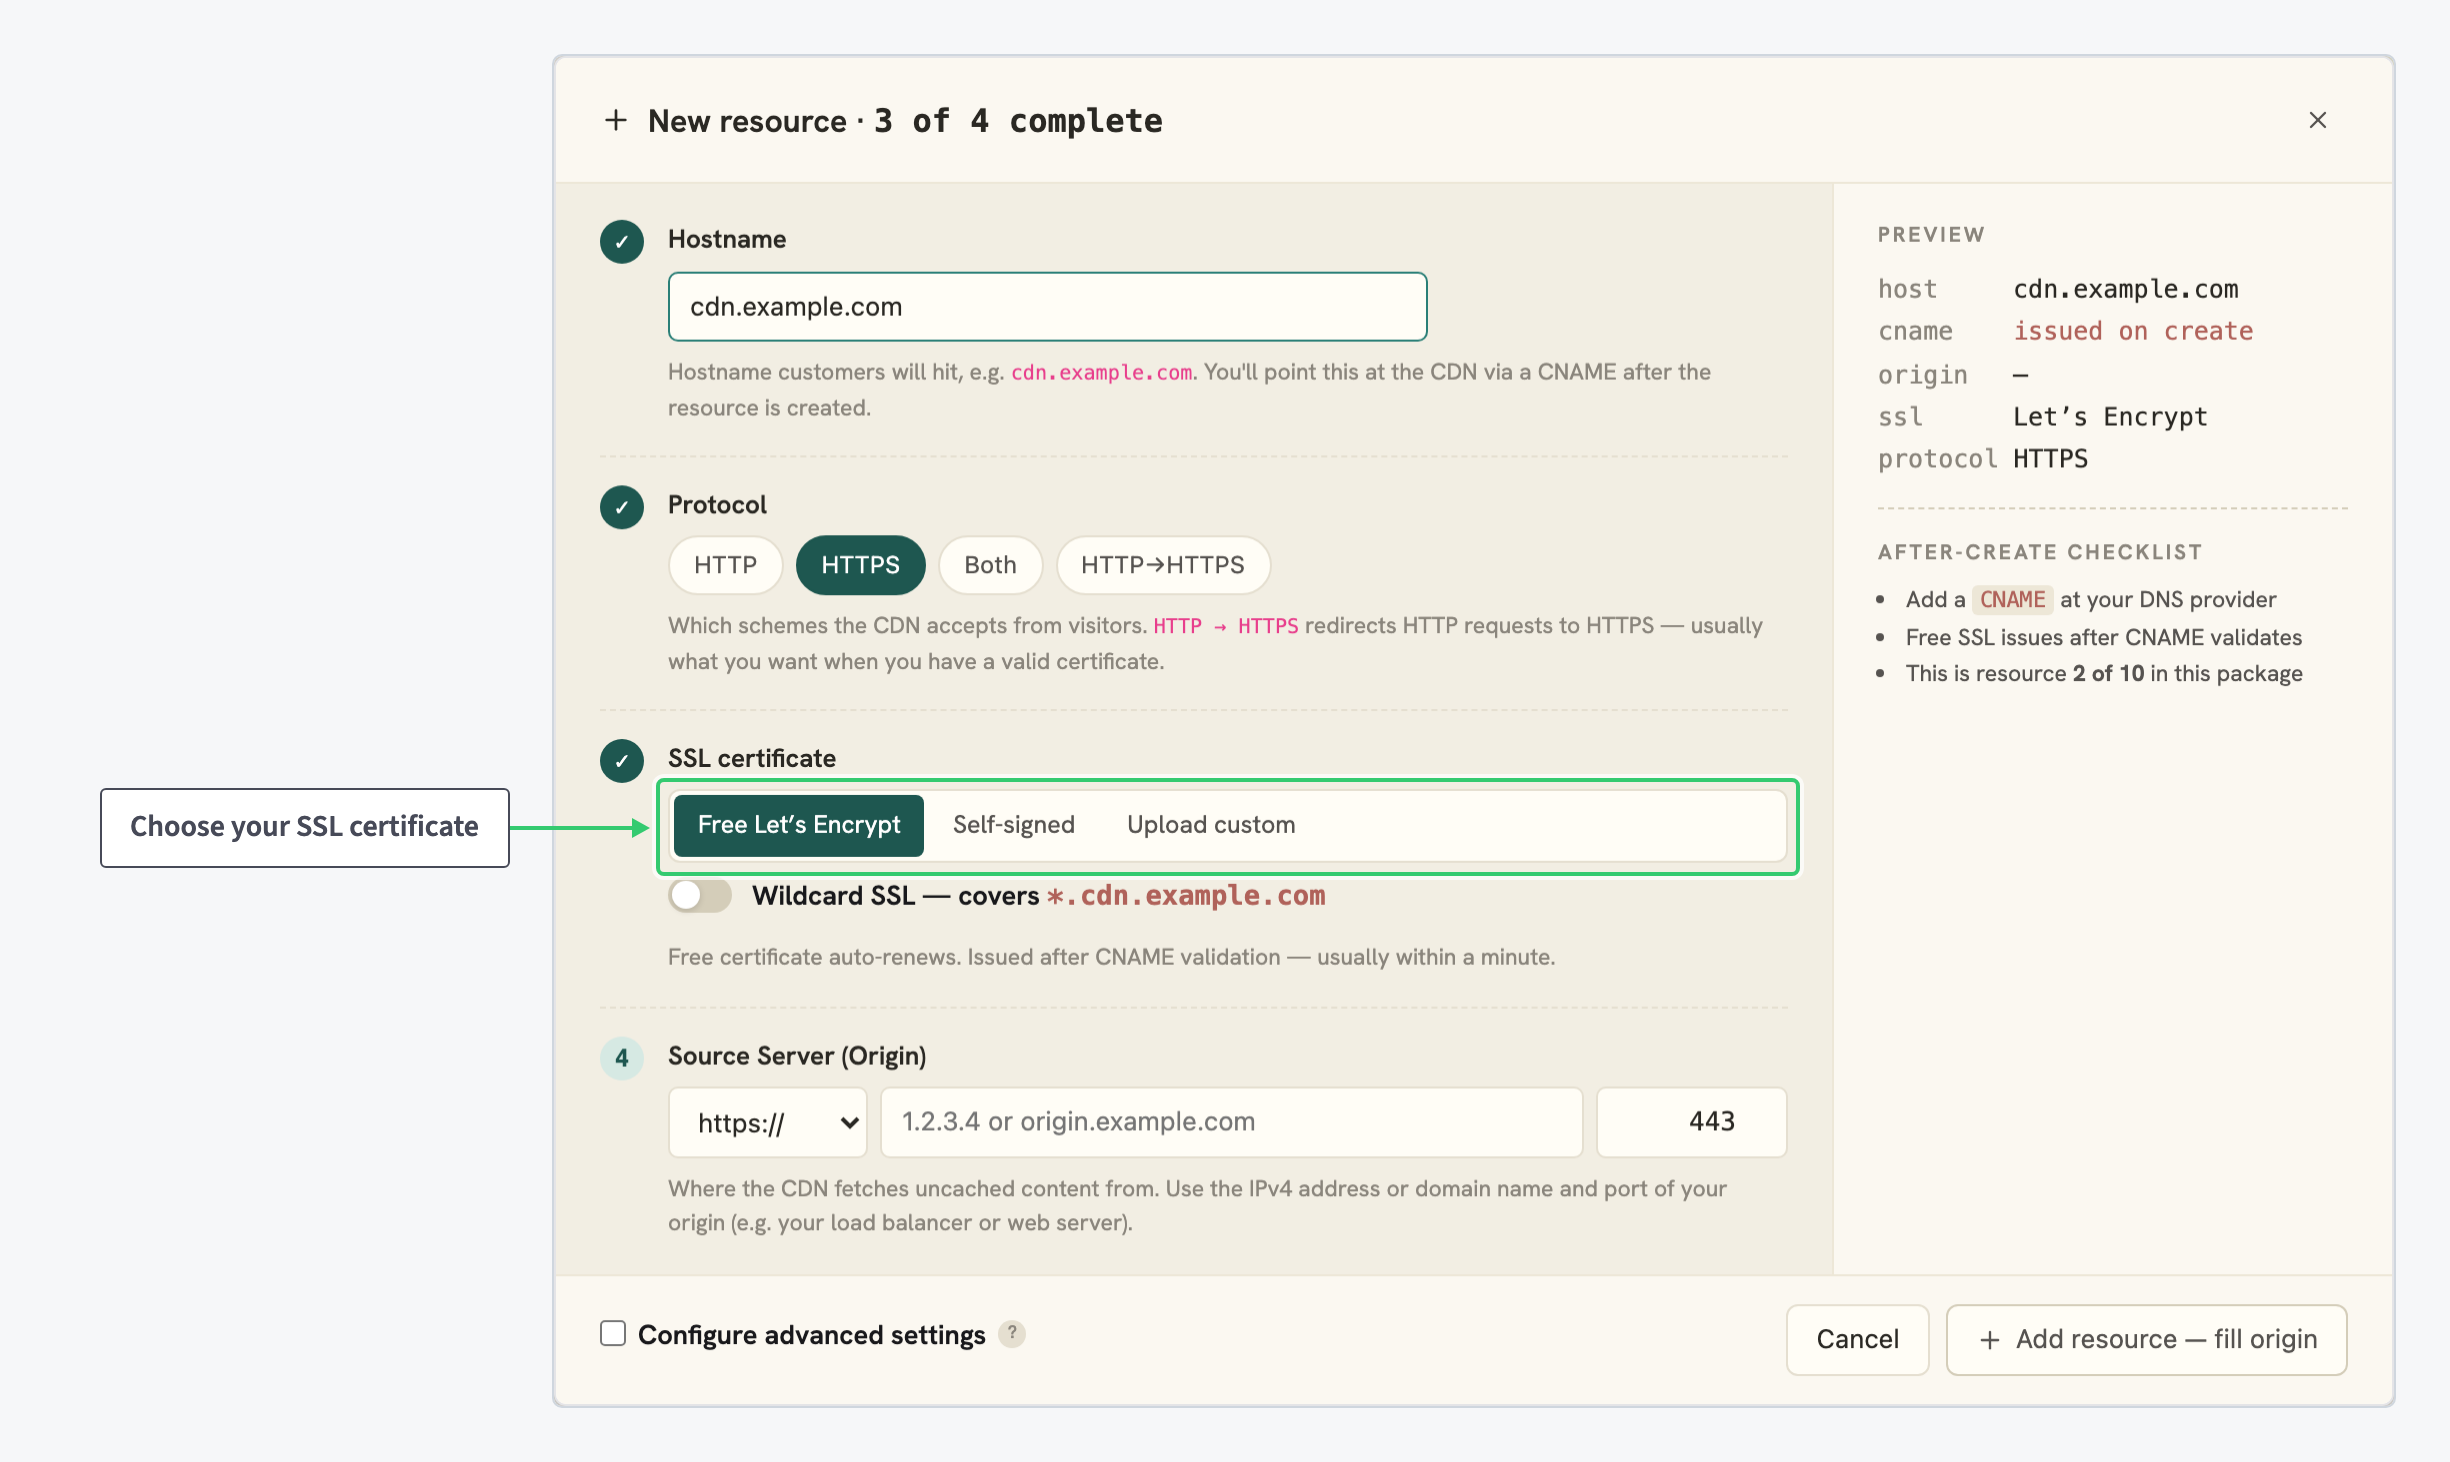
You can also switch to Self-signed or Upload custom if you bring your own certificate. All three are covered in How to add SSL certificates.
Step 5: Set your Source Server (Origin)
The origin is where the CDN fetches uncached content from: your web server or load balancer. Enter its IPv4 address or domain name, and adjust the scheme and port if needed.
| Setting | Value |
|---|---|
| Scheme | https:// |
| Host | origin.example.com |
| Port | 443 (default for HTTPS) |
Filled in, the section looks like this:
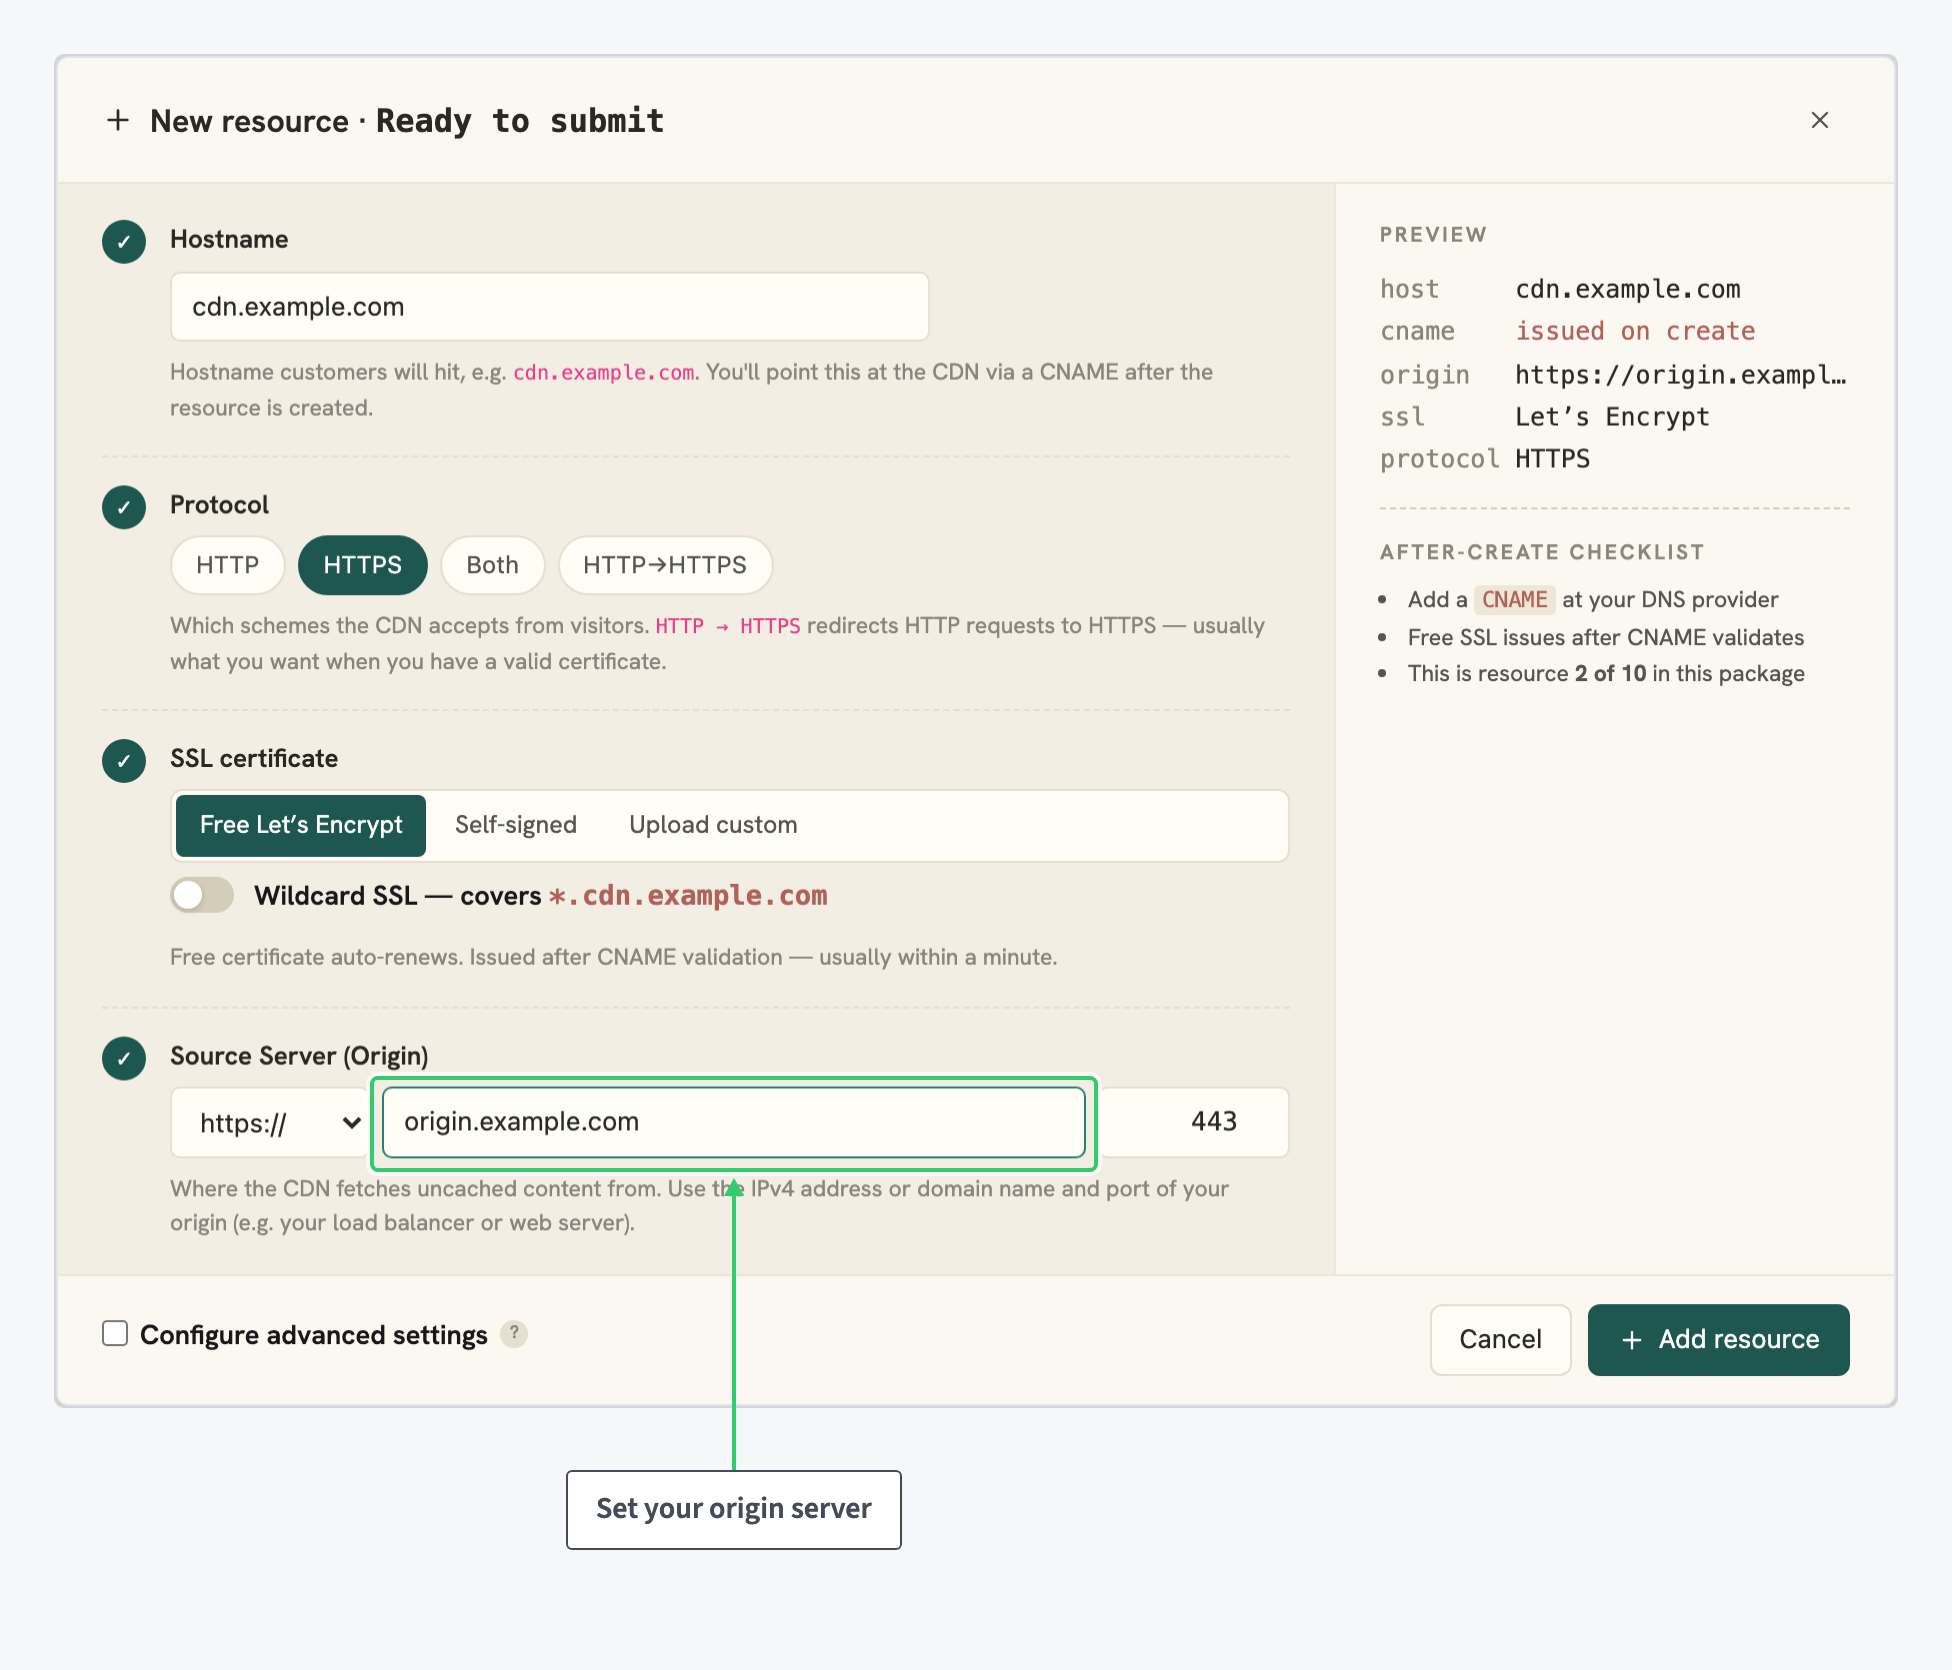
Once every section shows a check mark, the wizard title reads Ready to submit. The Configure advanced settings checkbox at the bottom exposes more controls, but the defaults are fine for a first resource.
Step 6: Create the resource and follow the checklist
Click Add resource. The wizard closes and your new resource appears in the package’s resource list, with quick actions for cache clearing, statistics, settings and deletion.
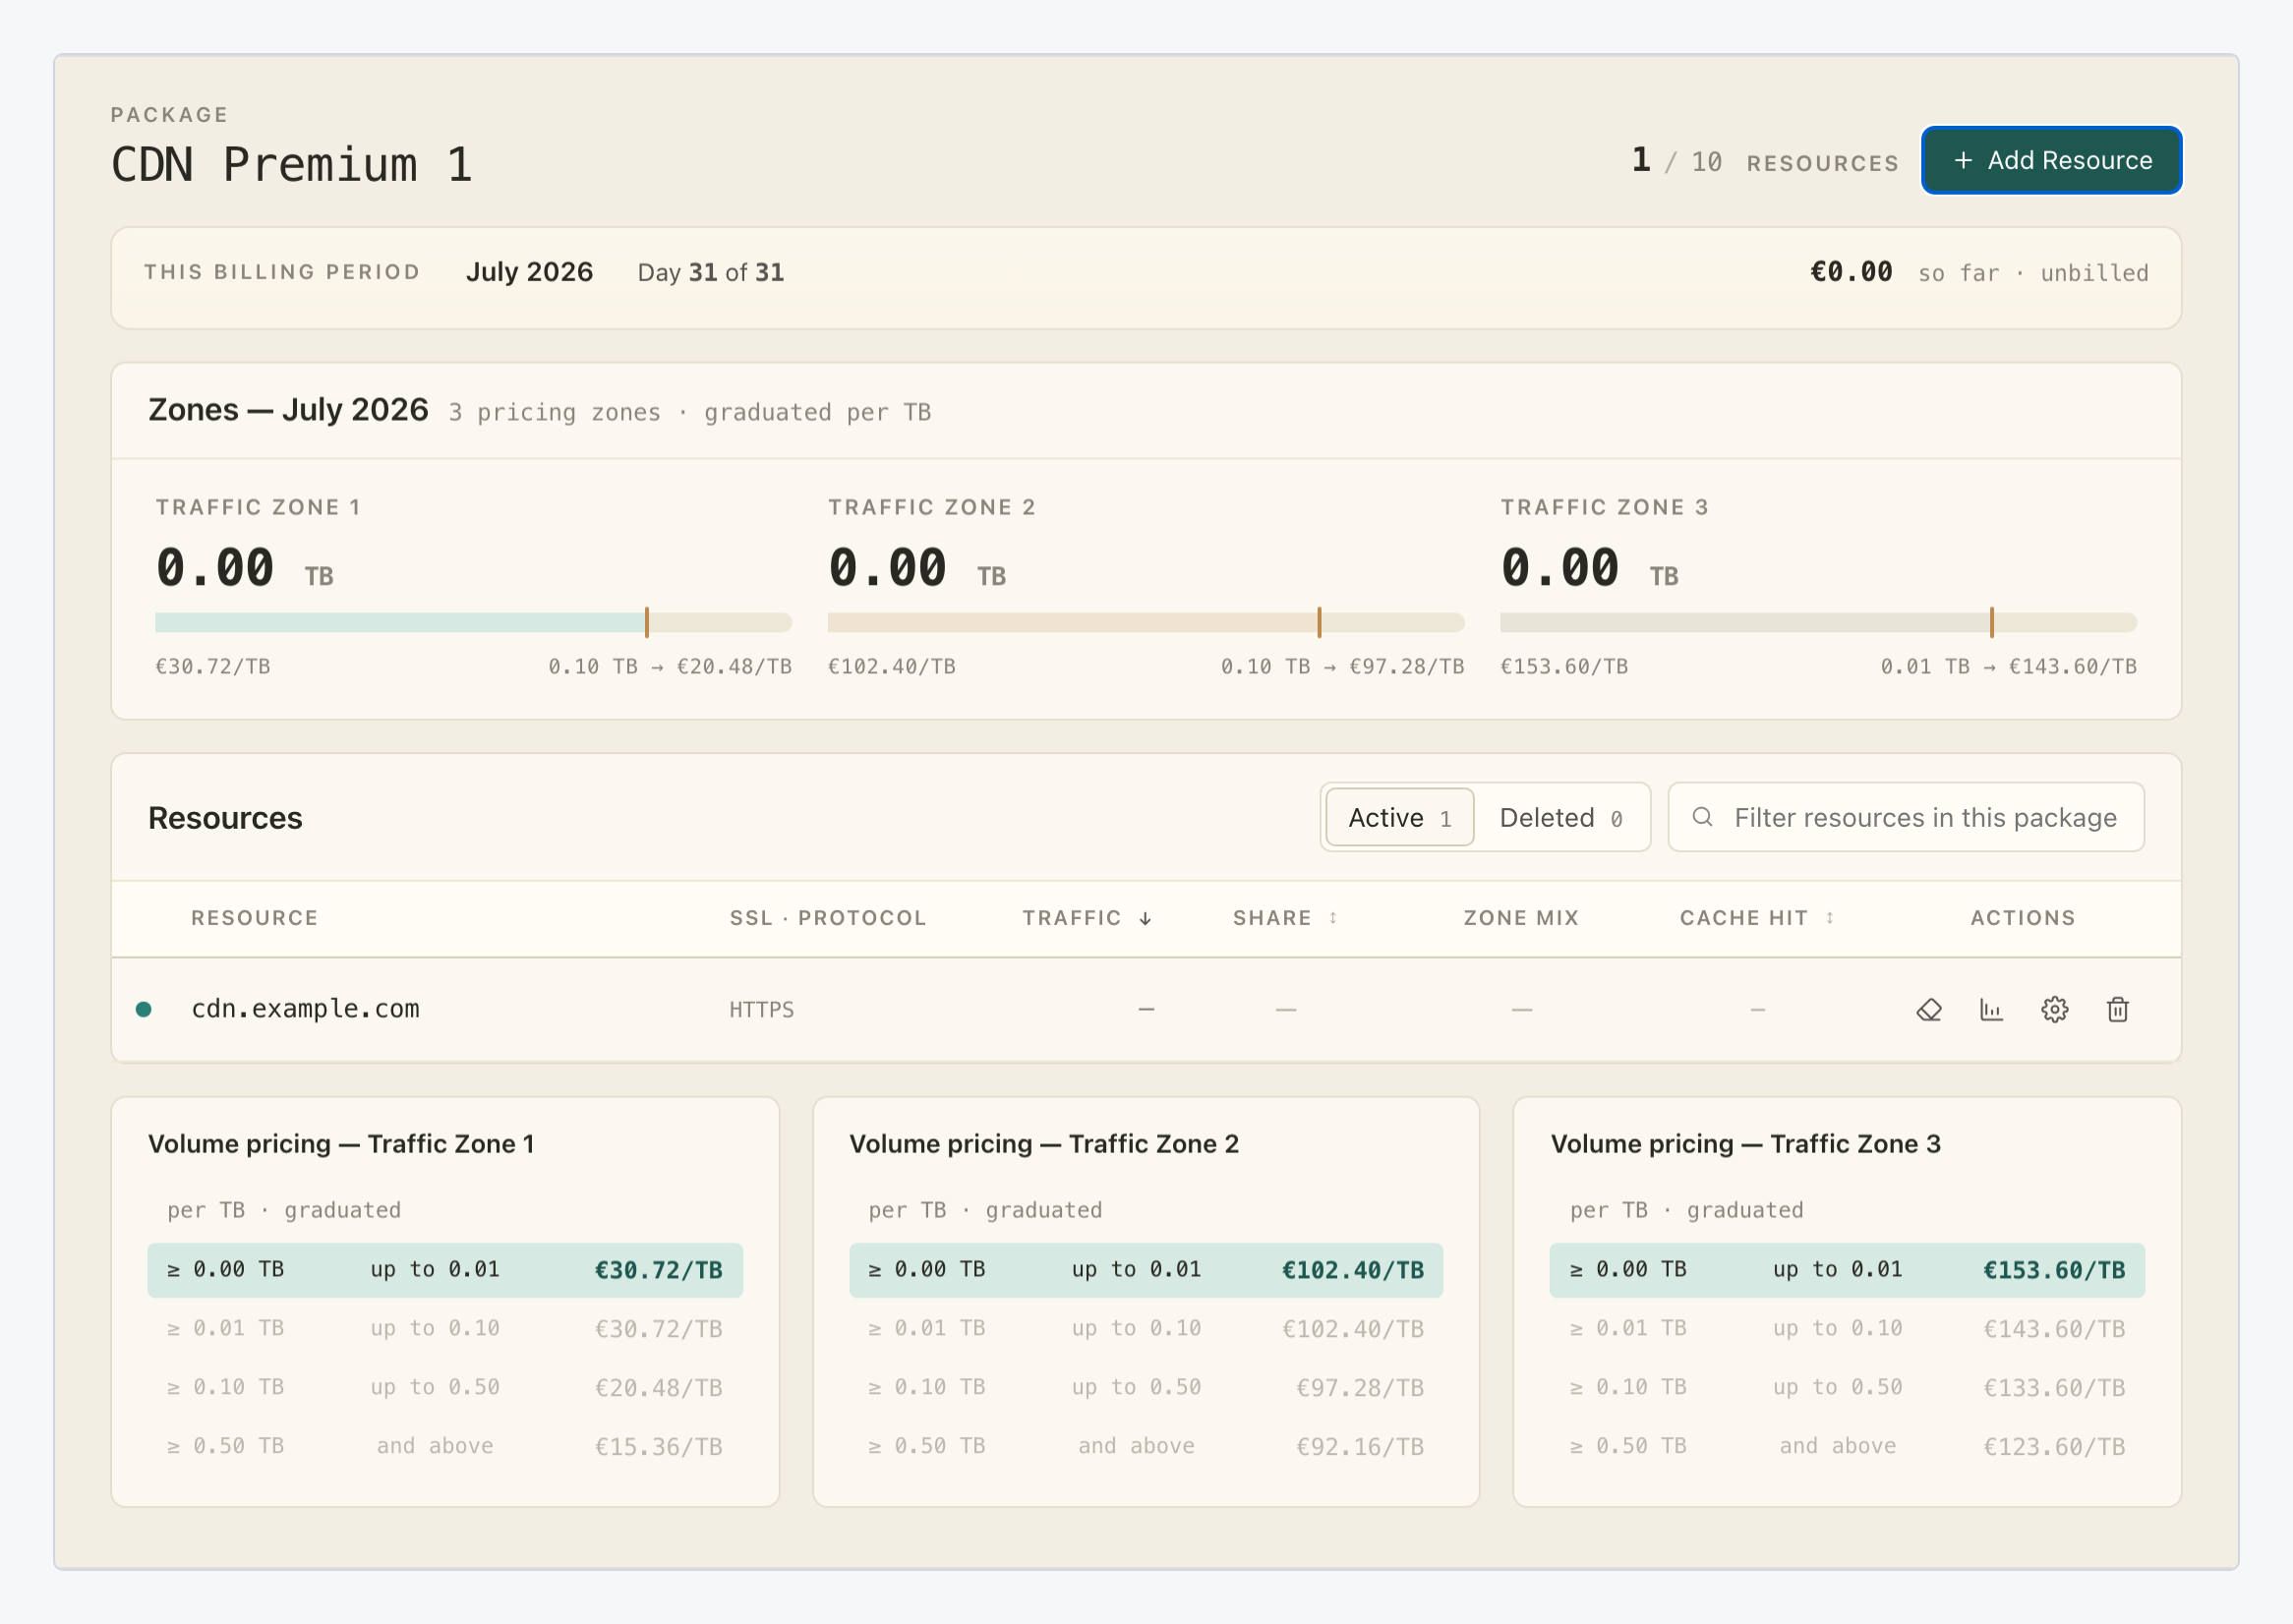
The wizard’s after-create checklist tells you what happens next:
- Add a
CNAMErecord at your DNS provider so your hostname points at the CDN. - The free SSL certificate issues automatically after the CNAME validates.
What you’ve built
Your first resource is created and occupies one slot in your package. The CDN is ready to serve cdn.example.com, fetch uncached content from your origin, and secure traffic with an automatically renewed certificate. One step remains to put it in front of visitors: adding the CNAME record at your DNS provider, covered in Pointing your domain at the CDN.