
A CDN resource fetches uncached content from its origin, and with a single origin server that fetch has a single point of failure. The Origins tab of the advanced settings solves this with upstreams: a pool of origin servers behind one resource.
Active servers share the traffic round-robin, weights skew the split, and backup servers sit idle until every active server is down. This tutorial opens the upstream editor, adds a second origin as a backup, and covers the per-server options.
Prerequisites
- A CDN resource already created, with its first origin set. See Add your first CDN resource and Set your CDN Source Server (Origin).
- A second origin server holding the same content, reachable by IPv4 address or domain name.
- Client Area access to the package.
Step 1: Open the Origins tab
In the Resources table of your package, click the gear icon (Edit resource settings) on the resource’s row, then click Advanced settings, and open the Origins tab.
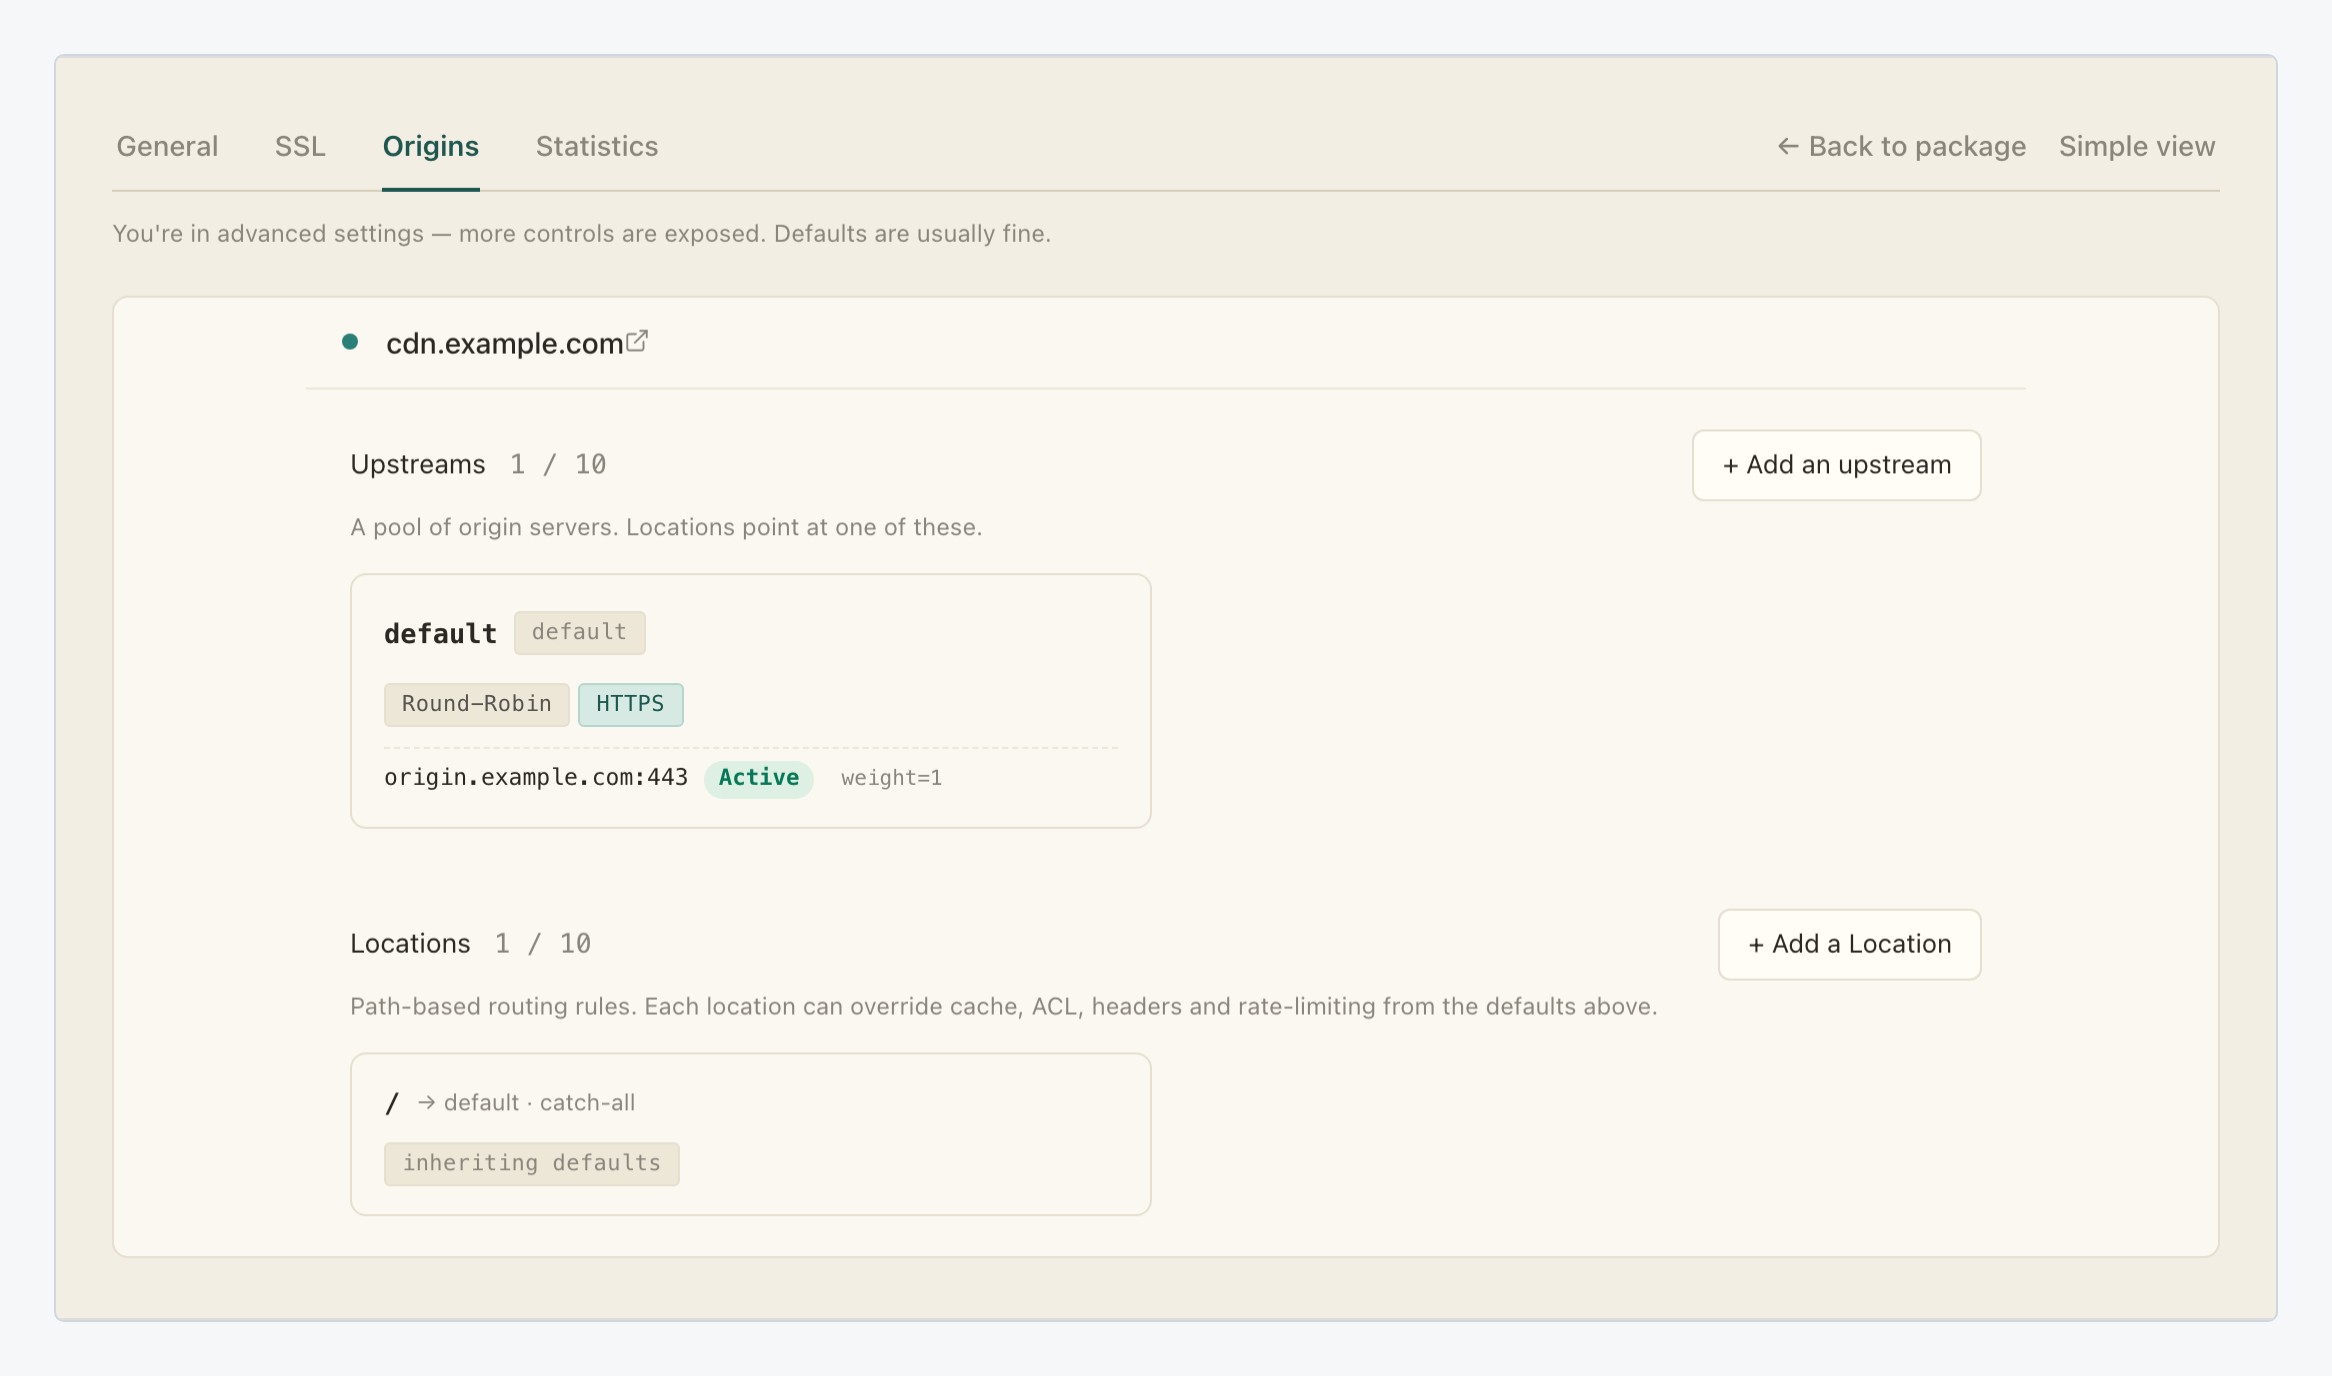
The tab has two panels. Upstreams is described on screen as a pool of origin servers that locations point at; Locations holds the path-based routing rules. This tutorial stays in the Upstreams panel; Route and configure a specific URL path on your CDN covers the other one.
Step 2: Open the upstream editor
Every resource starts with one upstream named default, and the origin you set on the General page is its only server. The card shows the upstream’s balancing pill (Round-Robin), its HTTPS pill, and the server line origin.example.com:443 marked Active with weight=1. A package allows up to 10 upstreams; the counter reads 1 / 10 here.
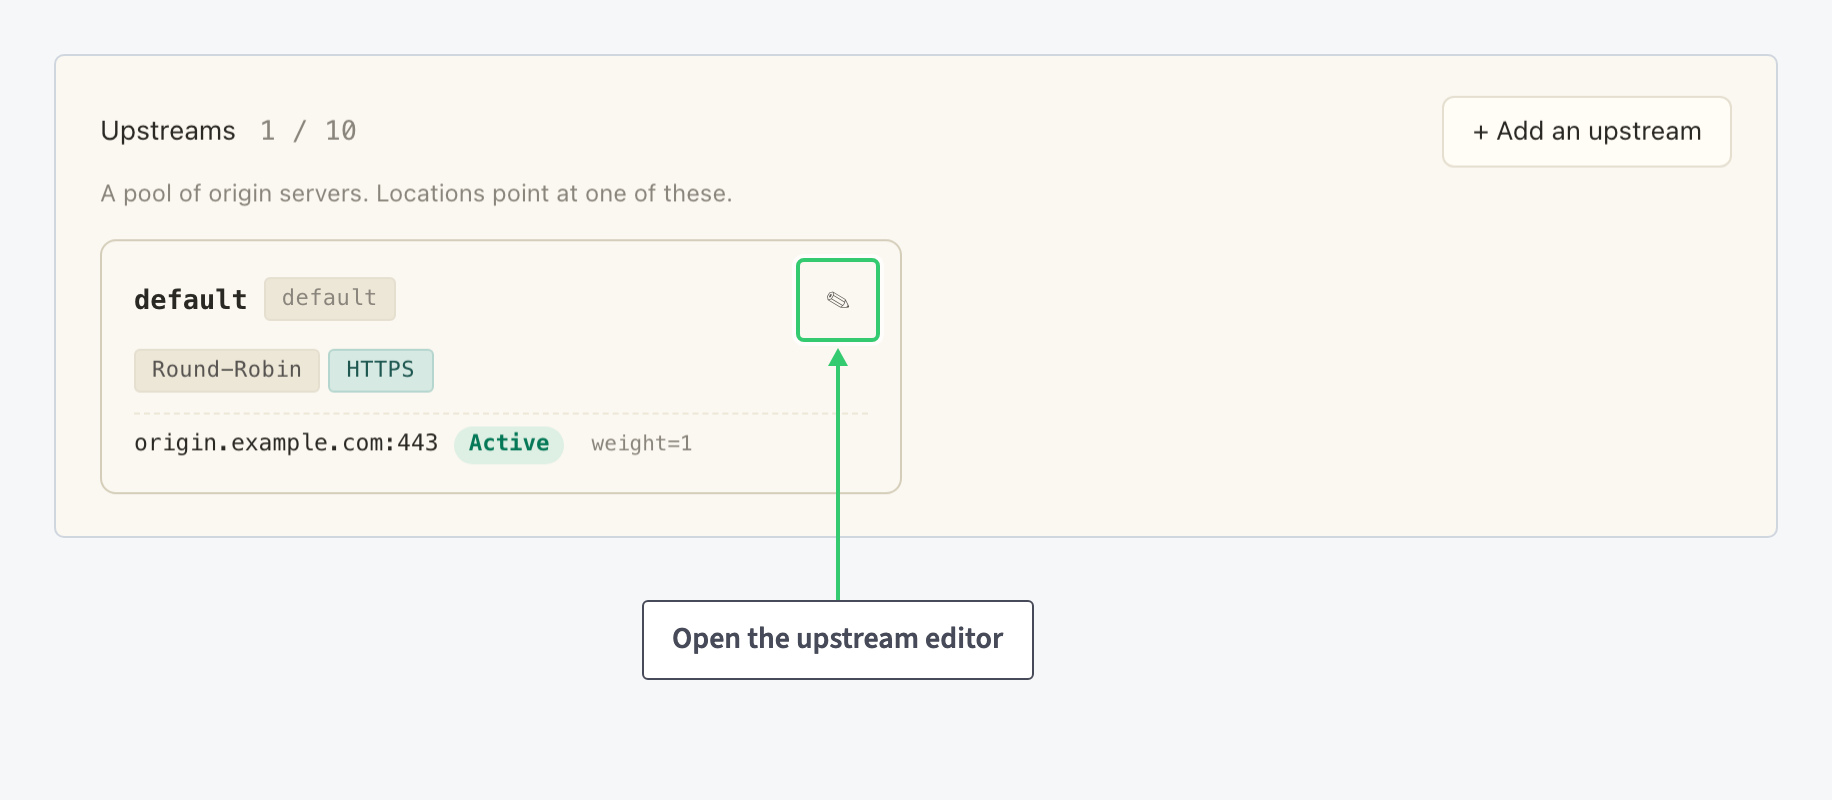
Hover over the card and click the pencil (Edit) that appears in its top right corner. The Edit upstream dialog opens.
Step 3: Review the editor’s fields
Choose the Origin type first and keep Web server: a pool of servers is what this tutorial builds. Choosing S3 bucket would turn the upstream into object storage with its own fields, covered in Serve a Melbicom S3 Bucket through Your CDN.
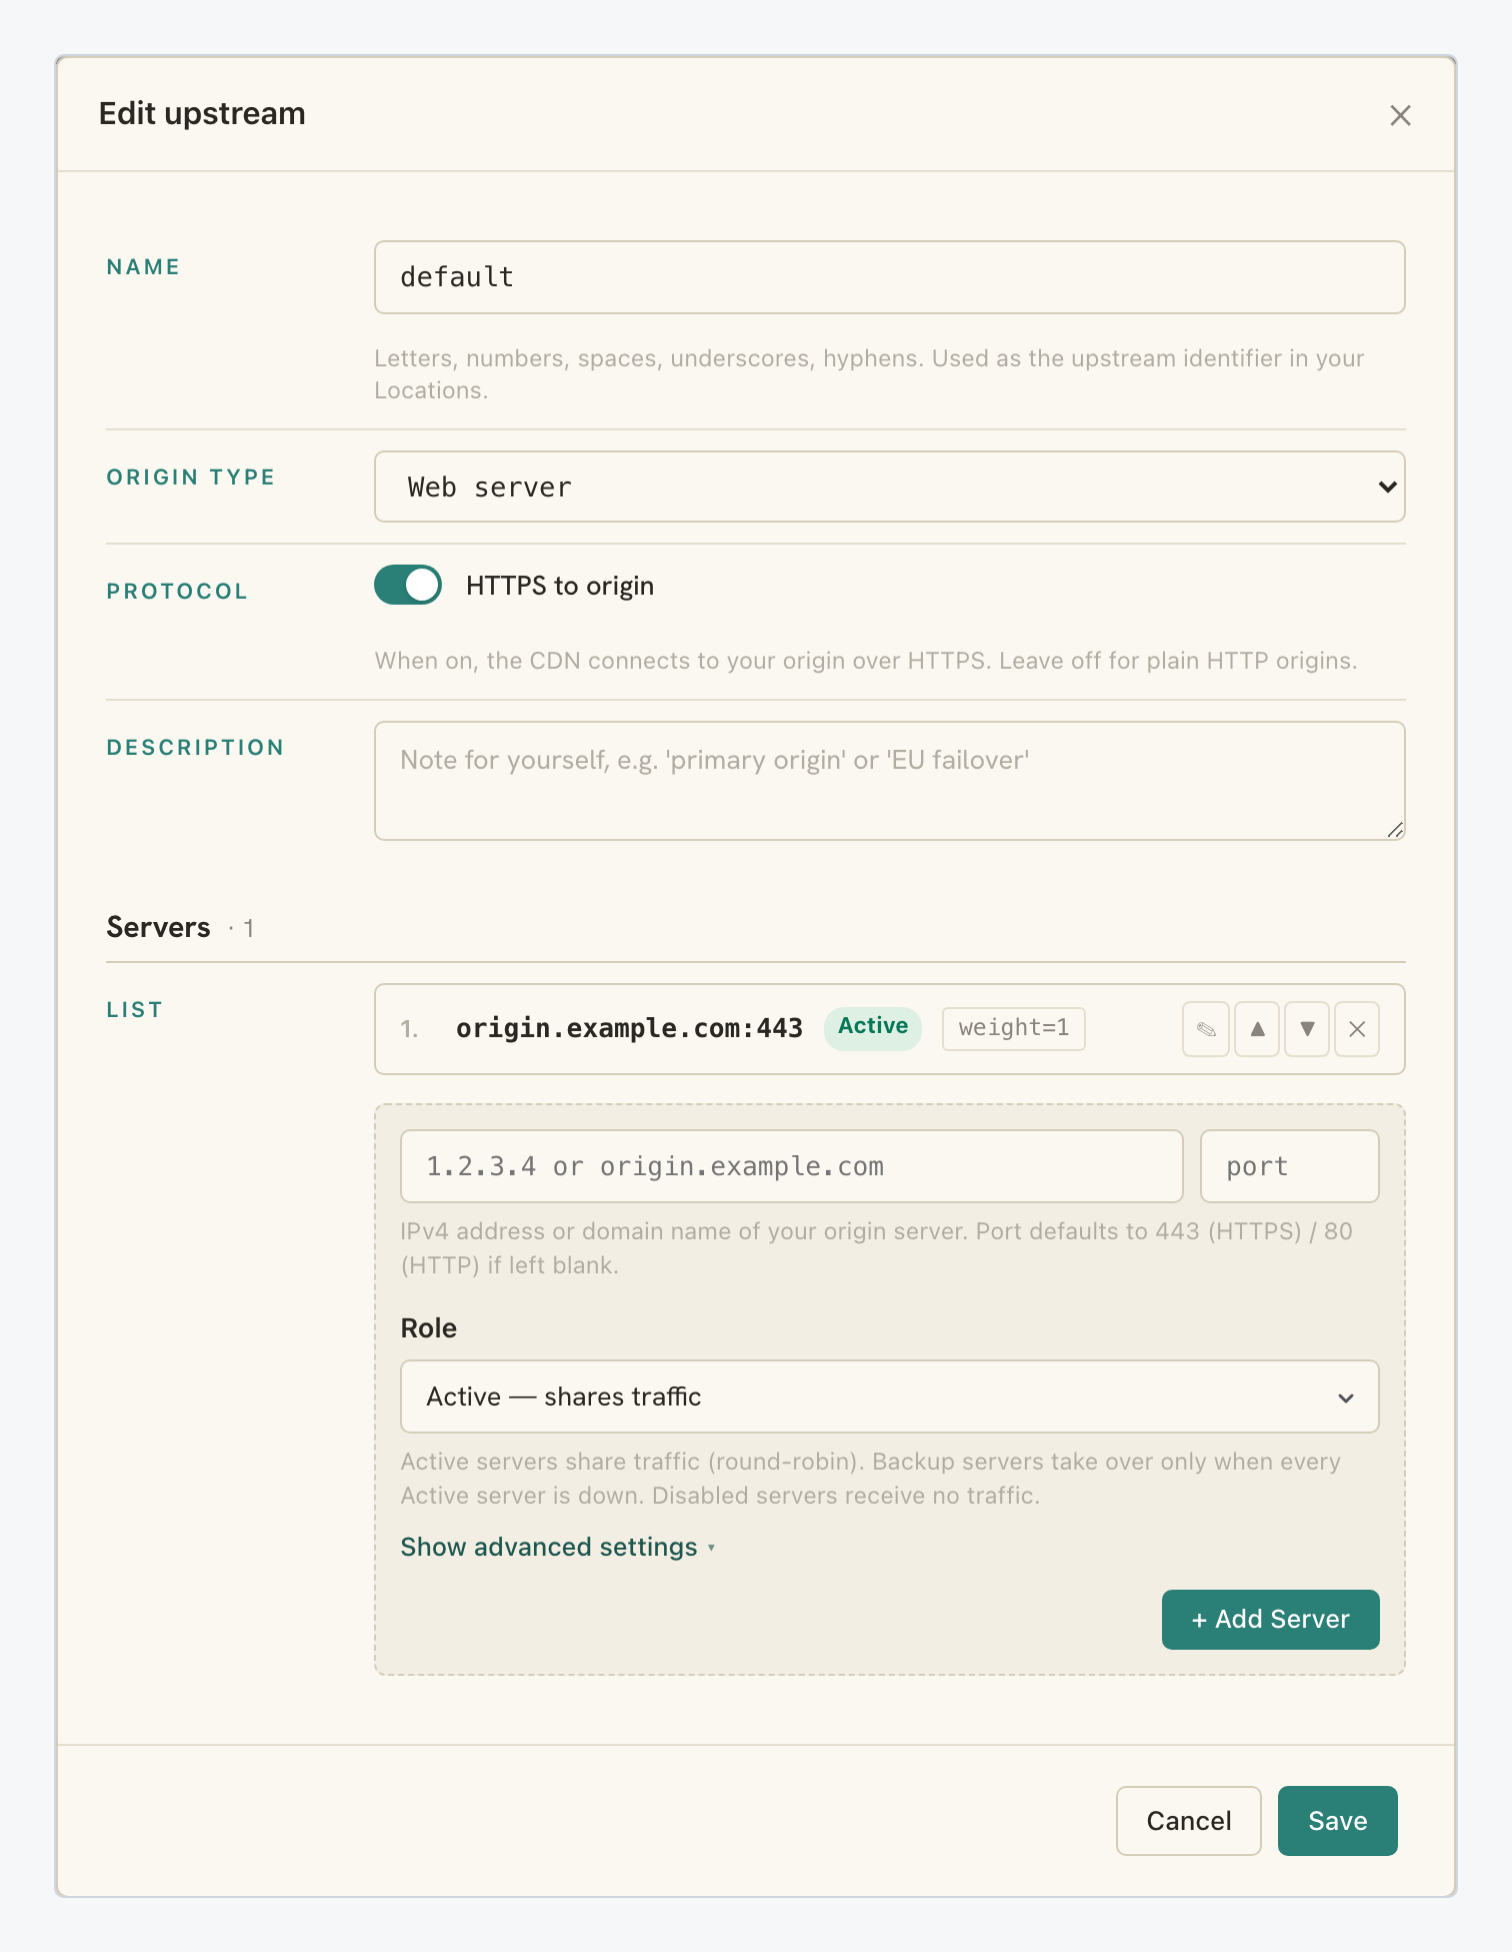
Top to bottom, the dialog holds:
- Name: letters, numbers, spaces, underscores and hyphens. The name becomes the upstream identifier in your Locations, so pick something you will recognize when routing paths later.
- Protocol: the HTTPS to origin toggle. On means the CDN connects to your origin over HTTPS; leave it off for plain HTTP origins. It applies to the whole pool, not per server.
- Description: a free note for yourself; the placeholder suggests things like a primary origin or an EU failover.
- Servers: the list of origin servers in the pool, each with its address, role badge and weight, plus per-server controls to edit, move up, move down and remove. Below the list sits the form that adds the next server.
Step 4: Add the second origin as a backup
Fill the add-server form at the bottom of the Servers section:
| Setting | Value |
|---|---|
| Address | origin-2.example.com (an IPv4 address or a domain name) |
| Port | Leave blank: it defaults to 443 for HTTPS and 80 for HTTP |
| Role | Backup (failover only) |
The Role dropdown is where the failover behaviour lives:
Activeservers share traffic round-robin.Backupservers take over only when every active server is down.Disabledservers receive no traffic.
So for a failover setup, keep your main origin Active and mark the spare Backup. If you want both to share the load instead, make them both Active.
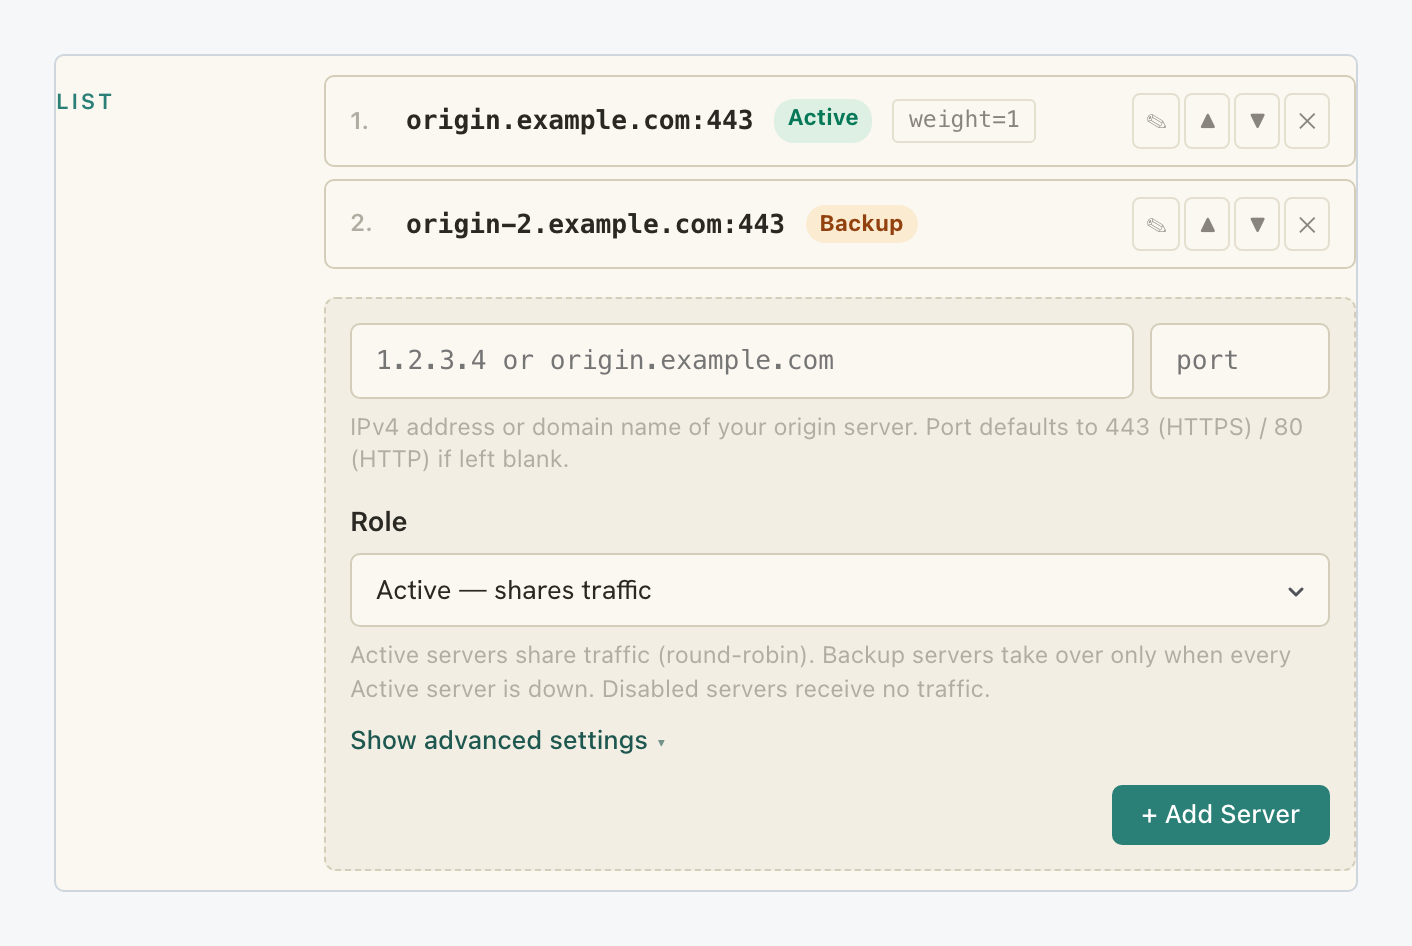
Click + Add Server. The entry joins the list, and the counter reads Servers · 2:
Step 5: Tune weight and health checks if you need them
Each server also has advanced fields, folded behind Show advanced settings in the add-server form (they are expanded in the screenshot above):
| Setting | Value |
|---|---|
| Weight | Relative load share; higher means more requests. Defaults to 1, an equal share. |
| max_fails | Failed connection attempts in a row before the server is marked unhealthy. 0 disables the check. |
| max_conns | Cap on simultaneous active connections. 0, the default, means no cap. |
| route | Sticky-session route label: requests with a matching cookie or header pin to this server. |
| service | DNS SRV record service name. The hint itself says to leave it blank unless you know you need it. |
For a plain failover pair none of these need changing. Weight becomes relevant once two or more servers are Active: a weight=2 server takes twice the requests of a weight=1 one.
Step 6: Save the upstream
Click Save in the dialog footer to apply the new pool; Cancel closes the editor and leaves the upstream as it was. Back on the tab, the upstream card lists the servers of the pool with their role badges.
What you’ve built
Your resource no longer depends on a single machine. Cache misses go to your active origin as before. If it stops answering, the CDN fails over to the backup you just added, with no DNS change and nothing visible to visitors.
The same editor scales with you: promote the backup to Active to share load, skew the split with weights, or add more servers to the pool, up to the package limits. And because the upstream keeps its name, every location that points at it follows the change automatically.