
Creating a resource registers your hostname on the CDN, but visitors still reach your origin server directly until you update DNS. Every resource carries a CNAME target: a hostname on the CDN network that your own hostname has to point to. This tutorial shows where to find that target, how to add the matching CNAME record at your DNS provider, and how the panel reports the result.
Prerequisites
- A CDN resource already created for the hostname you want to serve, for example
cdn.example.com. See Adding your first resource. - Access to the DNS zone of that domain, at your registrar or wherever your nameservers are hosted.
- A hostname that can take a CNAME record. Subdomains such as
cdn.example.comorwww.example.comare fine. A bare domain (example.com) cannot hold a standard CNAME, so use a subdomain or a provider feature such as ALIAS, ANAME or CNAME flattening.
Step 1: Open the resource settings
Open your CDN package and find the resource in the Resources table. In the Actions column, click the gear icon (Edit resource settings) on the row of the hostname you are pointing.
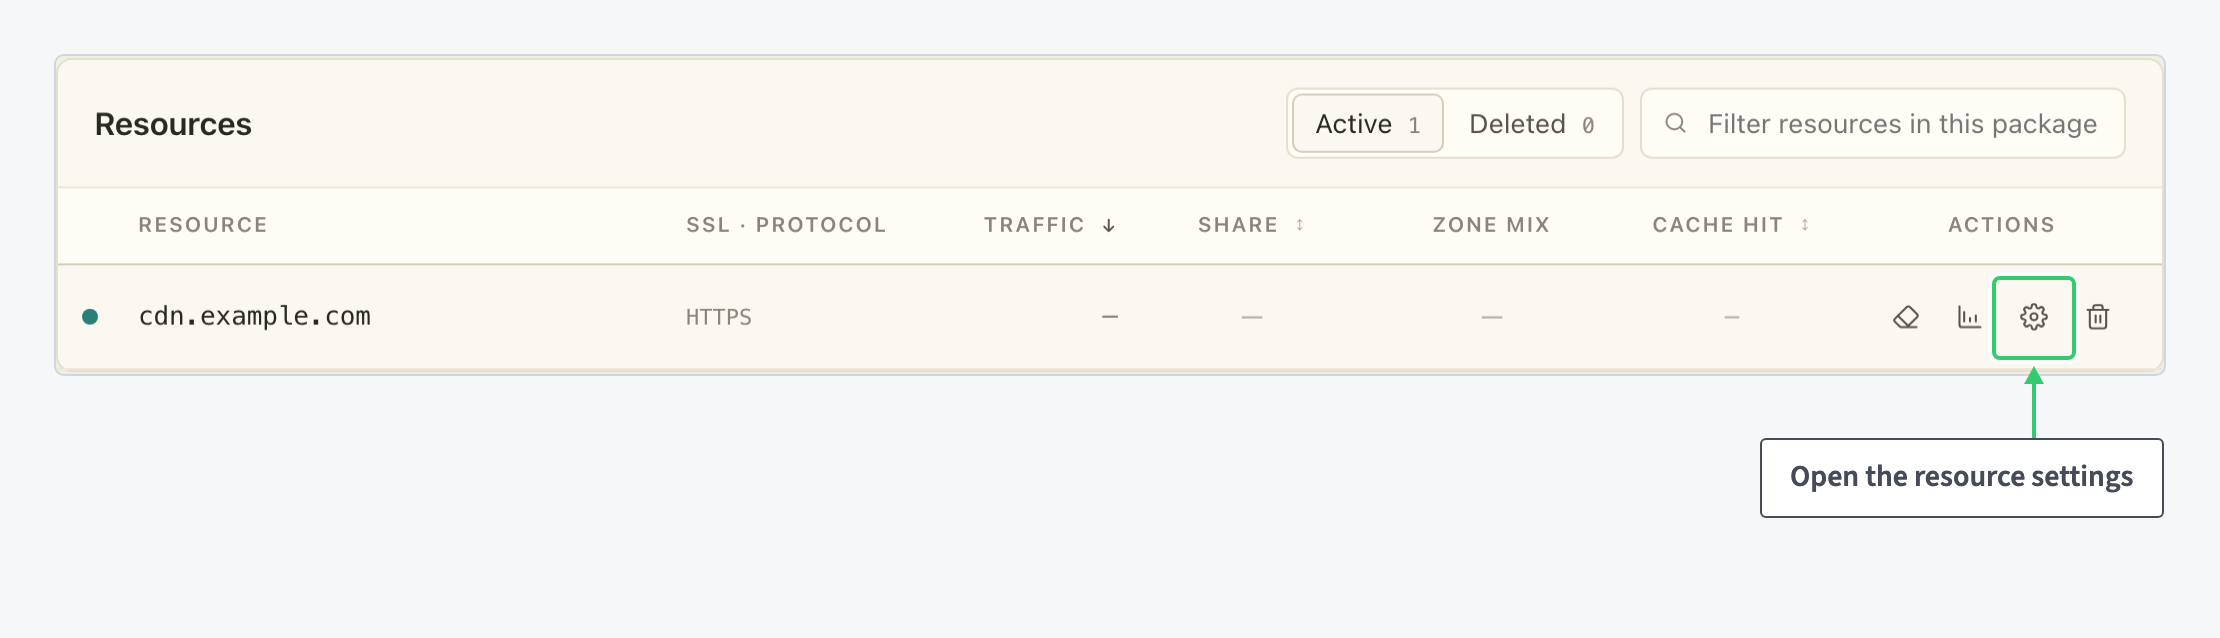
The resource opens on its General tab, which holds everything you need for this task: the CNAME record, the source server, the protocol and the SSL certificate. The other icons in the row clear the cache and open the statistics of that resource.
Step 2: Copy the CNAME target
The first field on the General tab is CNAME record. It contains the target hostname the CDN generated for this resource, something like 4prsl8kkuvvqnmlprn84.c10.swiftycdn.net. Click Copy to put it on your clipboard.
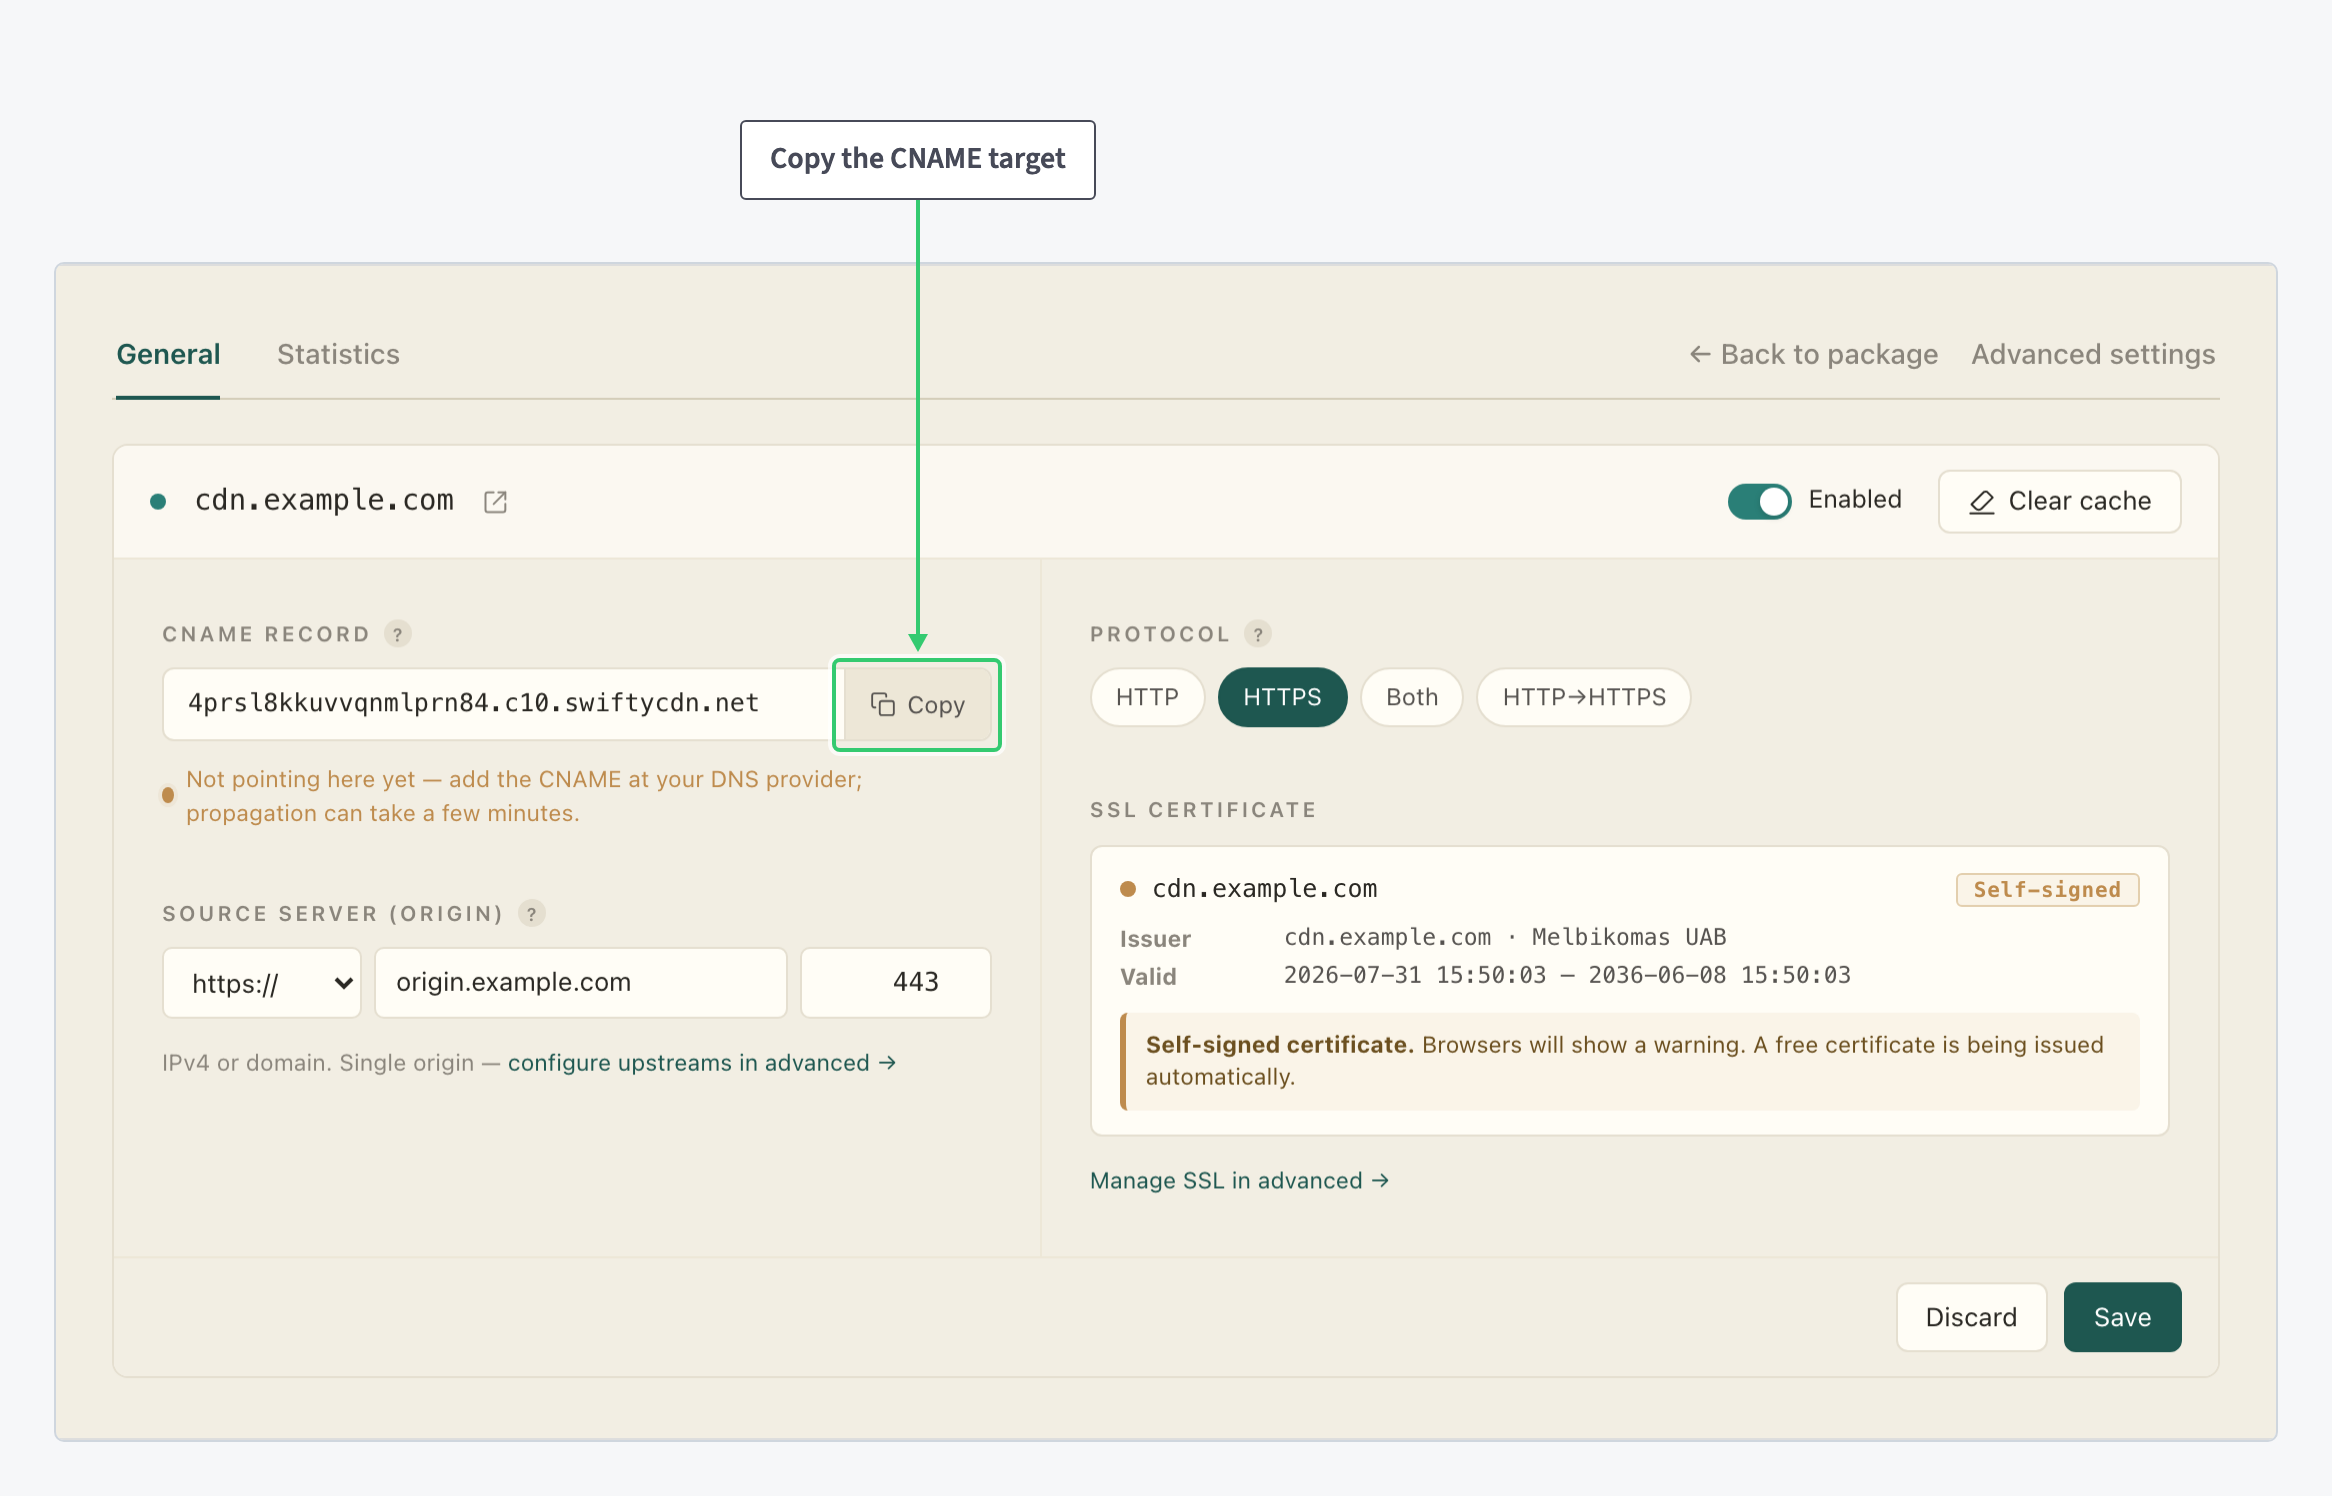
Two details about this value:
- The panel issues it when the resource is created: the wizard preview lists the CNAME as issued on create. Take the value from the resource you are pointing, not from another resource in the package.
- Copying it changes nothing in your configuration, so you can leave the page without touching Save.
Step 3: Add the CNAME record at your DNS provider
Log in wherever your domain’s DNS zone is managed (your registrar, your hosting control panel, or a DNS service such as your nameserver provider) and open the zone for your domain. Add one record:
| Setting | Value |
|---|---|
| Type | CNAME |
| Name (or Host) | The subdomain part of your hostname, for example cdn for cdn.example.com. Some providers expect the full hostname instead. |
| Value (or Target, Points to) | The target you copied, for example 4prsl8kkuvvqnmlprn84.c10.swiftycdn.net |
| TTL | The provider default (often 300 seconds or Auto) |
A few points that commonly cause mistakes:
- A hostname can carry only one record of this kind. If an
AorAAAArecord already exists for the same name, pointing at your origin server, replace it with the CNAME instead of adding one next to it. - Some zone editors require a trailing dot on the target (
target.example.net.), others add it for you. Follow the format your provider shows in its own examples. - Keep the TTL low during setup. A short TTL means a mistake is corrected in minutes rather than hours.
- Your origin server keeps its own name and address. The CNAME only moves the public hostname to the CDN, so leave the origin records unchanged.
Step 4: Check the DNS status in the panel
Back on the resource’s General tab, the line directly under the CNAME record reports what the panel currently sees for that hostname. Before the record exists or propagates, it shows an amber marker and reads Not pointing here yet, tells you to add the CNAME at your DNS provider, and notes that propagation can take a few minutes.
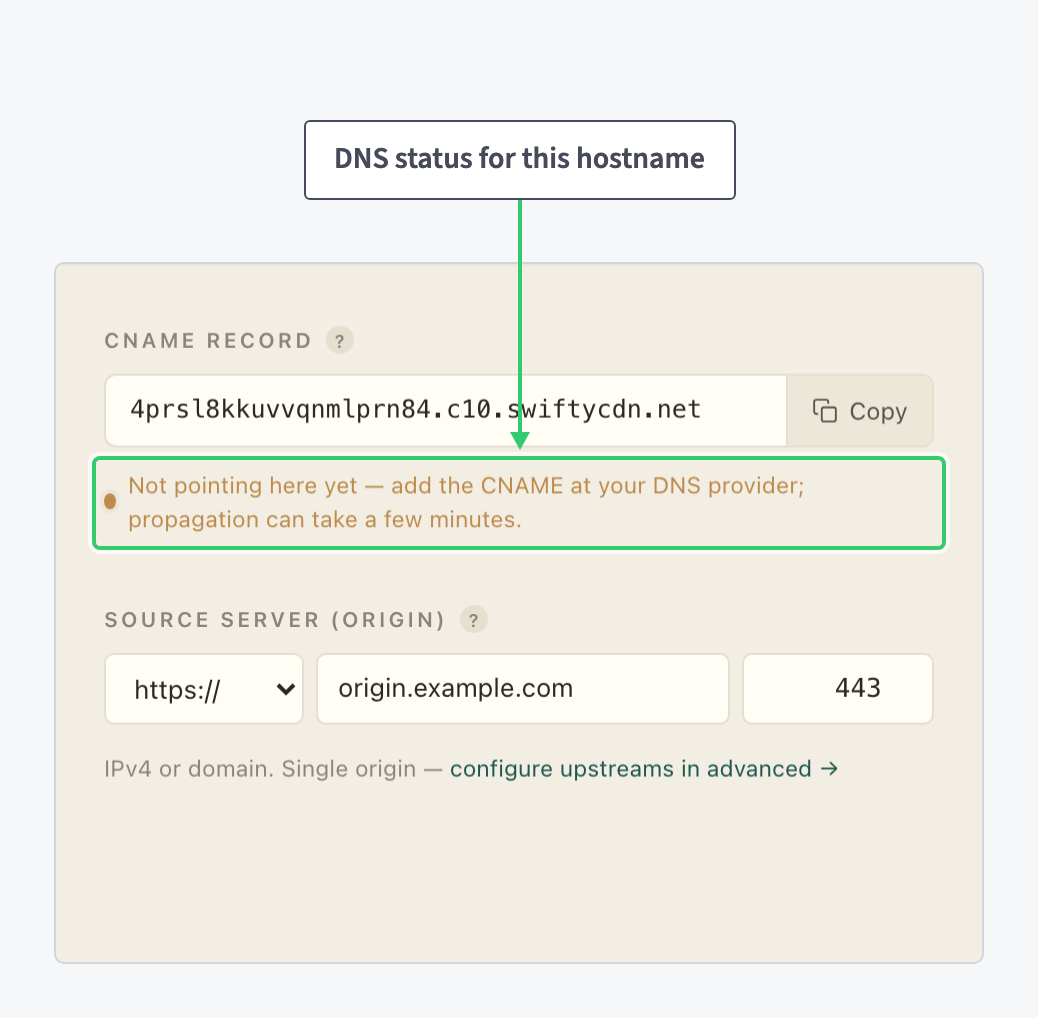
After saving the record at your provider, wait a few minutes and reload the settings page to see the status again. Resolvers and browsers cache DNS answers, so the change can be visible in one place before another.
Step 5: Wait for the certificate to issue
The CNAME is also what unblocks your certificate. The after-create checklist in the new resource wizard states it plainly: free SSL issues after the CNAME validates. Nothing to click, nothing to request.
Until then, the SSL certificate panel on the same page shows the placeholder currently in use. In this example it is marked Self-signed, with its issuer and validity dates, and the note that browsers will show a warning while the free certificate is being issued automatically.

So the order matters: point the hostname first, and the certificate issues automatically. If you bring your own certificate instead, or want the details of each option, see How to add SSL certificates.
Next to the certificate on the same page sits the Protocol setting, with its HTTP, HTTPS, Both and HTTP to HTTPS options: that is where you decide how visitors connect once traffic arrives. Choosing a protocol covers when to pick each one.
What you’ve built
Your hostname now resolves to the CDN instead of your origin server. Visitor requests land on the CDN network, cached content is served from there, and only the misses travel to your origin. One DNS record did that, and it is the only change your domain needs.
The resource settings, the protocol and the certificate all stay in the panel, where you can adjust them without touching DNS again. From here you can explore statistics per resource, cache controls, and the advanced settings behind the same page. If any of the vocabulary is still unclear, Understanding the Building Blocks of Your CDN Product defines resources, origins, upstreams and locations in one place.