
Every CDN resource forces one early decision: which schemes the CDN accepts from visitors. The panel gives you four options, and the wrong choice creates problems that stay invisible at first. Too strict and part of your audience gets a certificate warning or a failed connection. Too loose and the same page is reachable over two schemes forever, which is bad for SEO, bad for mixed content, and bad for anyone trying to reason about your cache.
By the end of this guide you will have picked one option on purpose, know exactly which condition would make you pick a different one, and know where to change it later without touching anything else.
Prerequisites
- An active CDN package with at least one resource. If you have not created one yet, start with Adding your first CDN resource.
- Client Area access to the package, since the protocol lives in each resource’s settings.
- Optional but recommended: your hostname already pointing at the CDN, so you can test the result immediately. See Pointing your domain at the CDN.
Why this setting deserves five minutes
- HTTP→HTTPS is the answer for most public websites: it keeps old links, bookmarks and hardcoded integrations working, then moves every one of them onto a single canonical scheme instead of serving two versions of the same site.
- Your certificate sets the timing, not your preference: forcing HTTPS before a browser-trusted certificate is live turns a working page into a security warning. Check the certificate first, switch second.
- Both is a transition state, not a permanent choice: it is the right answer during a migration window and the wrong answer three months later, when half your traffic is still plain HTTP and nobody noticed.
Step 1: Understand what each option does
The protocol setting controls which schemes the CDN accepts from visitors. It is a per resource setting: two resources in the same package can run different protocols. You choose it when you create the resource, and you can change it at any time afterwards.
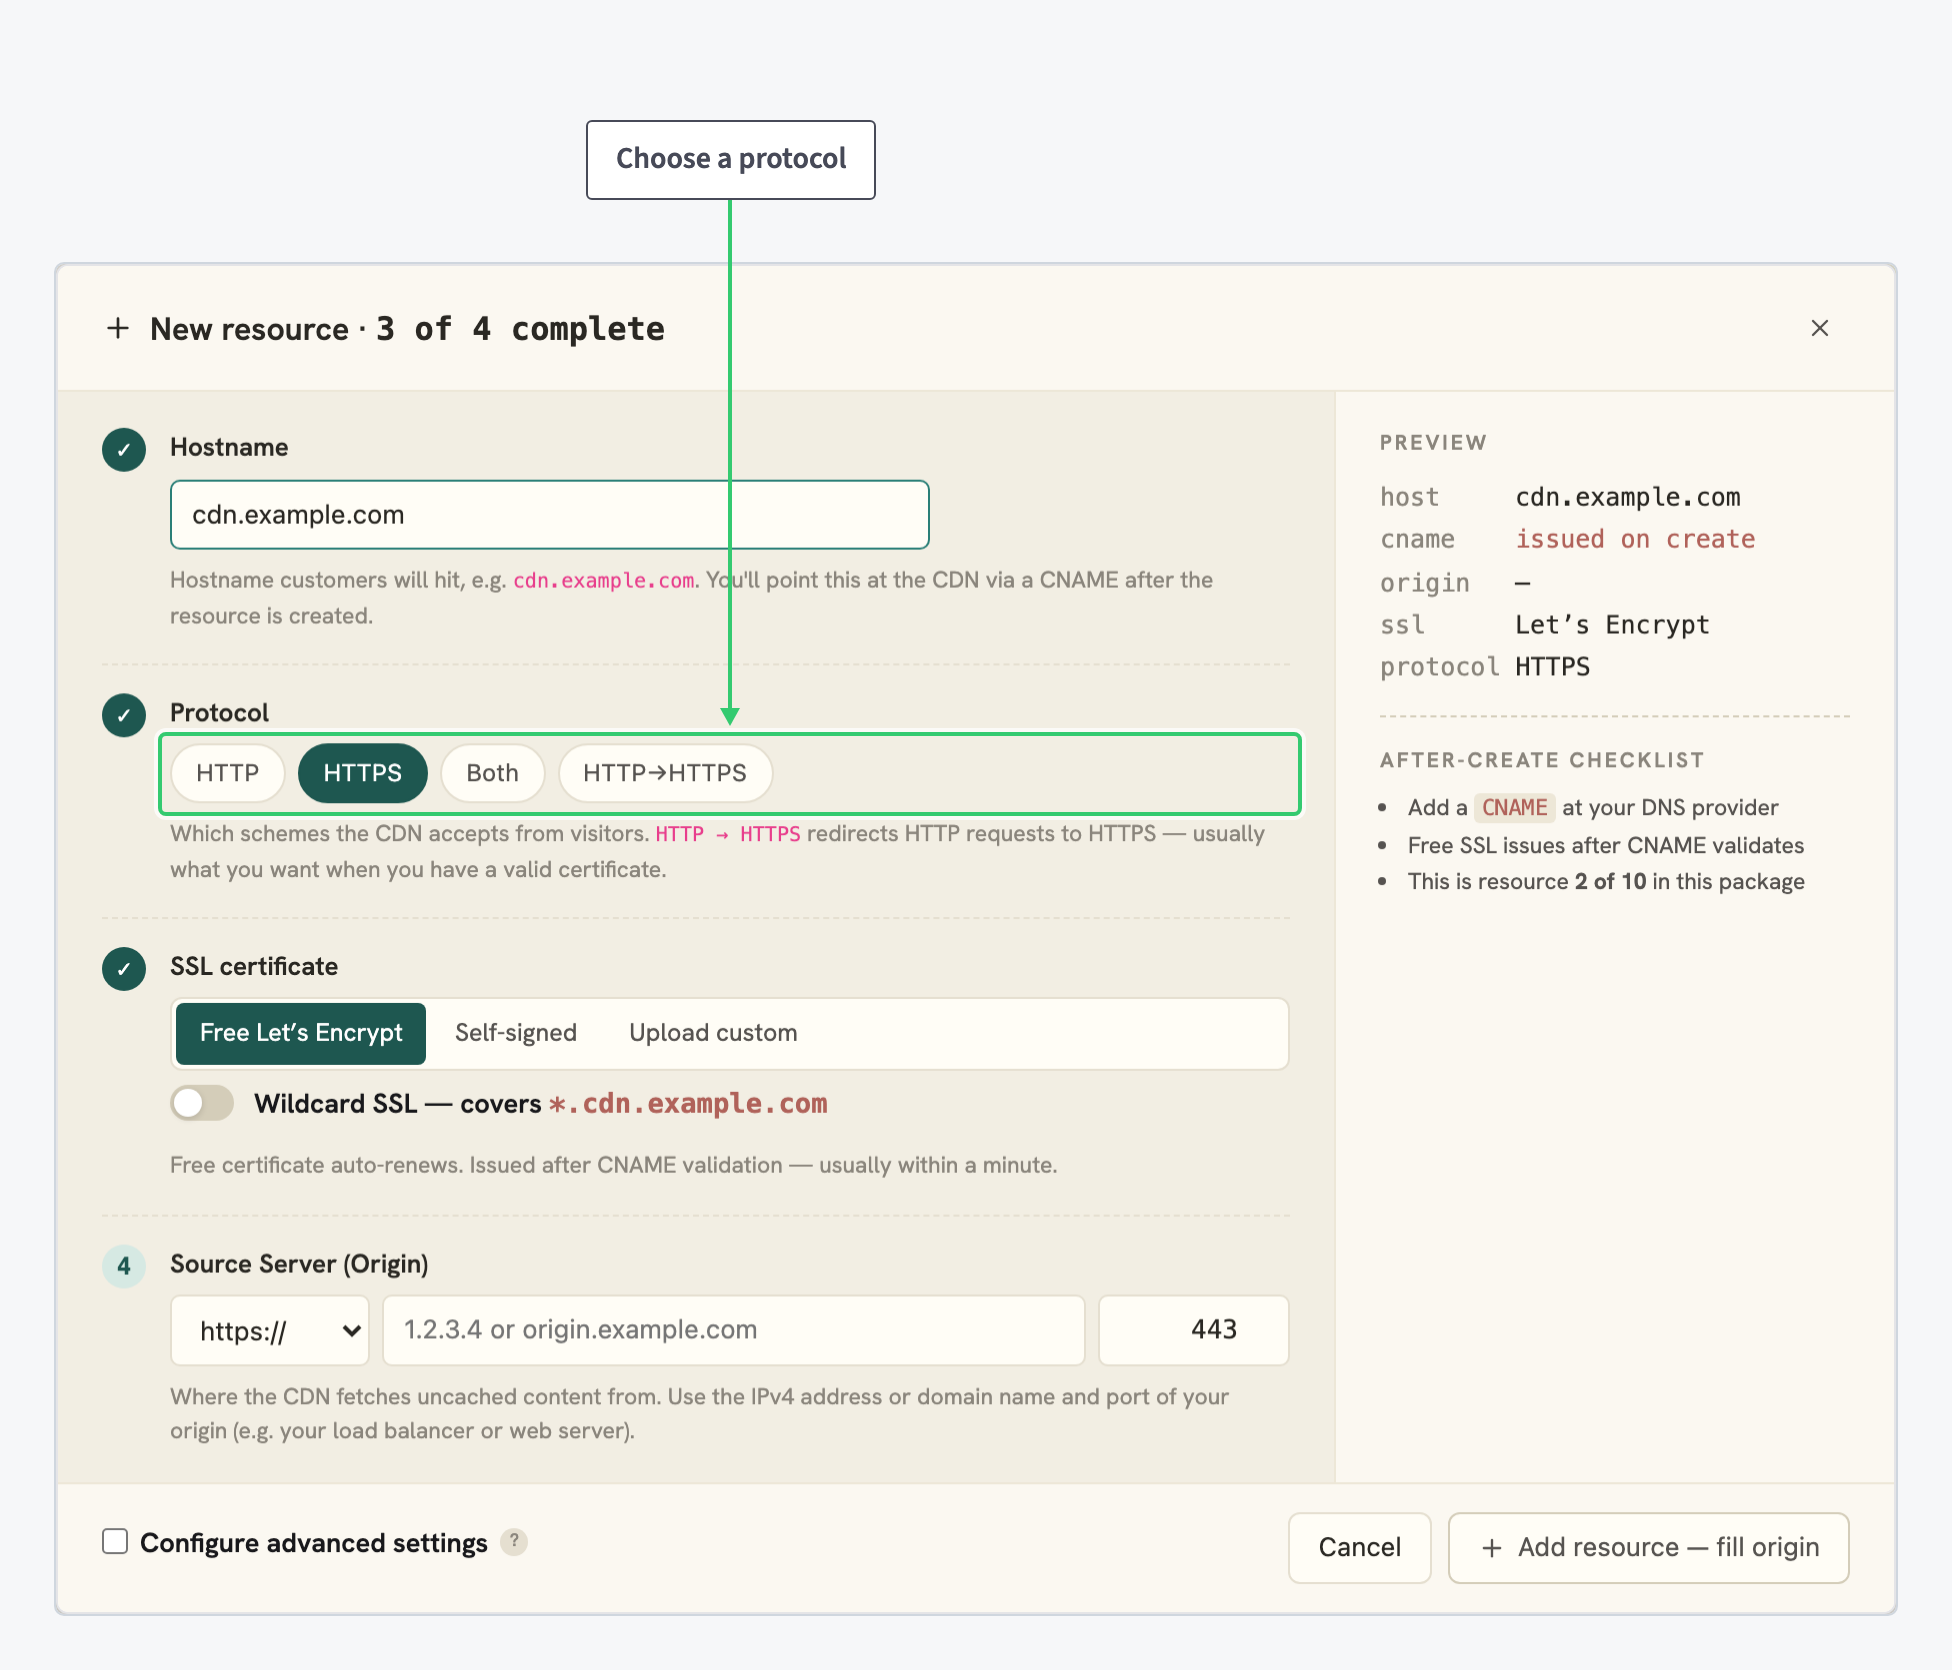
The four options behave like this:
| Option | What the CDN does | Pick it when |
|---|---|---|
| HTTP | Serves plain HTTP only. HTTPS requests are not served. | Legacy or internal traffic that cannot do TLS, and only on a hostname that never carries credentials or personal data. |
| HTTPS | Serves encrypted HTTPS only. Plain HTTP requests are not served. | APIs, app assets and any hostname whose clients you control and know are HTTPS only. |
| Both | Accepts HTTP and HTTPS, and serves whichever the visitor asked for. | A migration window, or a mixed client base you are still inventorying. |
| HTTP→HTTPS | Accepts HTTP but redirects those requests to HTTPS, so everything ends up encrypted. | Almost every public website: the option to pick once you have a valid certificate. |
Note the difference between HTTPS and HTTP→HTTPS, because it is the one people get wrong. HTTPS only is stricter: an old link that starts with http:// simply fails. HTTP→HTTPS accepts that same old link and sends the visitor to the encrypted version. Strictness is not the same as security here: both end up encrypted, but only one of them keeps your old links working.
Step 2: Match the option to your certificate situation
The protocol question is really a certificate question. Open the resource’s settings and look at the SSL certificate panel: it names the subject, the issuer, the validity window, and the certificate type.
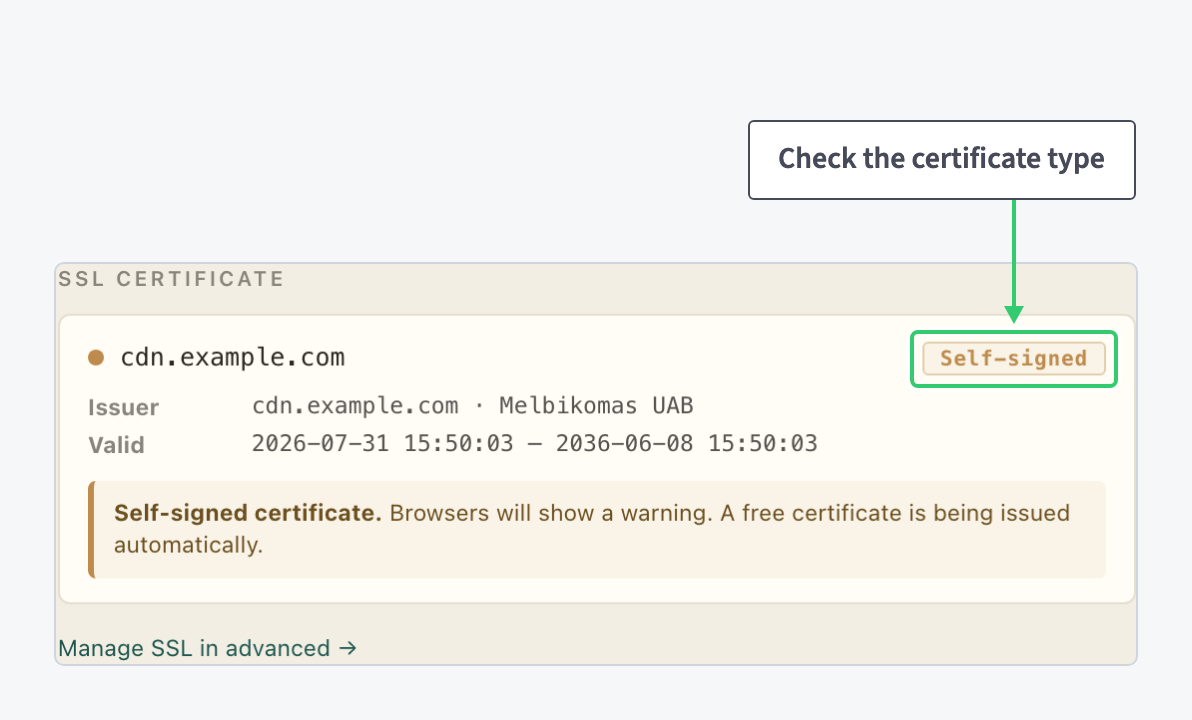
In the example above the badge reads Self-signed, and the panel spells out the consequence: browsers will show a warning, and a free certificate is being issued automatically. That status means wait before forcing HTTPS. Use this table to translate what you see into a protocol:
| Certificate situation | Protocol to set |
|---|---|
| Free Let’s Encrypt certificate issued and valid | HTTP→HTTPS |
| Custom certificate uploaded, valid, matches the hostname | HTTP→HTTPS |
| Self-signed, or free certificate still being issued | Both for now, then switch once the real certificate is live |
| Valid certificate, and every client is known to support HTTPS | HTTPS |
| Internal or legacy hostname with no TLS capable clients | HTTP, and treat it as temporary |
The certificate details are managed separately from the protocol. Issuing, re-issuing and uploading are covered in How to add SSL certificates; the panel links to the same place with Manage SSL in advanced.
Step 3: Set the protocol on your resource
Nothing here is permanent. The protocol is a two-click change on an existing resource.
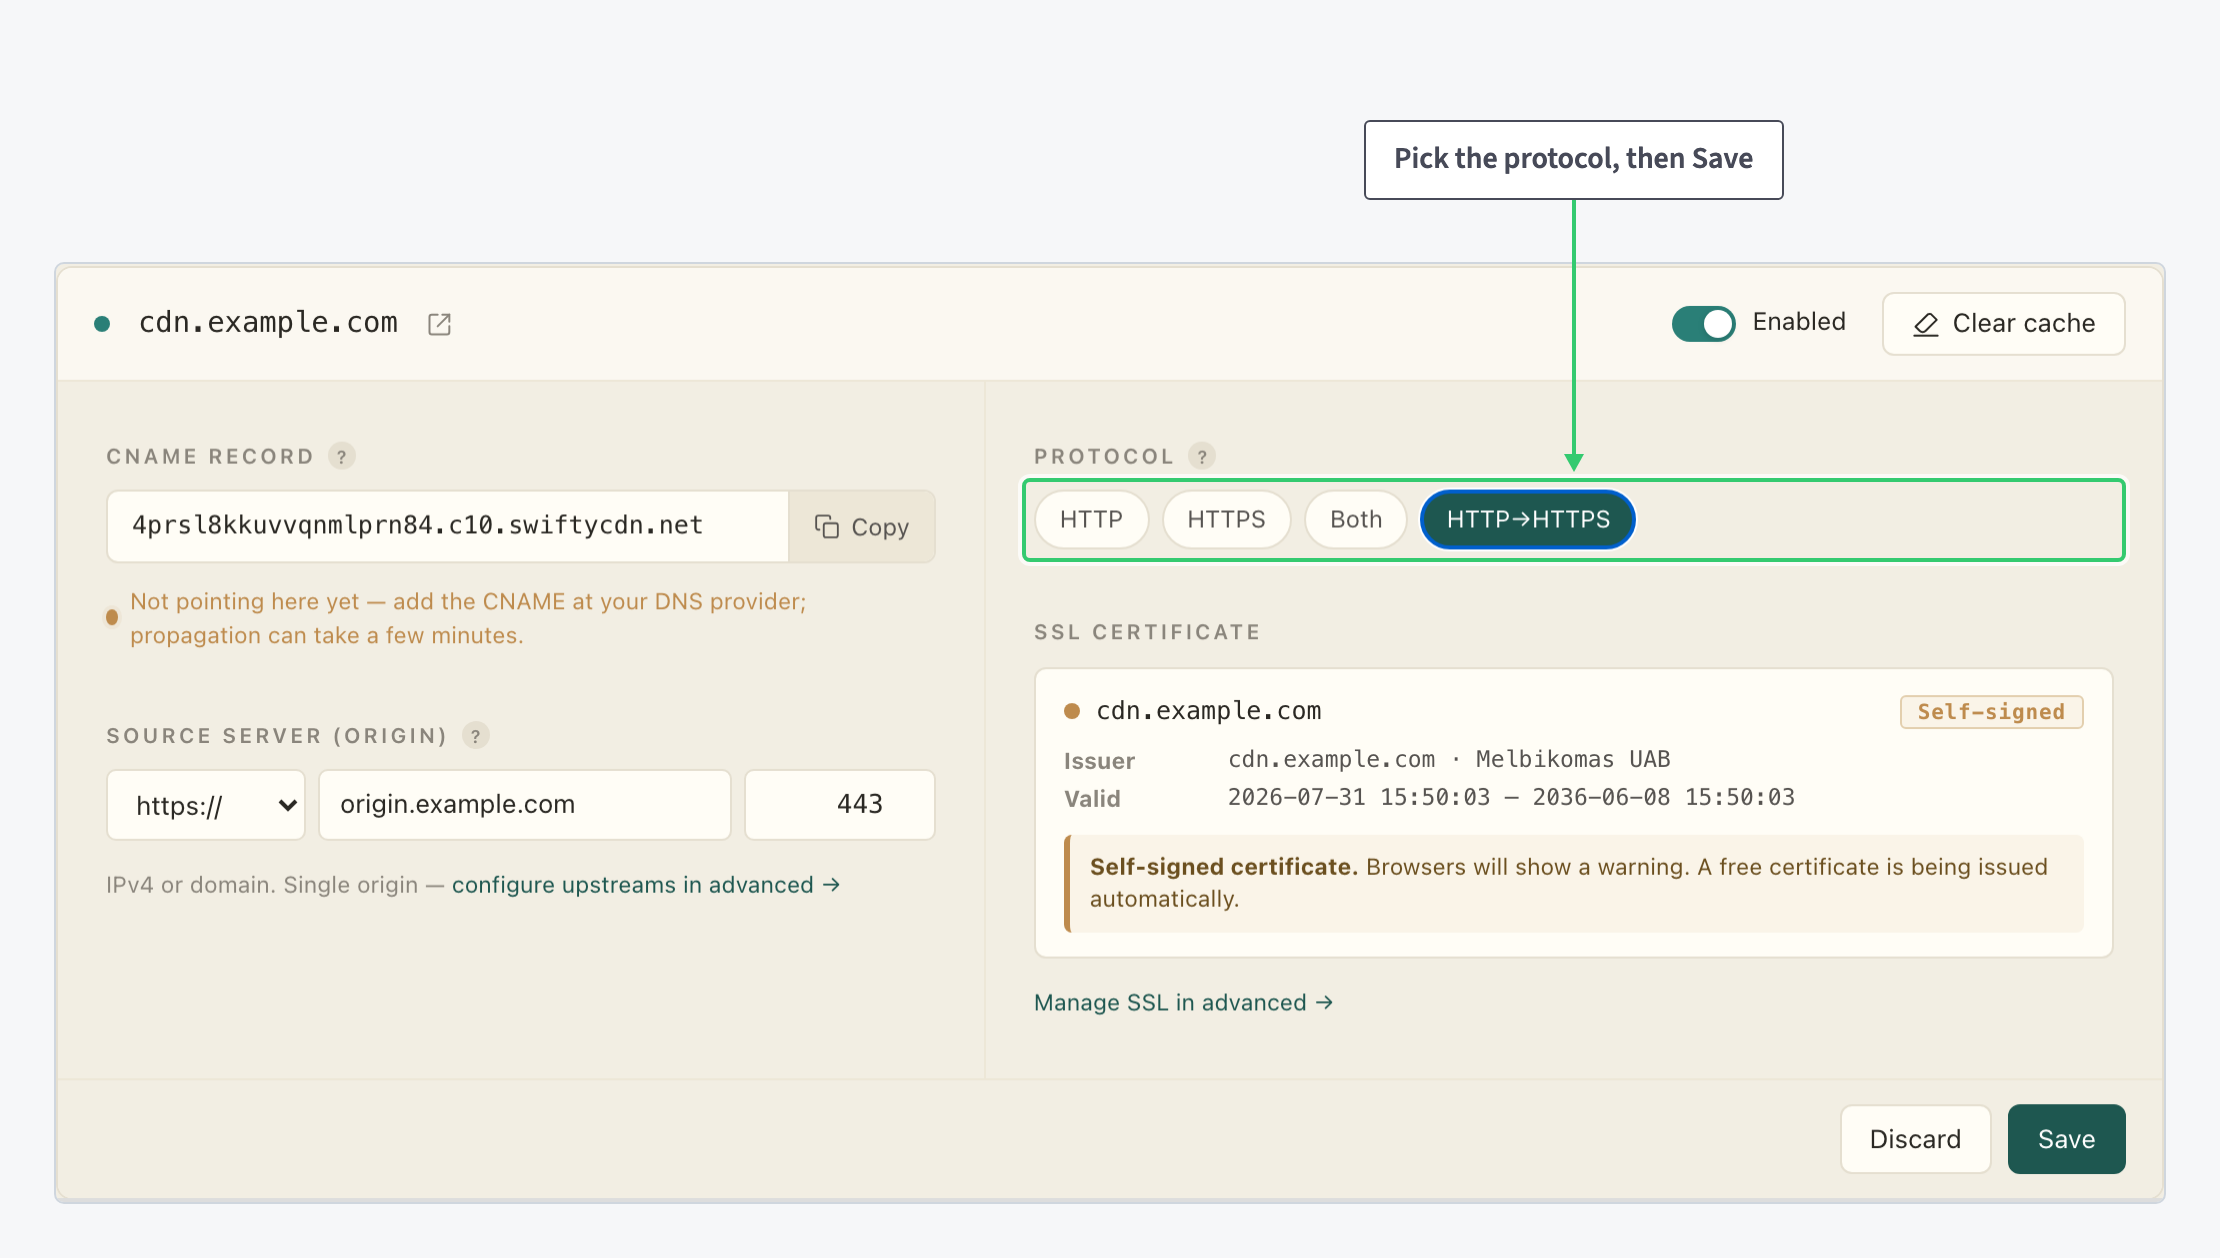
1. Open the resource settings
In your package, find the resource row and click the gear icon in the Actions column (its tooltip reads “Edit resource settings”). The General tab opens with the settings you use most often: the CNAME record, the source server, the protocol and the certificate.
2. Pick the protocol and save
In the Protocol section, click the option you want. The selected pill turns dark. Then click Save at the bottom of the card. Discard next to it discards the change before it is saved.
3. Confirm it took effect
Go back to the package with Back to package. The resource list has an SSL · PROTOCOL column that shows the protocol in force for every resource, so one glance tells you what each hostname is doing.
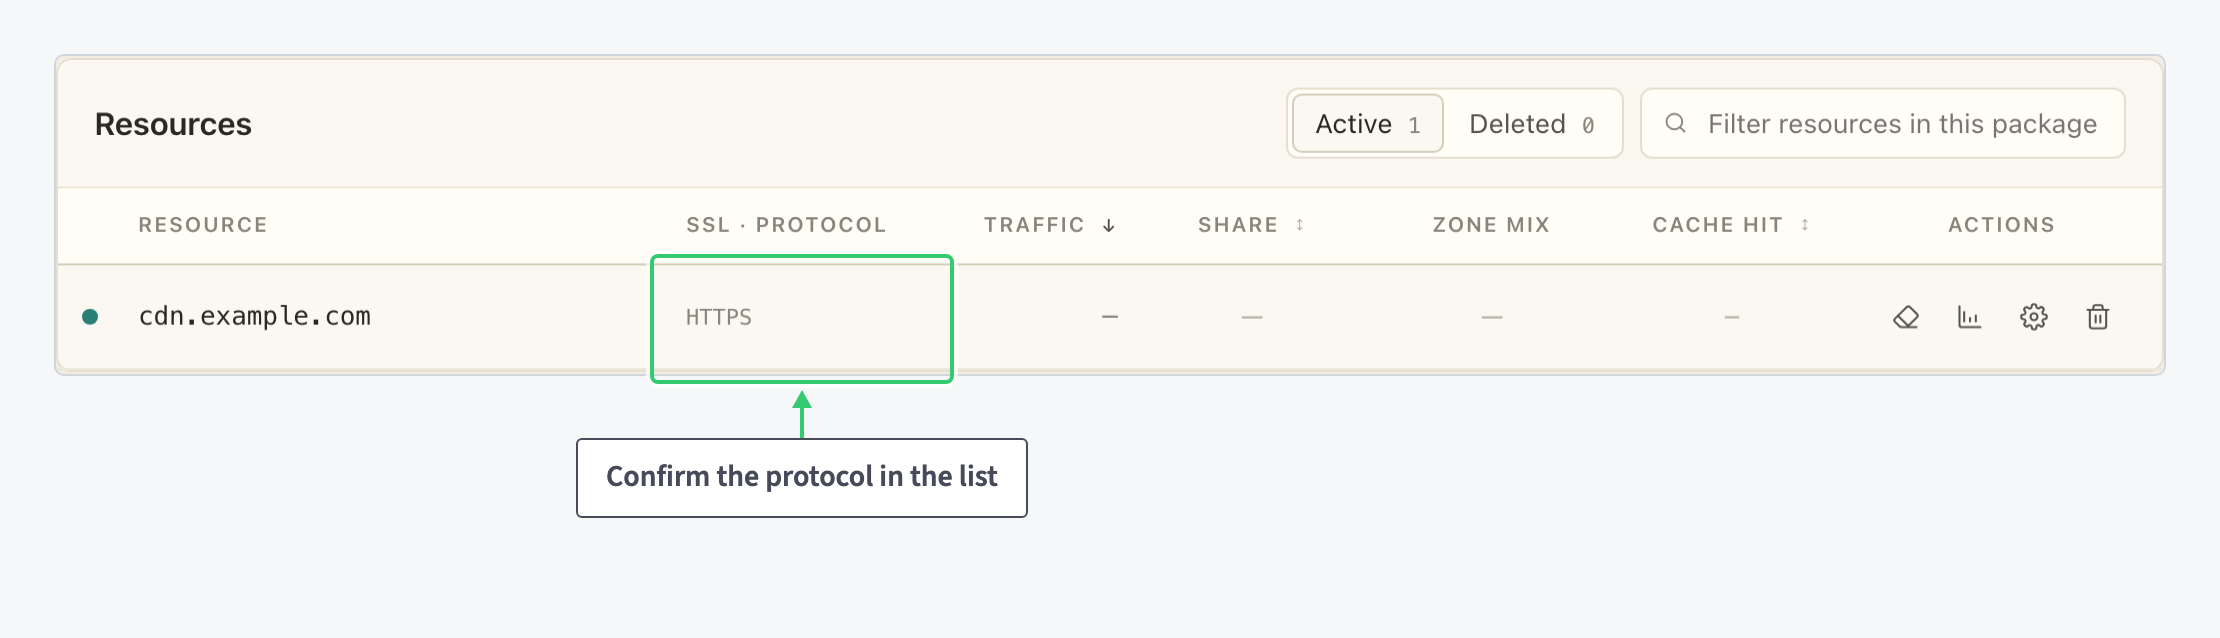
Then test it from outside the panel. Request your hostname over http:// and check that you land on the https:// version, and request it over https:// and check that the certificate your browser reports is the one you expect.
What you’ve decided
You now have a protocol you can justify, not one you inherited from a default. For most public hostnames that means HTTP→HTTPS: old links keep working, every visitor ends up on the encrypted version, and your site is served under one canonical scheme instead of two.
If your certificate is not ready yet, you have a plan rather than a warning page: run Both through the migration window, watch the SSL panel until the real certificate is live, then switch to HTTP→HTTPS and leave it there.
The same reasoning scales. Each resource in the package carries its own protocol, so a strict HTTPS API hostname and a permissive legacy hostname can live side by side, and the SSL · PROTOCOL column keeps the whole package auditable from a single screen.