
Compressed responses are smaller responses. The CDN can compress what it serves with two codecs, each its own row in the panel: Gzip and Brotli.
Gzip, as its editor puts it, “compresses text-like responses (HTML, CSS, JS, JSON) before sending” and “reduces bandwidth at a small CPU cost”. Brotli offers a “better compression ratio than Gzip”. This tutorial enables both, covers every field the two editors expose (compression levels, the Gzip proxied conditions, the Vary header toggle), and explains which defaults to keep.
Prerequisites
- A CDN resource already created. See Add your first CDN resource.
- Client Area access to the package.
Step 1: Open the advanced General page
In the Resources table of your package, click the gear icon (Edit resource settings) on the resource’s row, then click Advanced settings. The advanced General page stacks the feature groups below the resource form: Cache & Compression, Access Control and Rate Limiting.
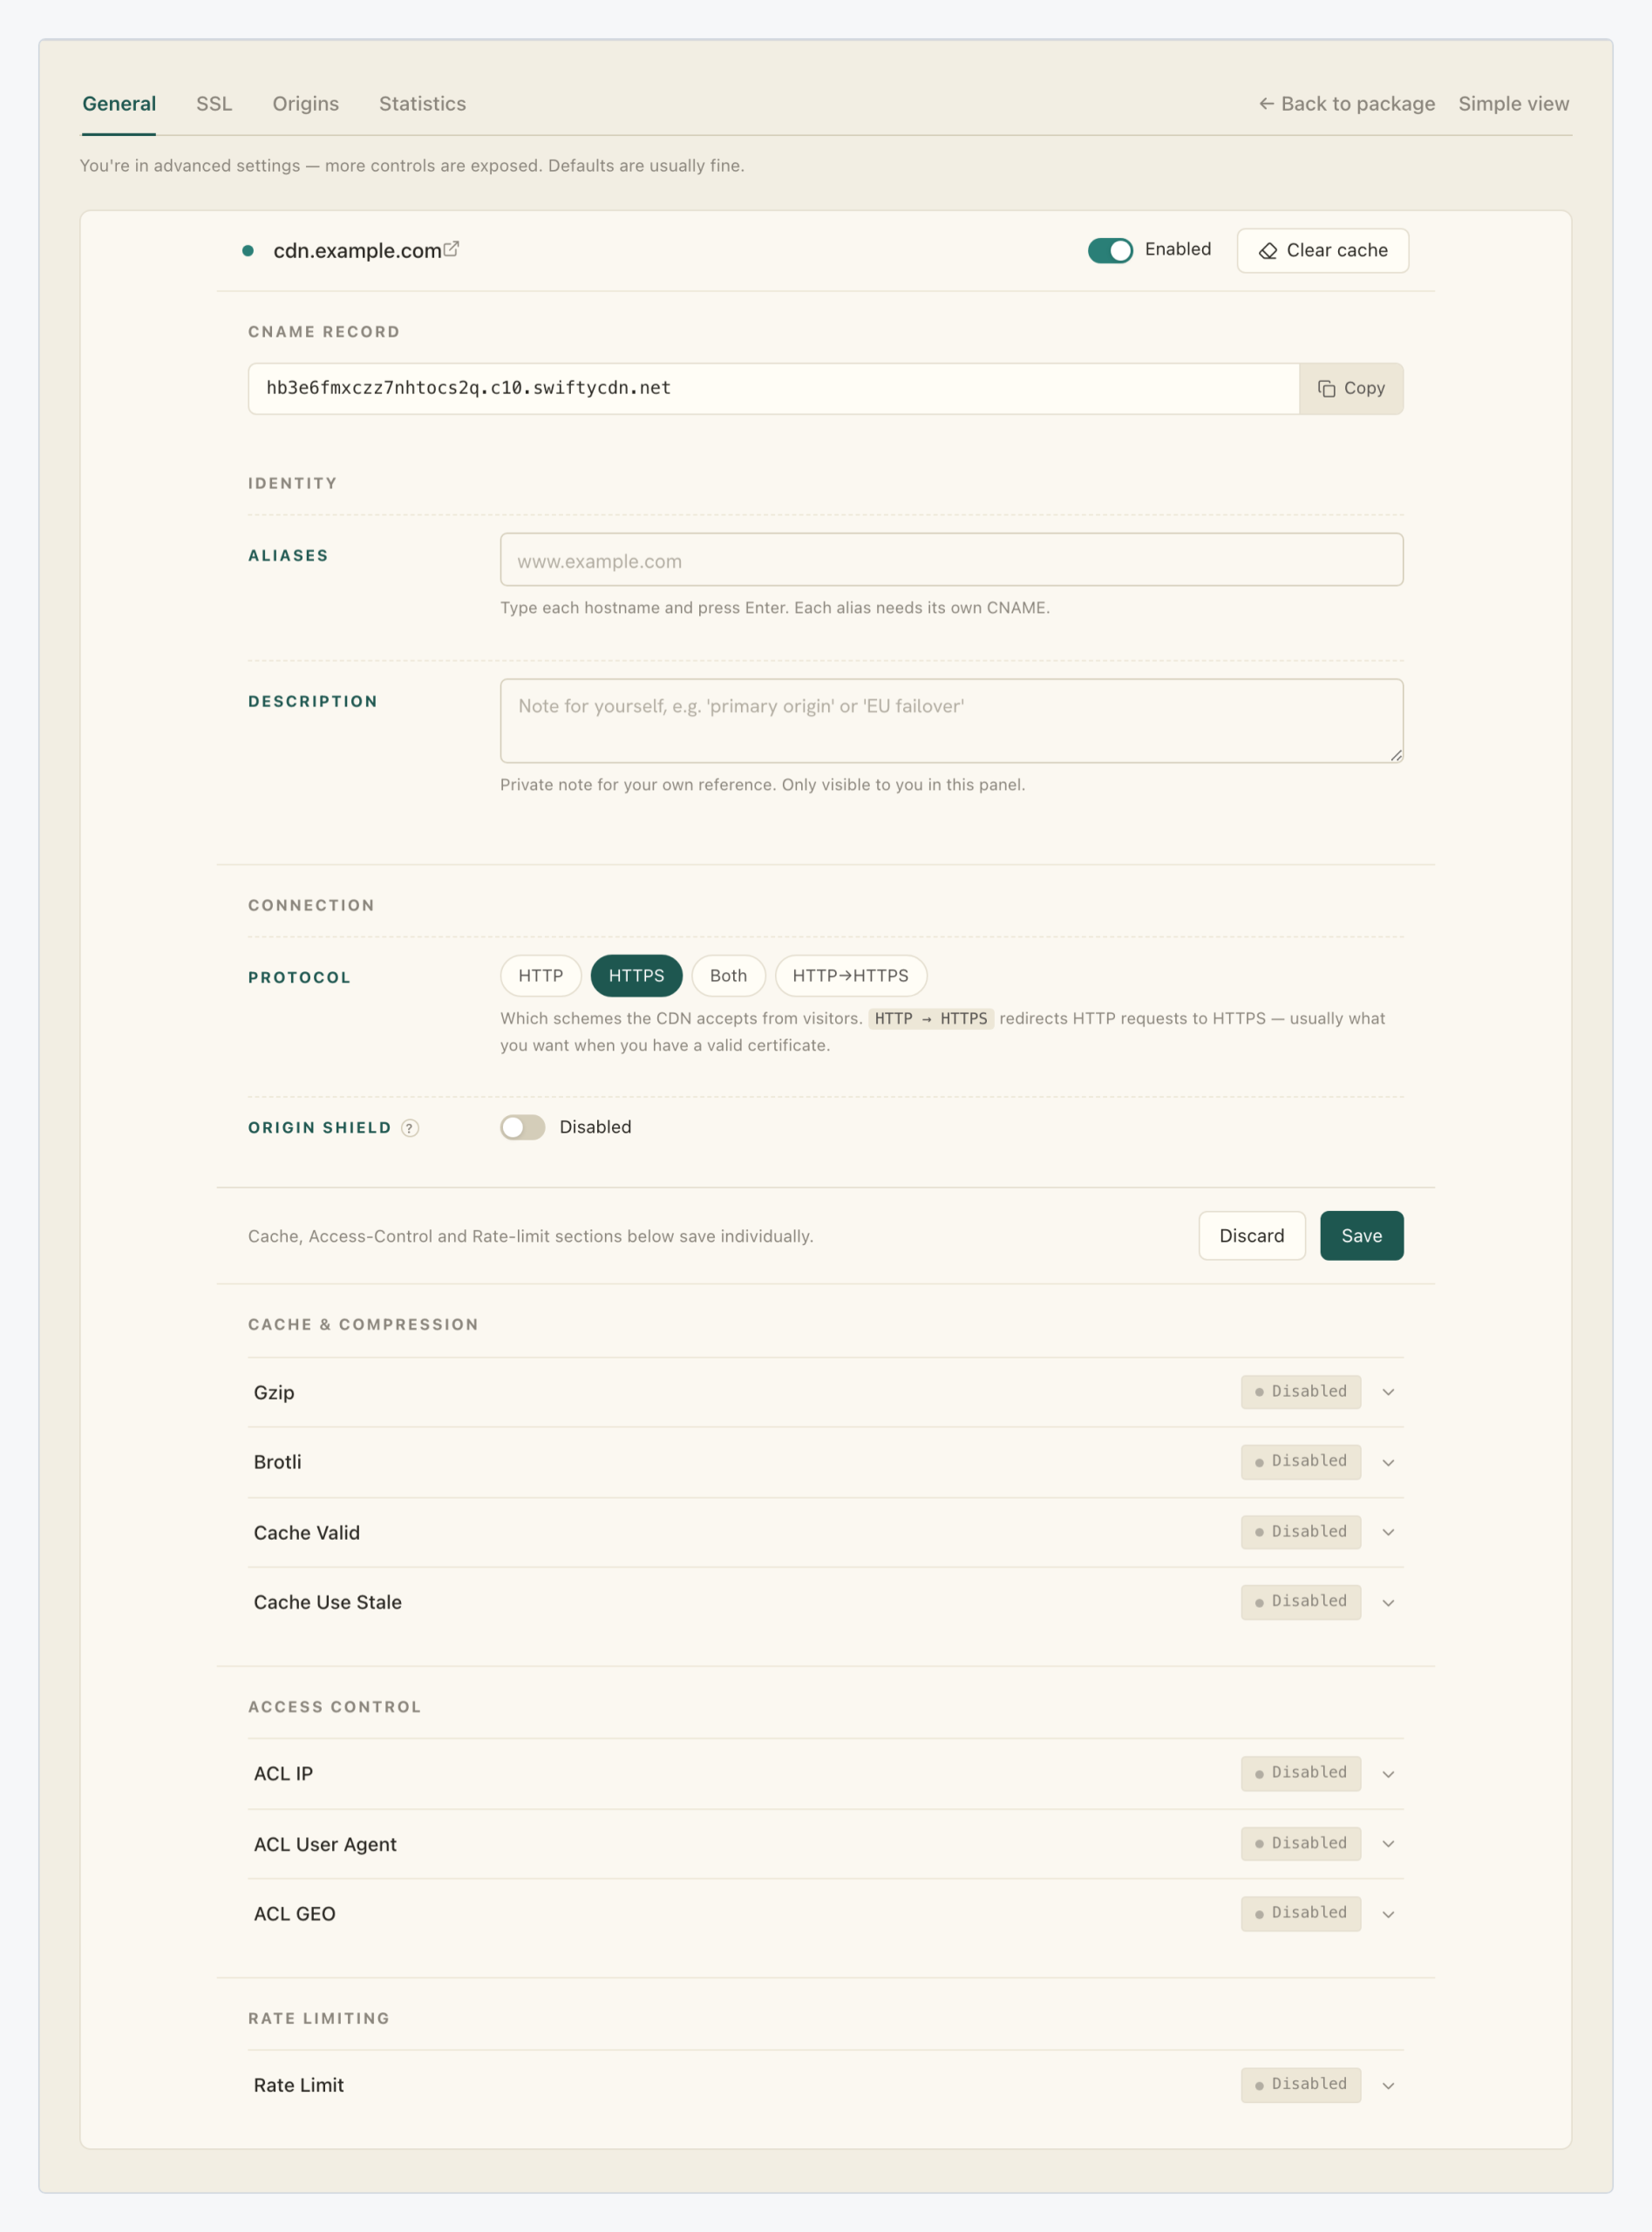
Step 2: Expand the Gzip row
The Cache & Compression section holds four collapsed rows: Gzip, Brotli, Cache Valid and Cache Use Stale, each with a status pill (all Disabled on a fresh resource) and a chevron. Click a row to expand its editor; expanding changes nothing on the resource.
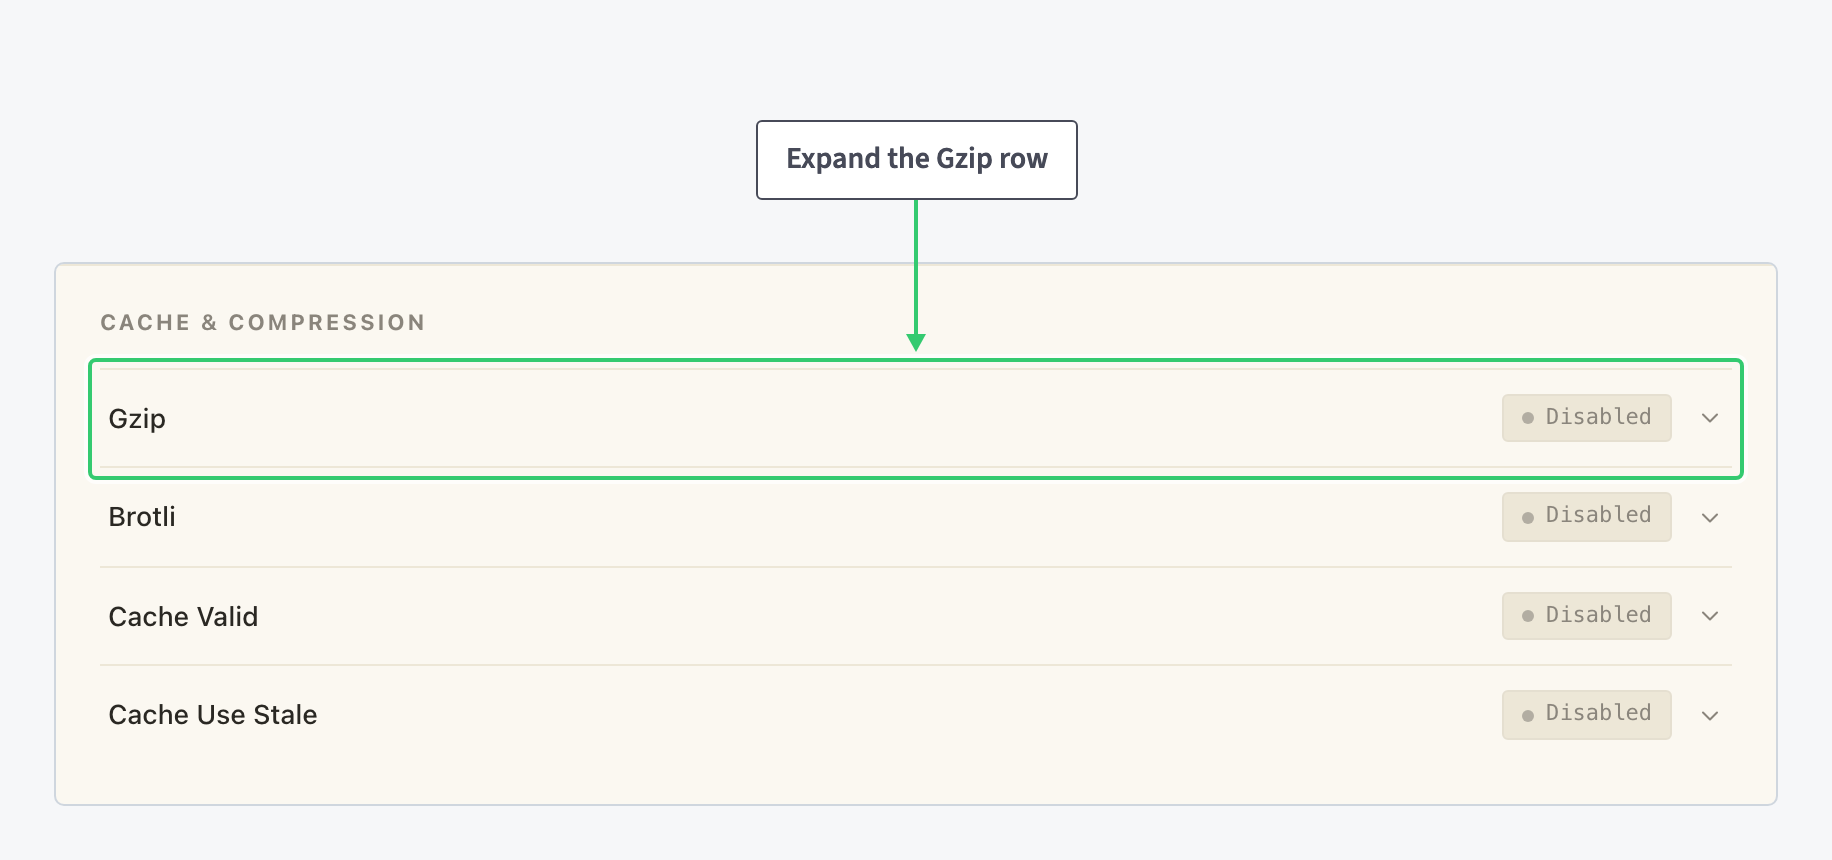
Unlike the resource form above them, the Cache, Access-Control and Rate-limit sections save individually: each expanded row carries its own Save button.
Step 3: Turn on Enable Gzip
The expanded Gzip editor is one toggle, an Advanced disclosure and a Save button:
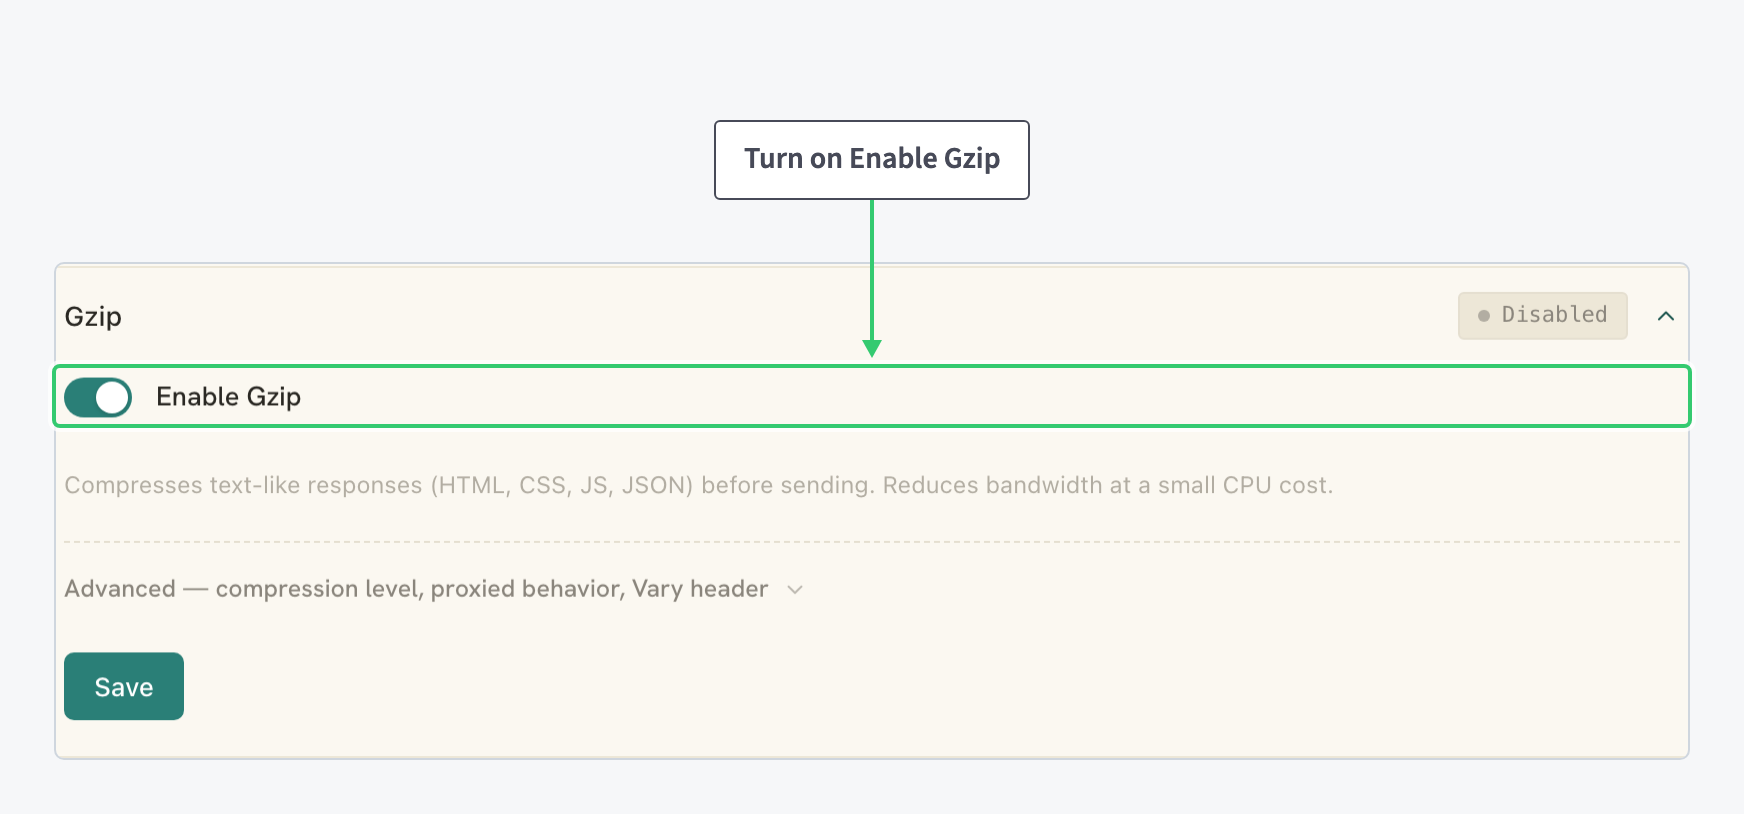
Switch Enable Gzip on. The status pill in the row header keeps reading Disabled while the change is only staged; it is the section’s Save button that applies it. If the defaults below suit you, you can Save here and the setup is complete.
Step 4: Tune the advanced Gzip options
The Advanced disclosure covers the compression level, the proxied behavior and the Vary header:
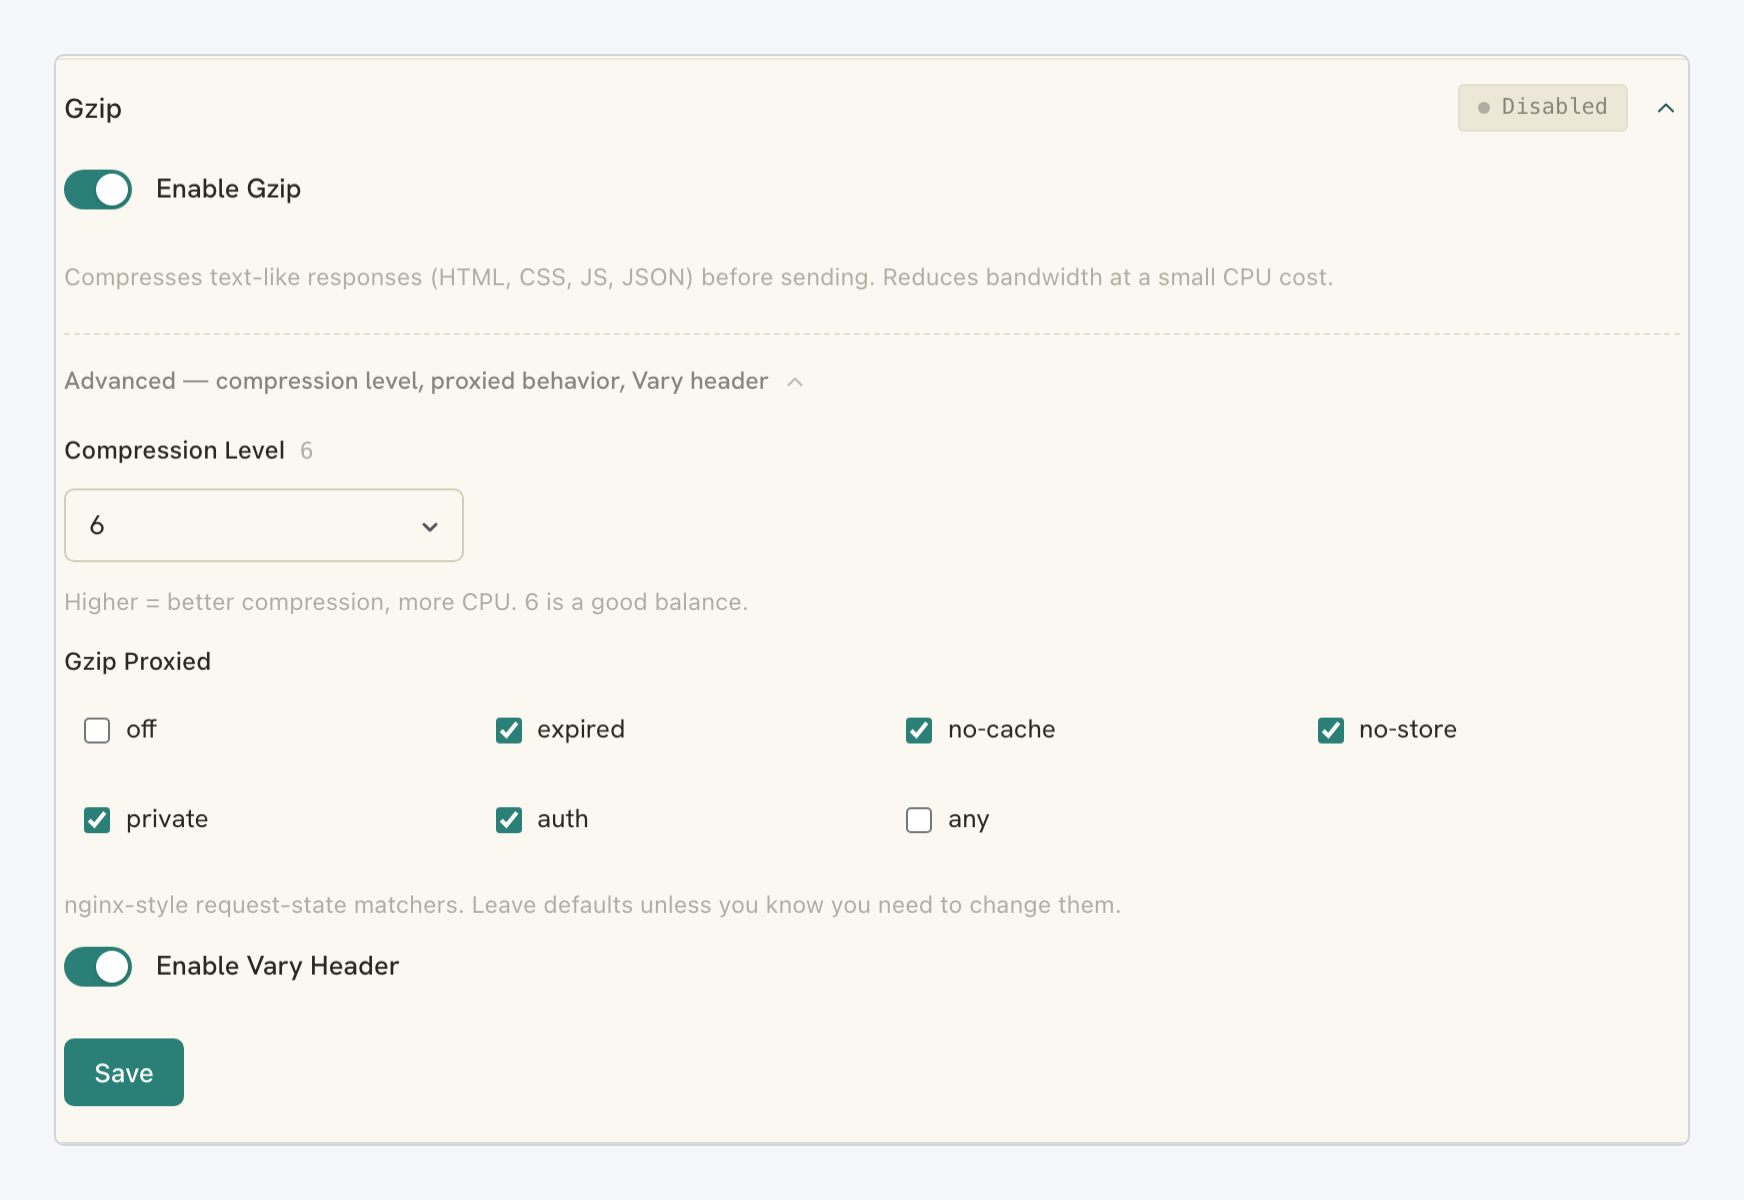
| Setting | Value |
|---|---|
| Compression Level | 1 (fastest) to 9 (max), default 6. Higher means better compression for more CPU; the default 6 is the right balance, keep it. |
| Gzip Proxied | A checkbox grid of “nginx-style request-state matchers”: off, expired, no-cache, no-store, private, auth and any. Five come preselected (expired, no-cache, no-store, private, auth); leave the defaults unless you know you need to change them. |
| Enable Vary Header | A toggle, on by default. |
Click Save to apply the section.
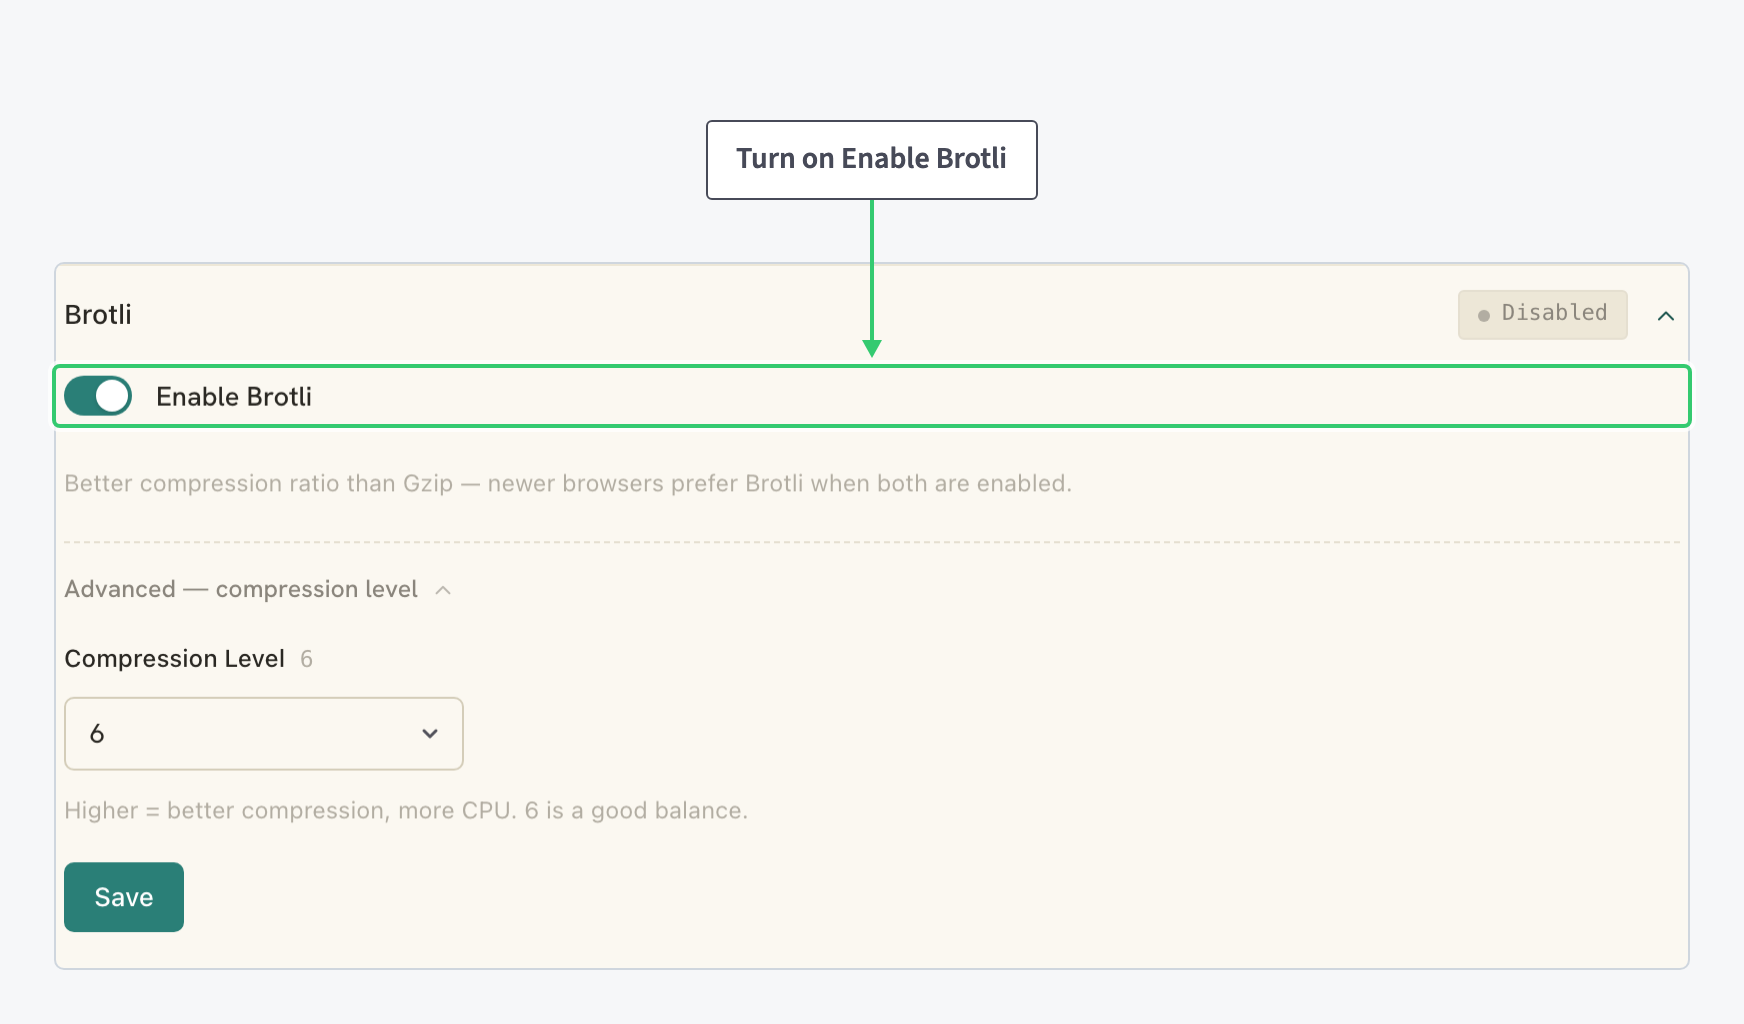
Step 5: Turn on Enable Brotli
Back in the section list, expand the Brotli row. Its editor is the same shape with a shorter advanced part:
| Setting | Value |
|---|---|
| Enable Brotli | The on/off toggle for the codec. |
| Compression Level | 1 (fastest) to 11 (max), default 6, with the same “6 is a good balance” guidance. |
Enabling Brotli does not replace Gzip, it sits beside it: newer browsers prefer Brotli when both are enabled. Switch the toggle on and click the section’s Save.
What you’ve enabled
Your resource now compresses text-like responses with two codecs: Brotli for the browsers that prefer it, Gzip for everything else, both at the balanced default level 6. The defaults for the proxied conditions and the Vary header are the ones to keep unless you have a specific reason.
If only part of your site should behave differently, compression is one of the sections a location can override per URL path: see Route and configure a specific URL path on your CDN.