
Every CDN resource needs to know where your content actually lives. That is the job of the Source Server (Origin) field: it holds the server the CDN fetches uncached requests from. If the words resource, origin or upstream are new, Understanding the Building Blocks of Your CDN Product defines them in one place.
The value has three parts: a scheme, a host and a port. You can change all three at any time from the resource’s settings page. This tutorial walks through the field, the save flow, and how the origin you set here appears in the advanced Origins tab.
Prerequisites
- A CDN resource already created, for example
cdn.example.com. See Add your first CDN resource. - The address of your origin server: an IPv4 address or a domain name, and the port it listens on.
- Client Area access to the package.
Step 1: Open the resource settings
Open your CDN package and find the resource in the Resources table. In the Actions column, click the gear icon (Edit resource settings) on the row of the resource whose origin you want to change.

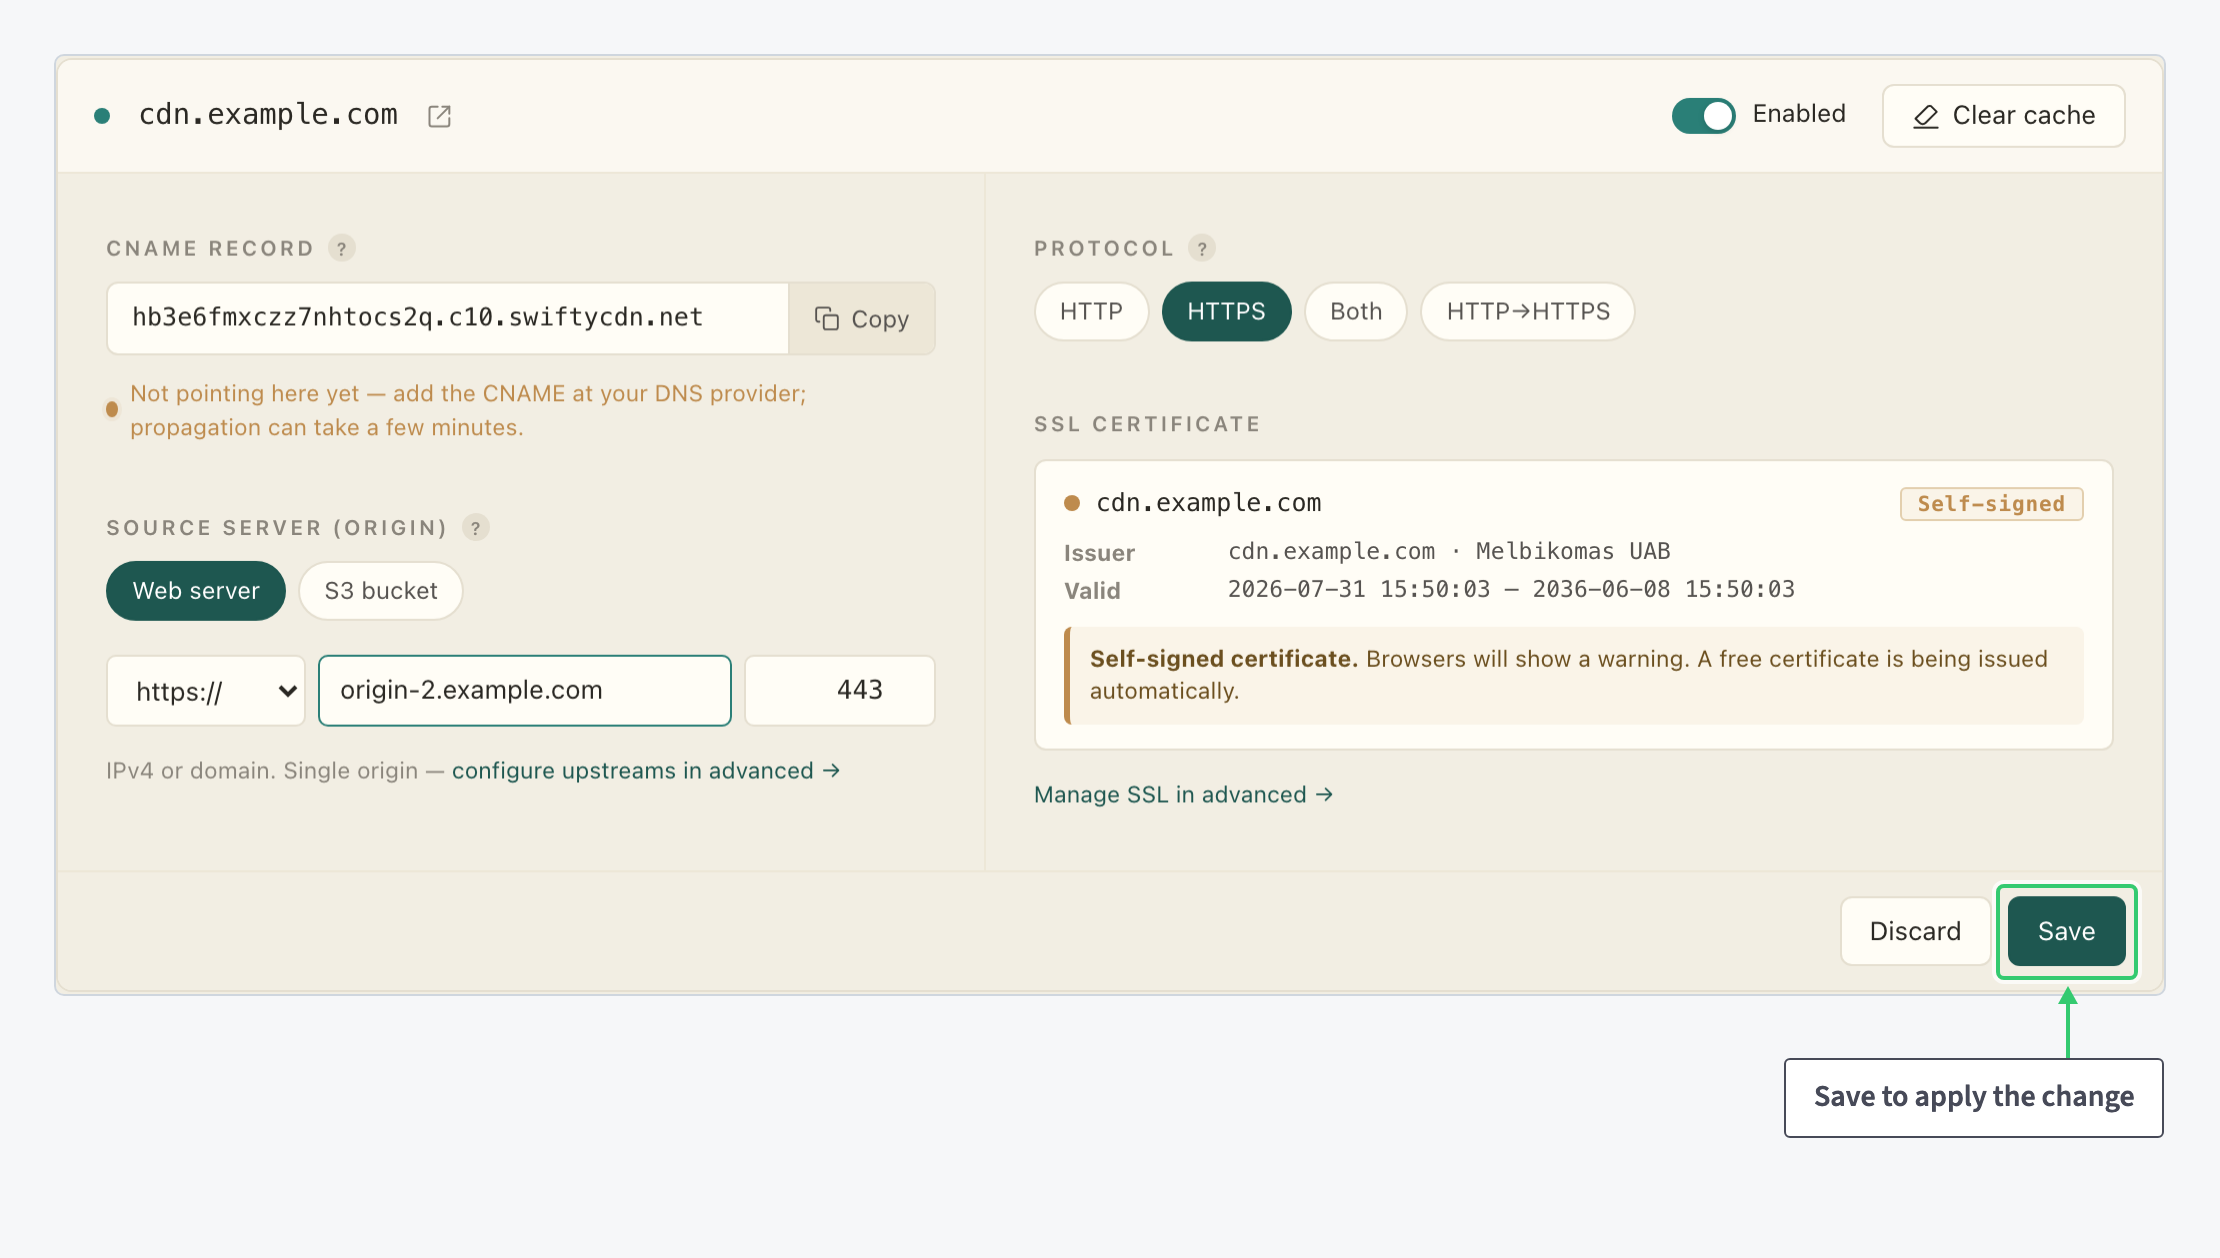
The settings page opens on the General tab. The Source Server (Origin) field sits directly under the CNAME record.
Step 2: Enter the new origin
Choose the origin type first: Web server for any server that answers HTTP requests, S3 bucket to point the resource at object storage instead. The bucket path is covered in Serve a Melbicom S3 Bucket through Your CDN.
For a web server, the field has three parts: a scheme dropdown, a host field and a port field. Type the new host into the middle field. In this example the origin moves from origin.example.com to origin-2.example.com:
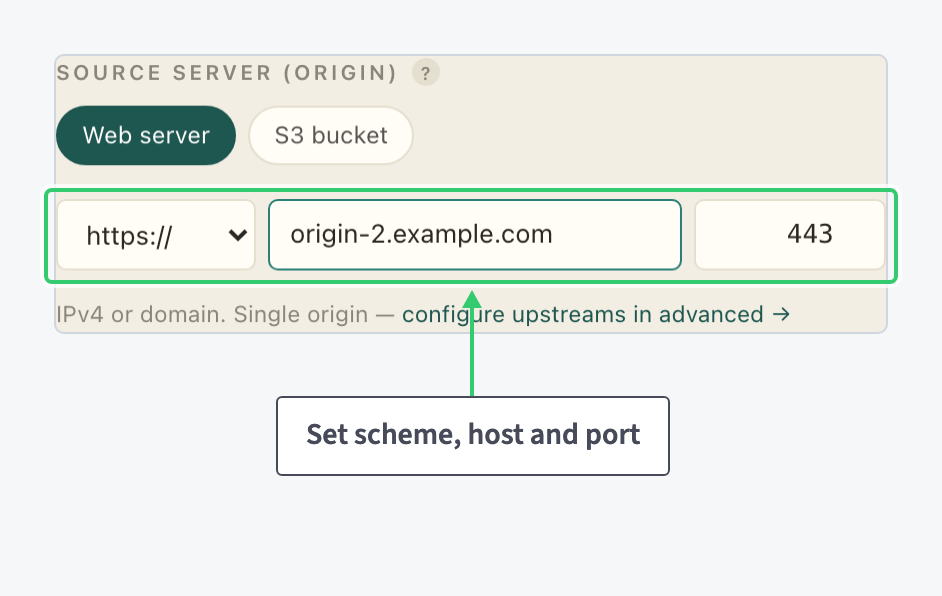
What each part means:
| Setting | Value |
|---|---|
| Scheme | https:// or http://: the protocol the CDN uses to connect to your origin server |
| Host | An IPv4 address or a domain name, for example 1.2.3.4 or origin.example.com |
| Port | The port your origin listens on, 443 in this example |
Two distinctions matter here:
- The scheme here is about the connection between the CDN and your origin. How visitors connect to the CDN is the separate Protocol setting on the same page; Choosing a protocol covers that choice.
- The host is where content is fetched from, not the public hostname. The public hostname is handled by the CNAME record above the field; see Point your domain at the CDN.
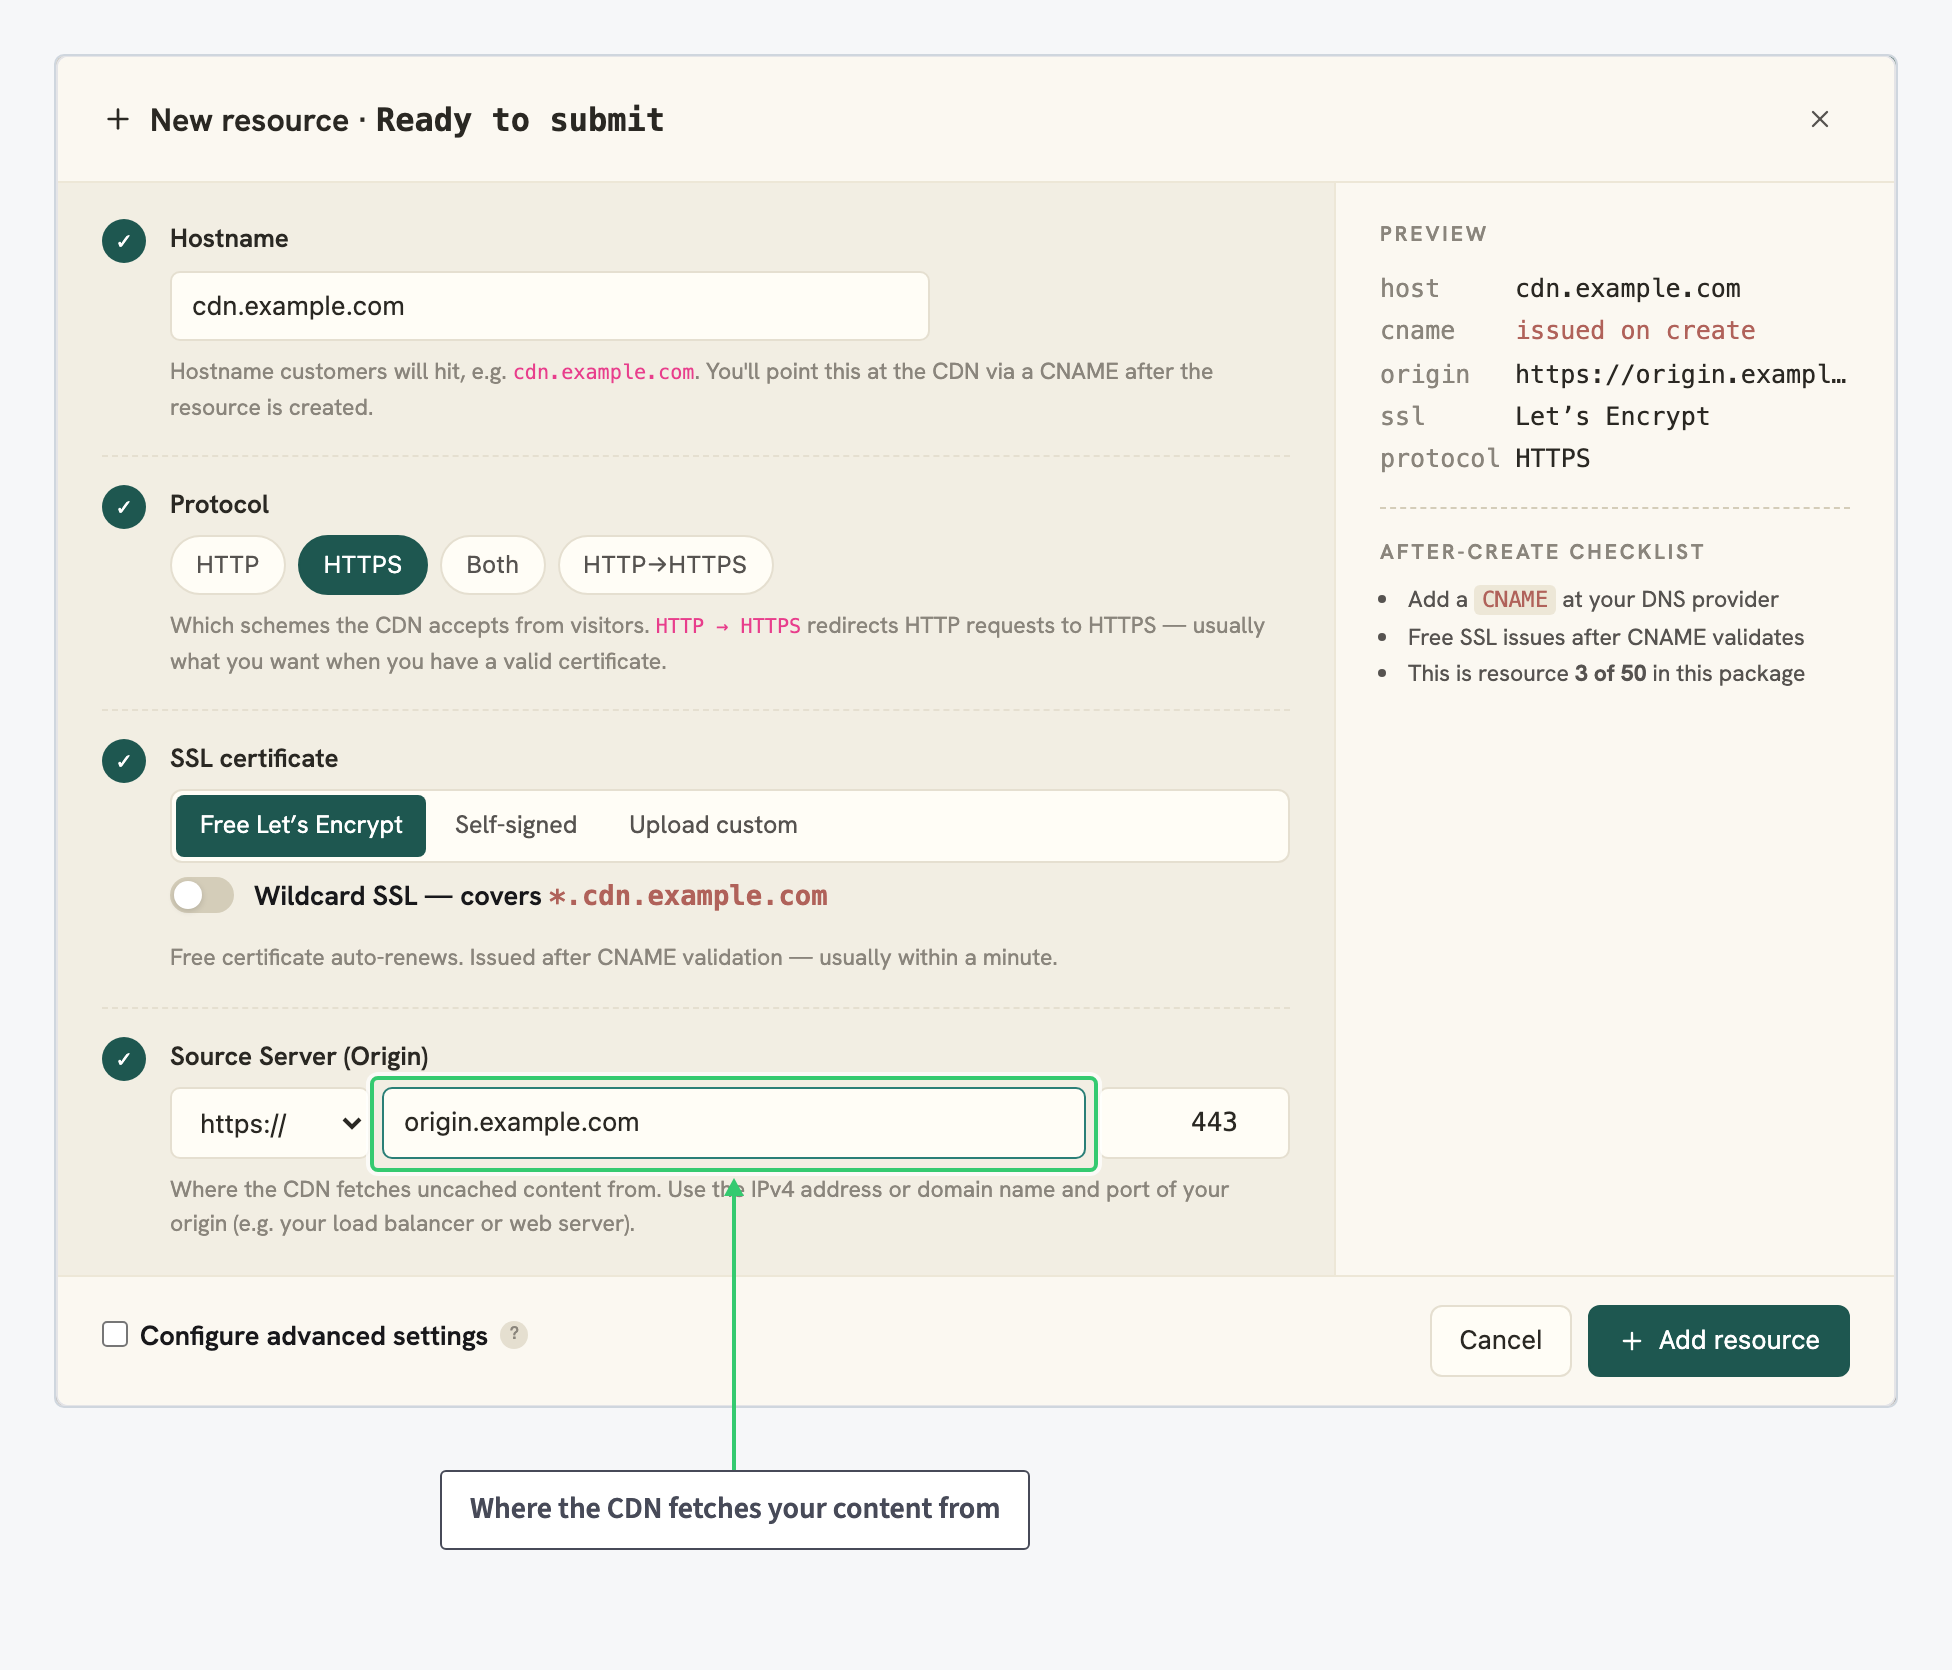
These are the same three fields you filled in when the resource was created: the wizard’s Source Server section asks for exactly these values.
Step 3: Save or discard
Nothing applies while you type. The settings page has a footer with two buttons: Save submits every change on the page, Discard discards them and restores the saved values.
After saving, remember that the CDN’s cache is not cleared automatically when the origin changes: objects already cached keep being served until they expire. If the new origin serves different content, clear the cache so every request is fetched fresh. Purge a URL or your entire CDN cache shows both the single-path and the full purge.
Step 4: See the origin as an upstream in advanced settings
The field sets a single origin. The configure upstreams in advanced link under it opens the Origins tab of the advanced settings, where the same origin appears as the single server of the resource’s default upstream:
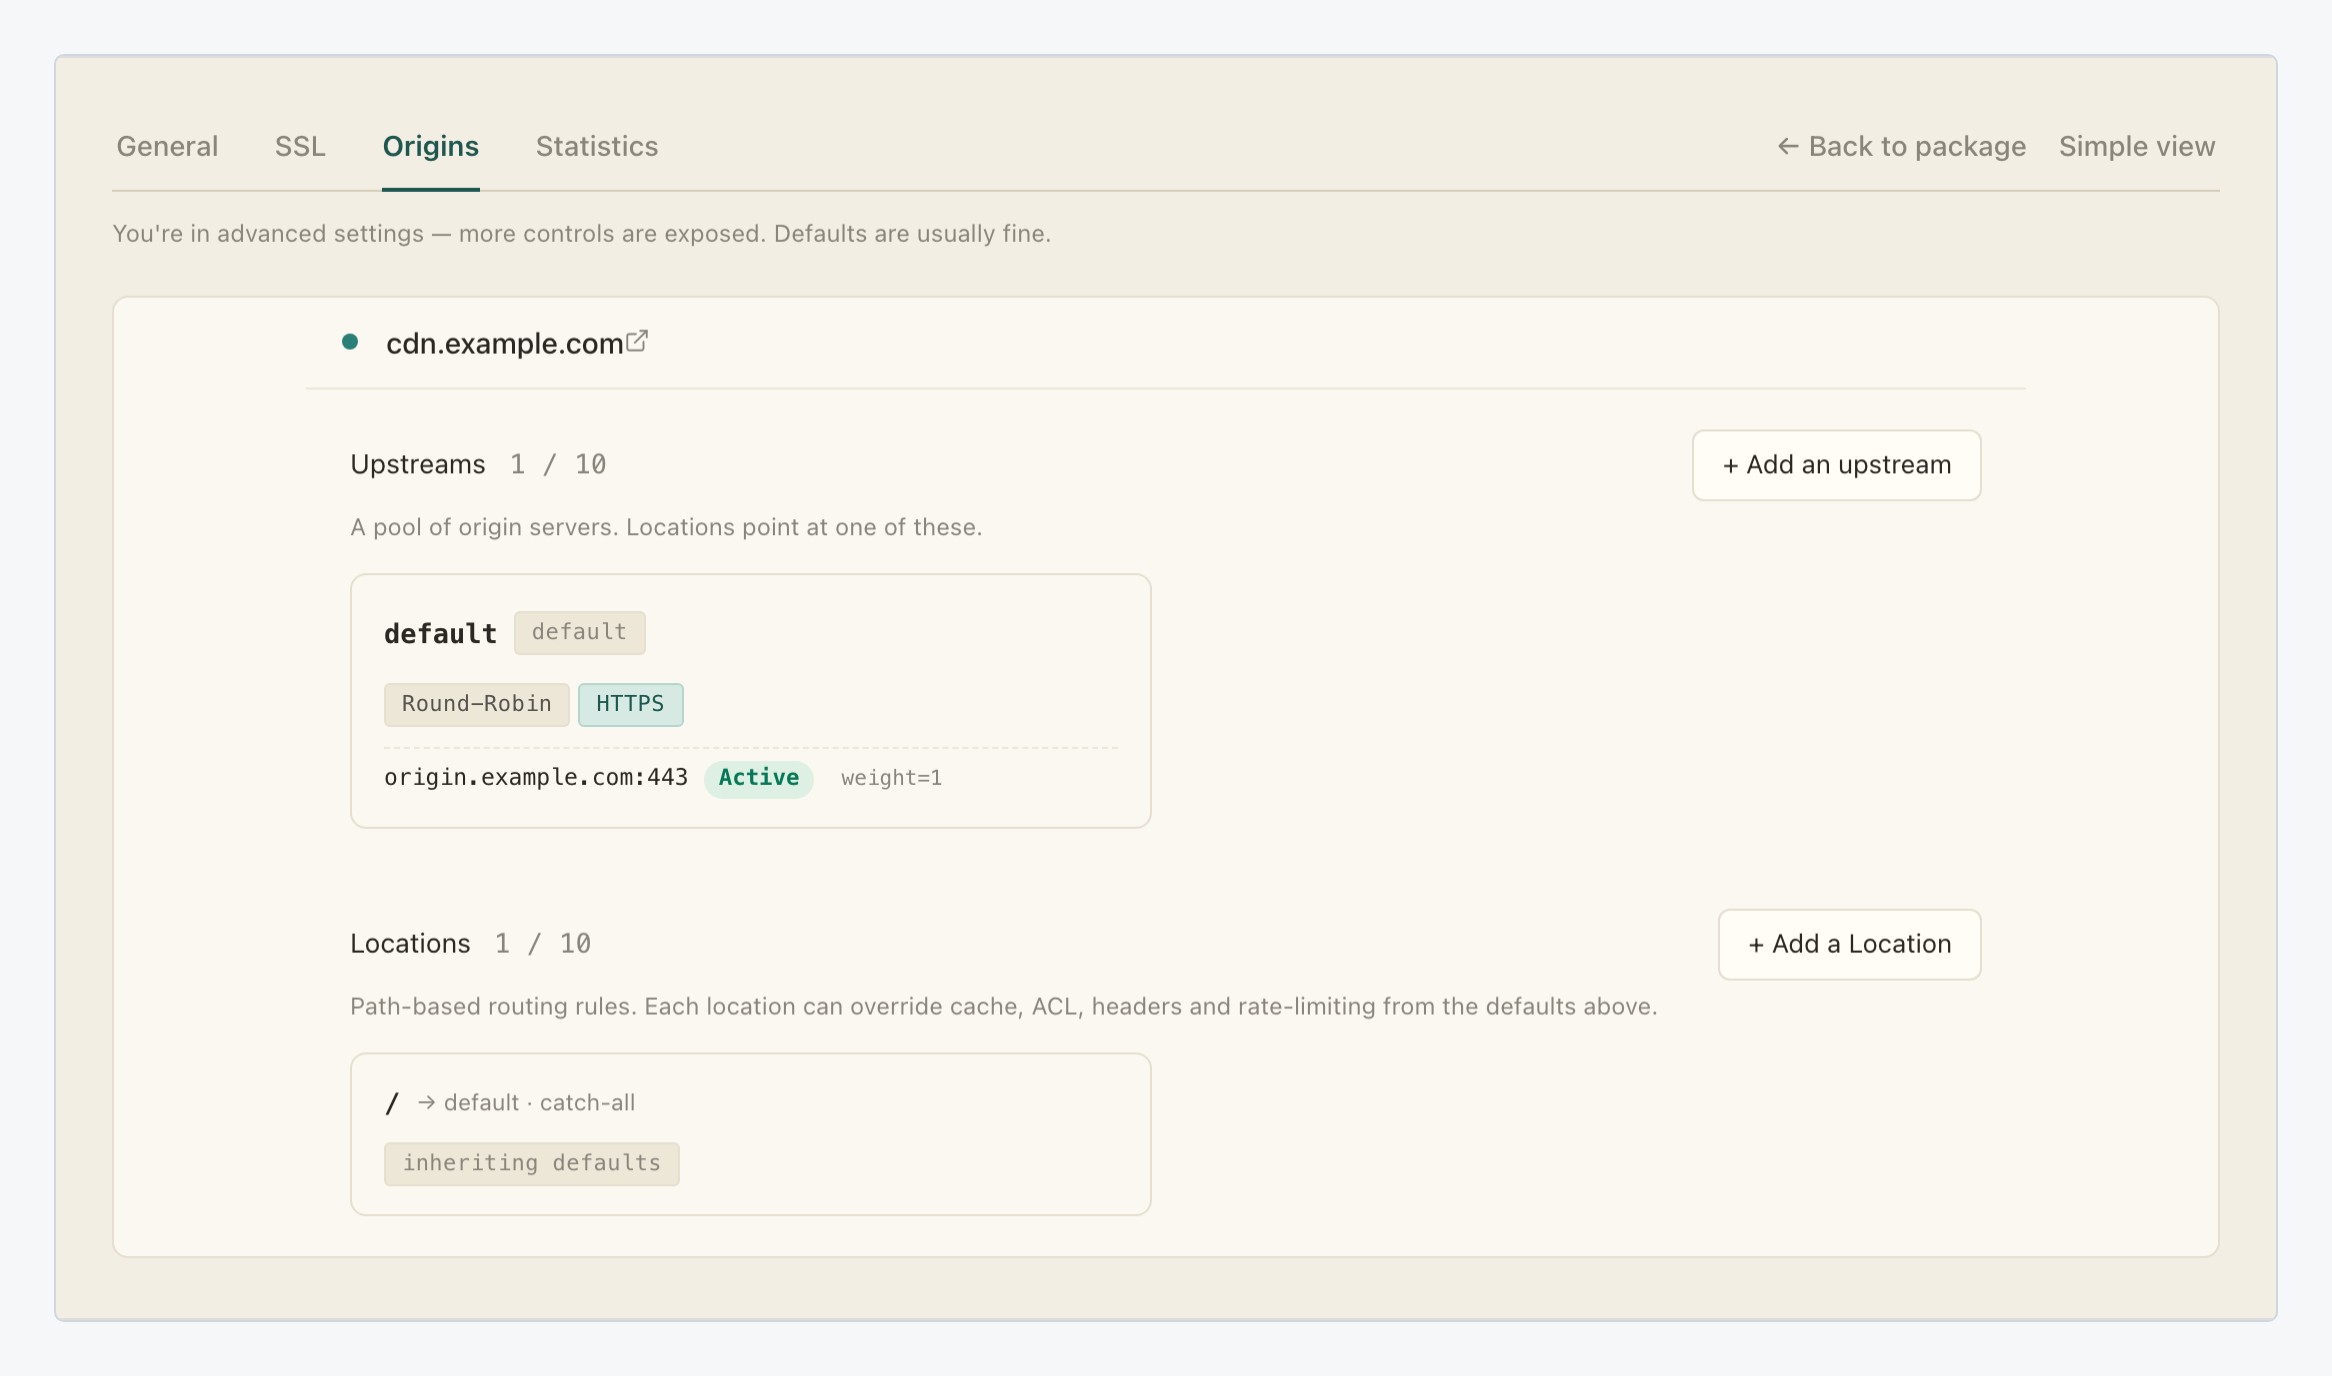
The Upstreams panel describes itself as a pool of origin servers that locations point at. The default upstream carries the origin you set in Step 2: origin.example.com:443, marked Active with weight=1, under an HTTPS pill that mirrors the scheme. In other words, the simple field is a shortcut: one origin, one upstream, no extra decisions.
When one origin is not enough, the same upstream can hold a whole pool: several servers, weights, and backup servers that take over when the active ones are down. That is a separate tutorial: Add multiple origins and failover to your CDN.
What you’ve built
Your resource now fetches uncached content from the origin you chose, over the scheme and port you chose. You also know the field is a simplified view of the default upstream. Changing hosting providers, moving the origin behind a new IP, or switching it to HTTPS is a two-field edit and a Save, with no DNS involved and no effect on your public hostname.