
A bucket is the container every object on your Melbicom S3 Object Storage lives in, and the unit most settings apply to: versioning, object locking, quotas, access rules. This tutorial creates one from the web console and explains the one naming rule that rejects most first attempts: the name must start with your account username.
Prerequisites
- An active Melbicom S3 service, with its username and password from the service page (see Understanding Your Melbicom S3 Object Storage Service).
Step 1: Open the Console and the Buckets Page
Open the web interface address from your service page, https://s3-ams.swiftycdn.net:38854/. Log in with your username as the access key and your service password as the secret key.
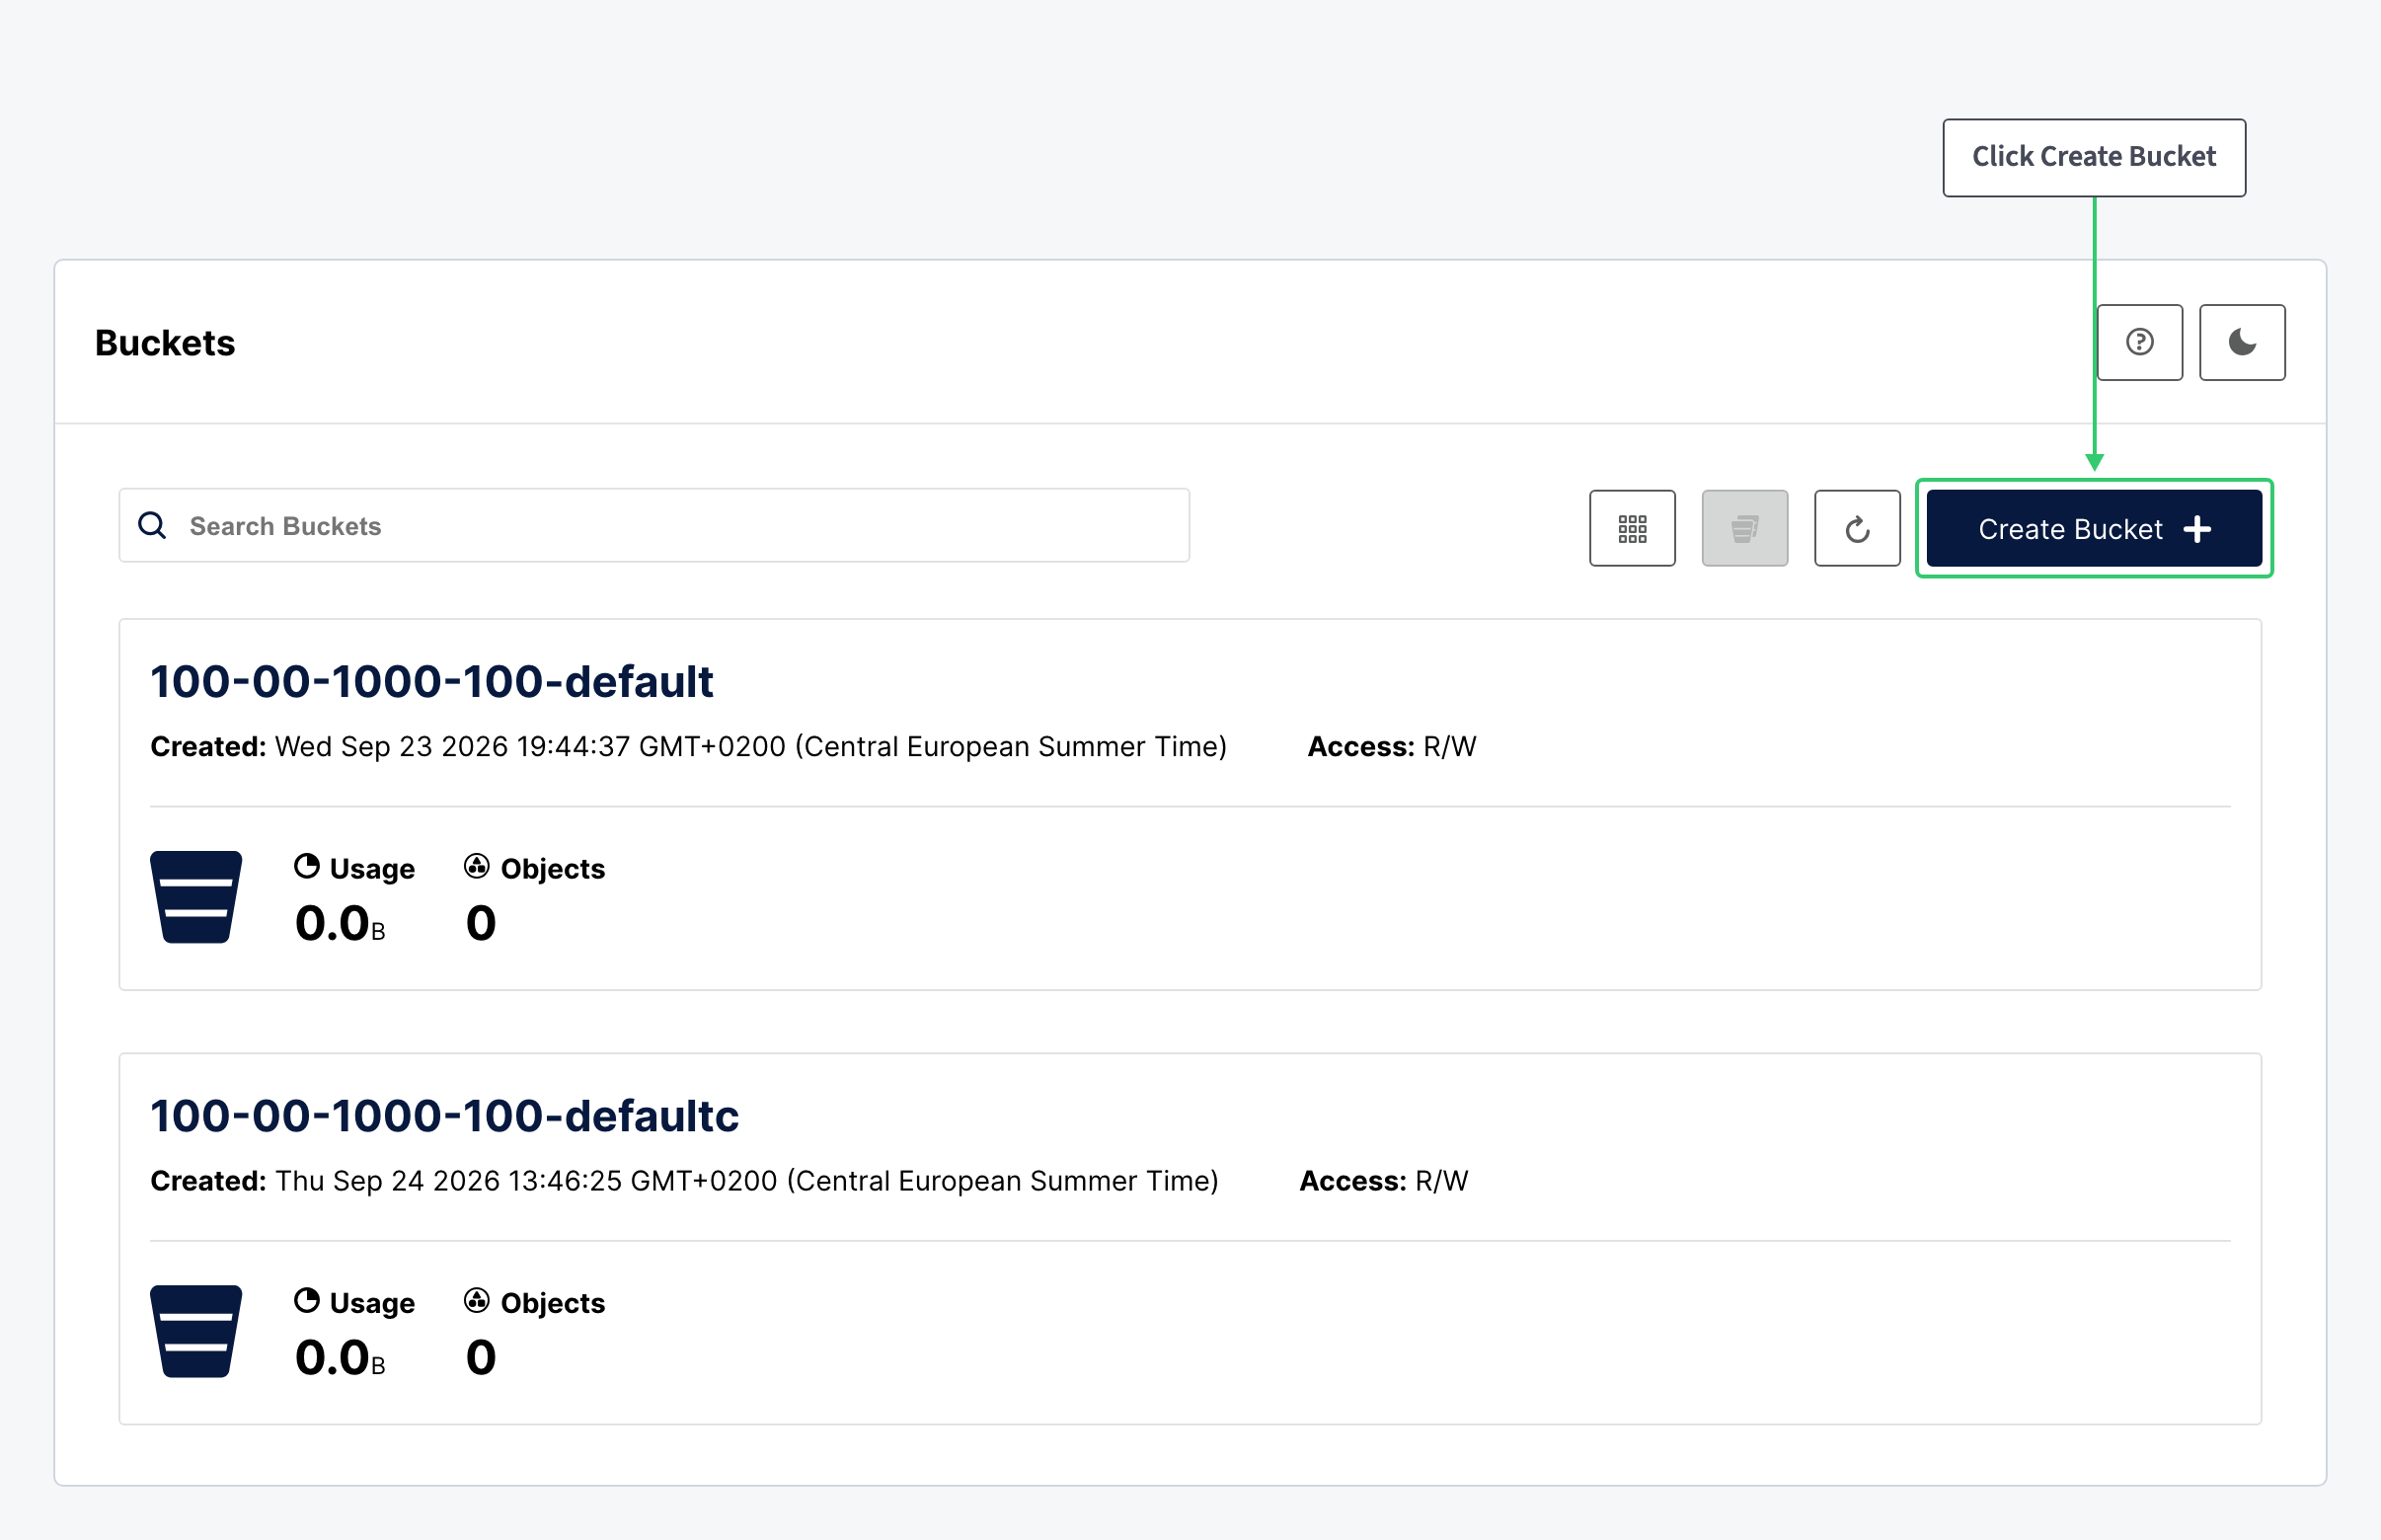
Under Administrator, click Buckets. Your existing buckets are listed with their object count, size and access. Click Create Bucket:
Step 2: Name the Bucket and Choose Its Features
Click Create Bucket. Type the name with your username as prefix, for example 100-00-1000-100-kb-demo for an account named 100-00-1000-100: the service rejects any name without that prefix. After the prefix, the usual S3 rules apply: lowercase letters, digits and hyphens.
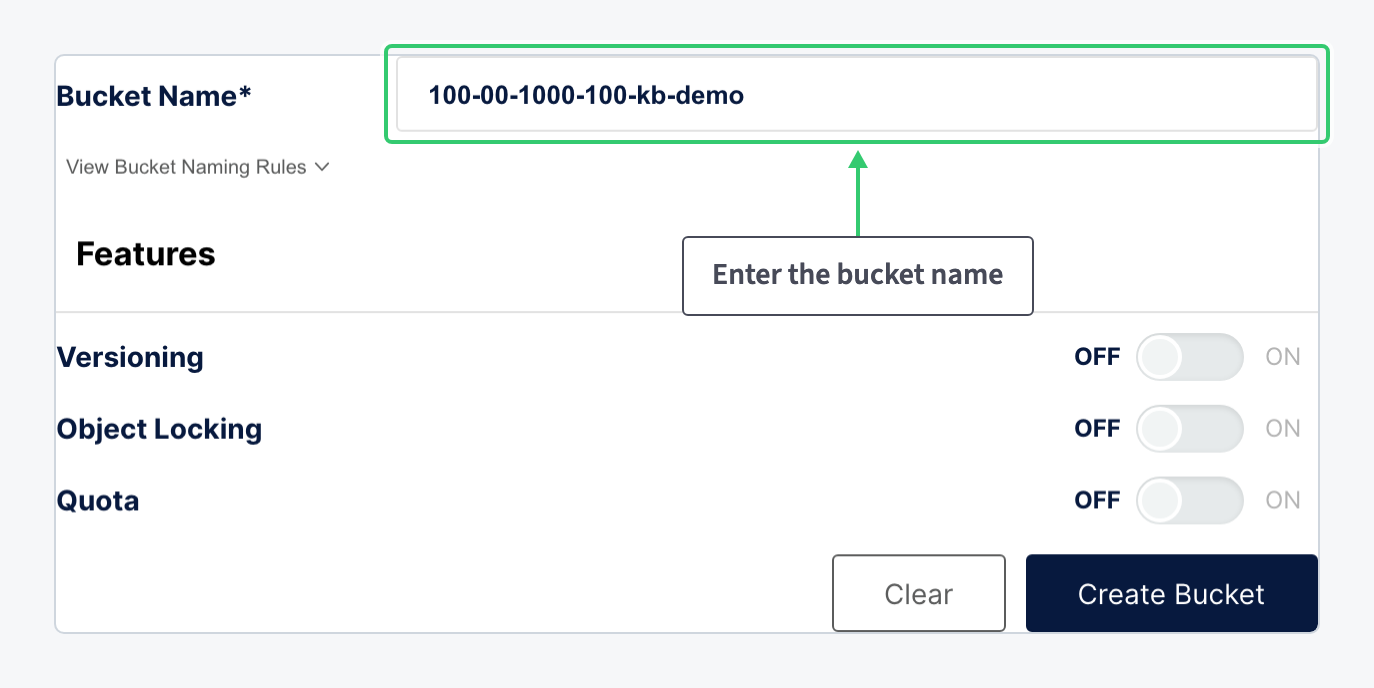
Decide two of the three features now, before the bucket exists:
| Feature | Choose it when |
|---|---|
| Versioning | You want every overwrite and delete to keep the previous version recoverable. It can also be enabled later; see Enable Versioning on a Melbicom S3 Bucket. |
| Object Locking | Objects must become immutable for a retention period (backups, audit records). This one can only be set at creation, and it turns Versioning on with it; see Create a Melbicom S3 Bucket with Object Lock. |
| Quota | The bucket must stop accepting writes at a fixed size, independently of the service-wide disk limit. |
Leave all three off for a general-purpose bucket and click Create Bucket.
Step 3: Check the Result
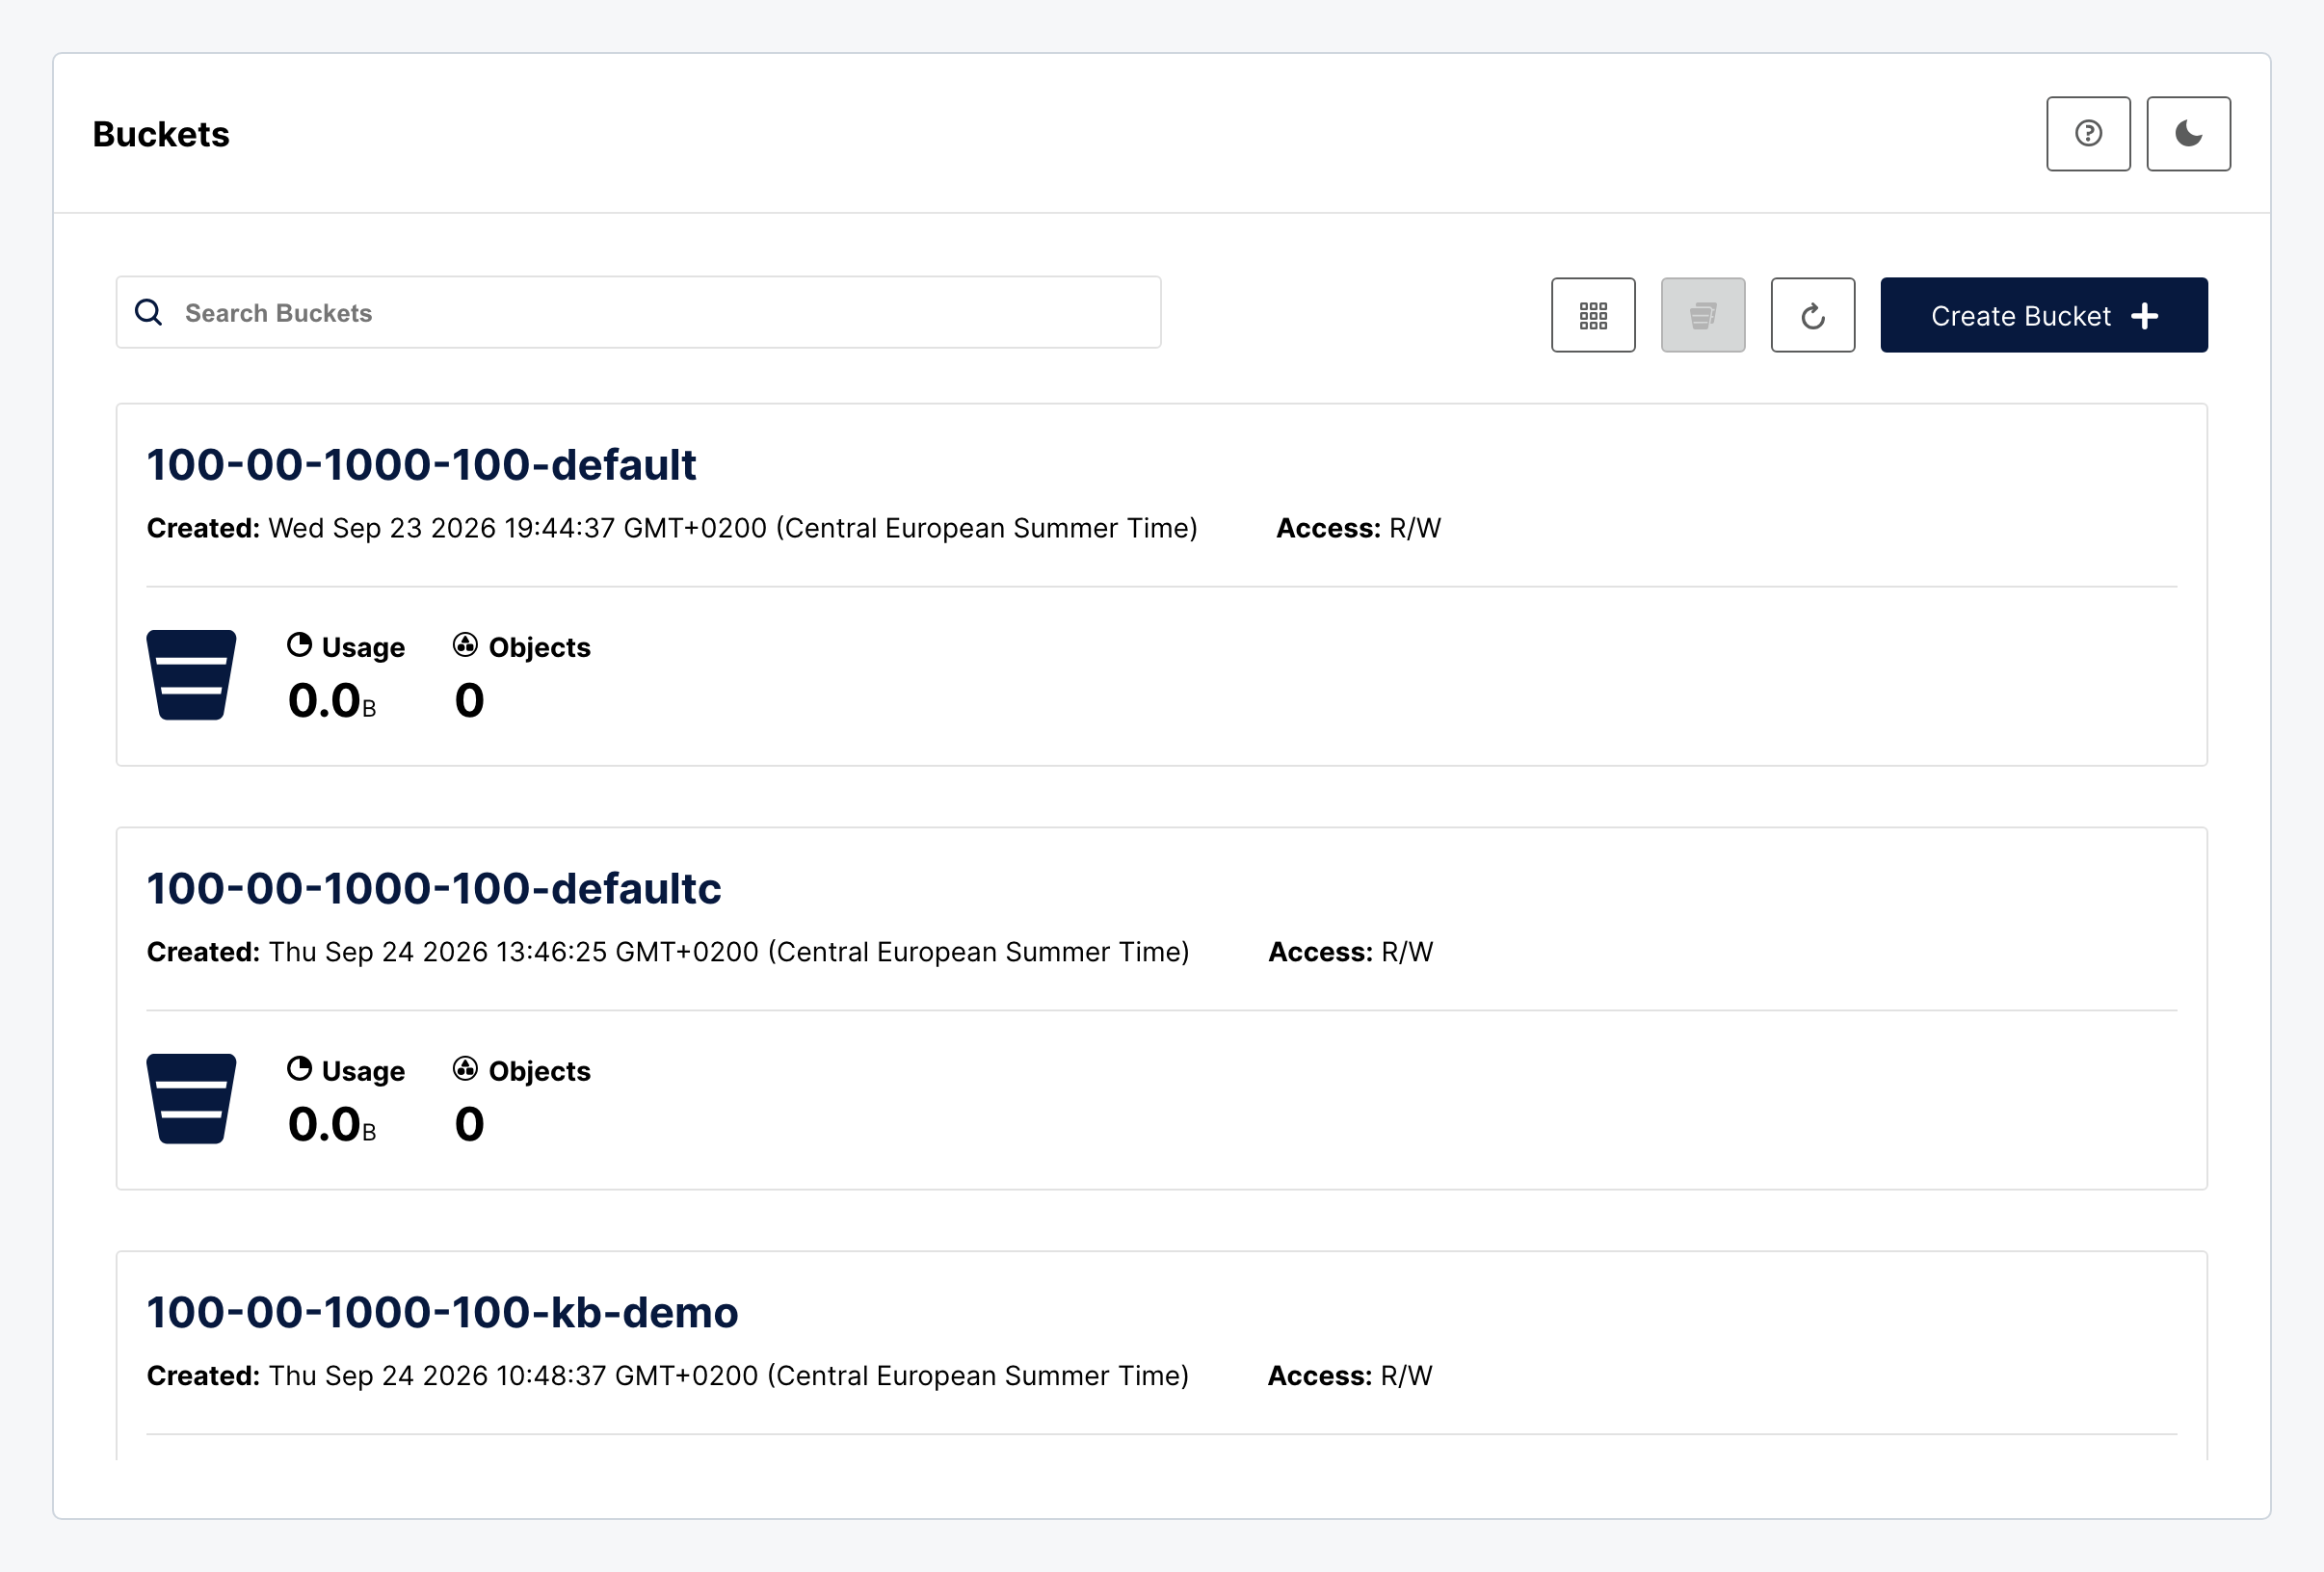
The new bucket appears in the list with zero objects and private access. Private is the default for every bucket: nothing in it is reachable without credentials until you decide otherwise.
What You Have
A private bucket, named within your account’s namespace, ready for uploads from the console’s Object Browser or from the command line with Install and Configure the MinIO Client for Melbicom S3. Applications should get their own credentials rather than your service password: Create Melbicom S3 Access Keys with Limited Permissions covers that next step.