Blog

Effective Tips to Host a Database Securely with Melbicom
One does not simply forget about data breaches. Each year, their number increases, and every newly reported data breach highlights the need to secure database infrastructure, which can be challenging for architects.
Modern strategies that center around dedicated, hardened infrastructure are quickly being favored over older models.
Previously, in an effort to keep costs low and simplify things, teams may have co-located the database with application servers, but this runs risks. If an app layer becomes compromised, then the database is vulnerable.
Shifting to dedicated infrastructure and isolating networks is a much better practice. This, along with rigorous IAM and strong encryption, is the best route to protect databases.
Choose Melbicom— 1,300+ ready-to-go servers — 21 global Tier IV & III data centers — 55+ PoP CDN across 6 continents |
 |
Of course, there is also compliance to consider along with monitoring and maintenance, so let’s discuss how to host a database securely in modern times.
This step-by-step guide will hopefully serve as a blueprint for the right approach to reduce the known risks and ever-evolving threats.
Step 1: Cut Your Attack Surface with a Dedicated, Hardened Server
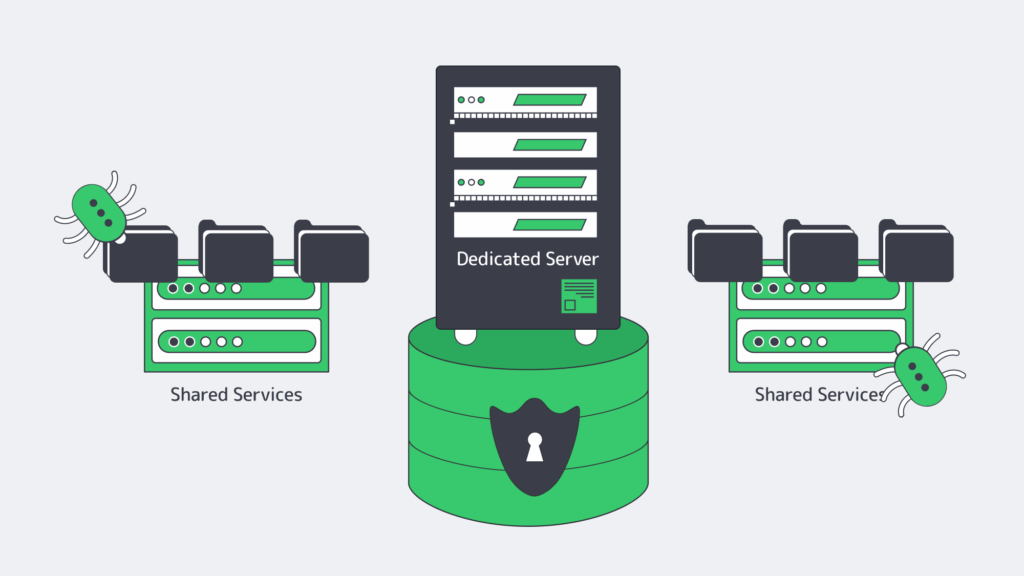
While a shared or co-located environment might be more cost-effective, you potentially run the risk of paying a far higher price. Hosting your database on a dedicated server dramatically lowers the exposure to vulnerabilities in other services.
By running your Database Management System (DBMS) solely on its own hardware, you can prevent lateral movement by hardening things at an OS level. With a dedicated server, administrators can disable any unnecessary services and tailor default packages to lower vulnerabilities further.
The settings can be locked down by applying a reputable security benchmark, reducing the likelihood that one compromised application provides access to the entire database.
A hardened dedicated server provides a solid foundation for a trustworthy, secure database environment. At Melbicom, we understand that physical and infrastructure security are equally important, and so our dedicated servers are situated in Tier III and Tier IV data centers. These centers operate with an overabundance of resources and have robust access control to ensure next-level protection and reduce downtime.
Step 2: Secure Your Database by Isolating the Network Properly
A public-facing service can expose the database unnecessarily, and therefore, preventing public access in addition to locking your server down is also crucial to narrowing down the risk of exploitation.
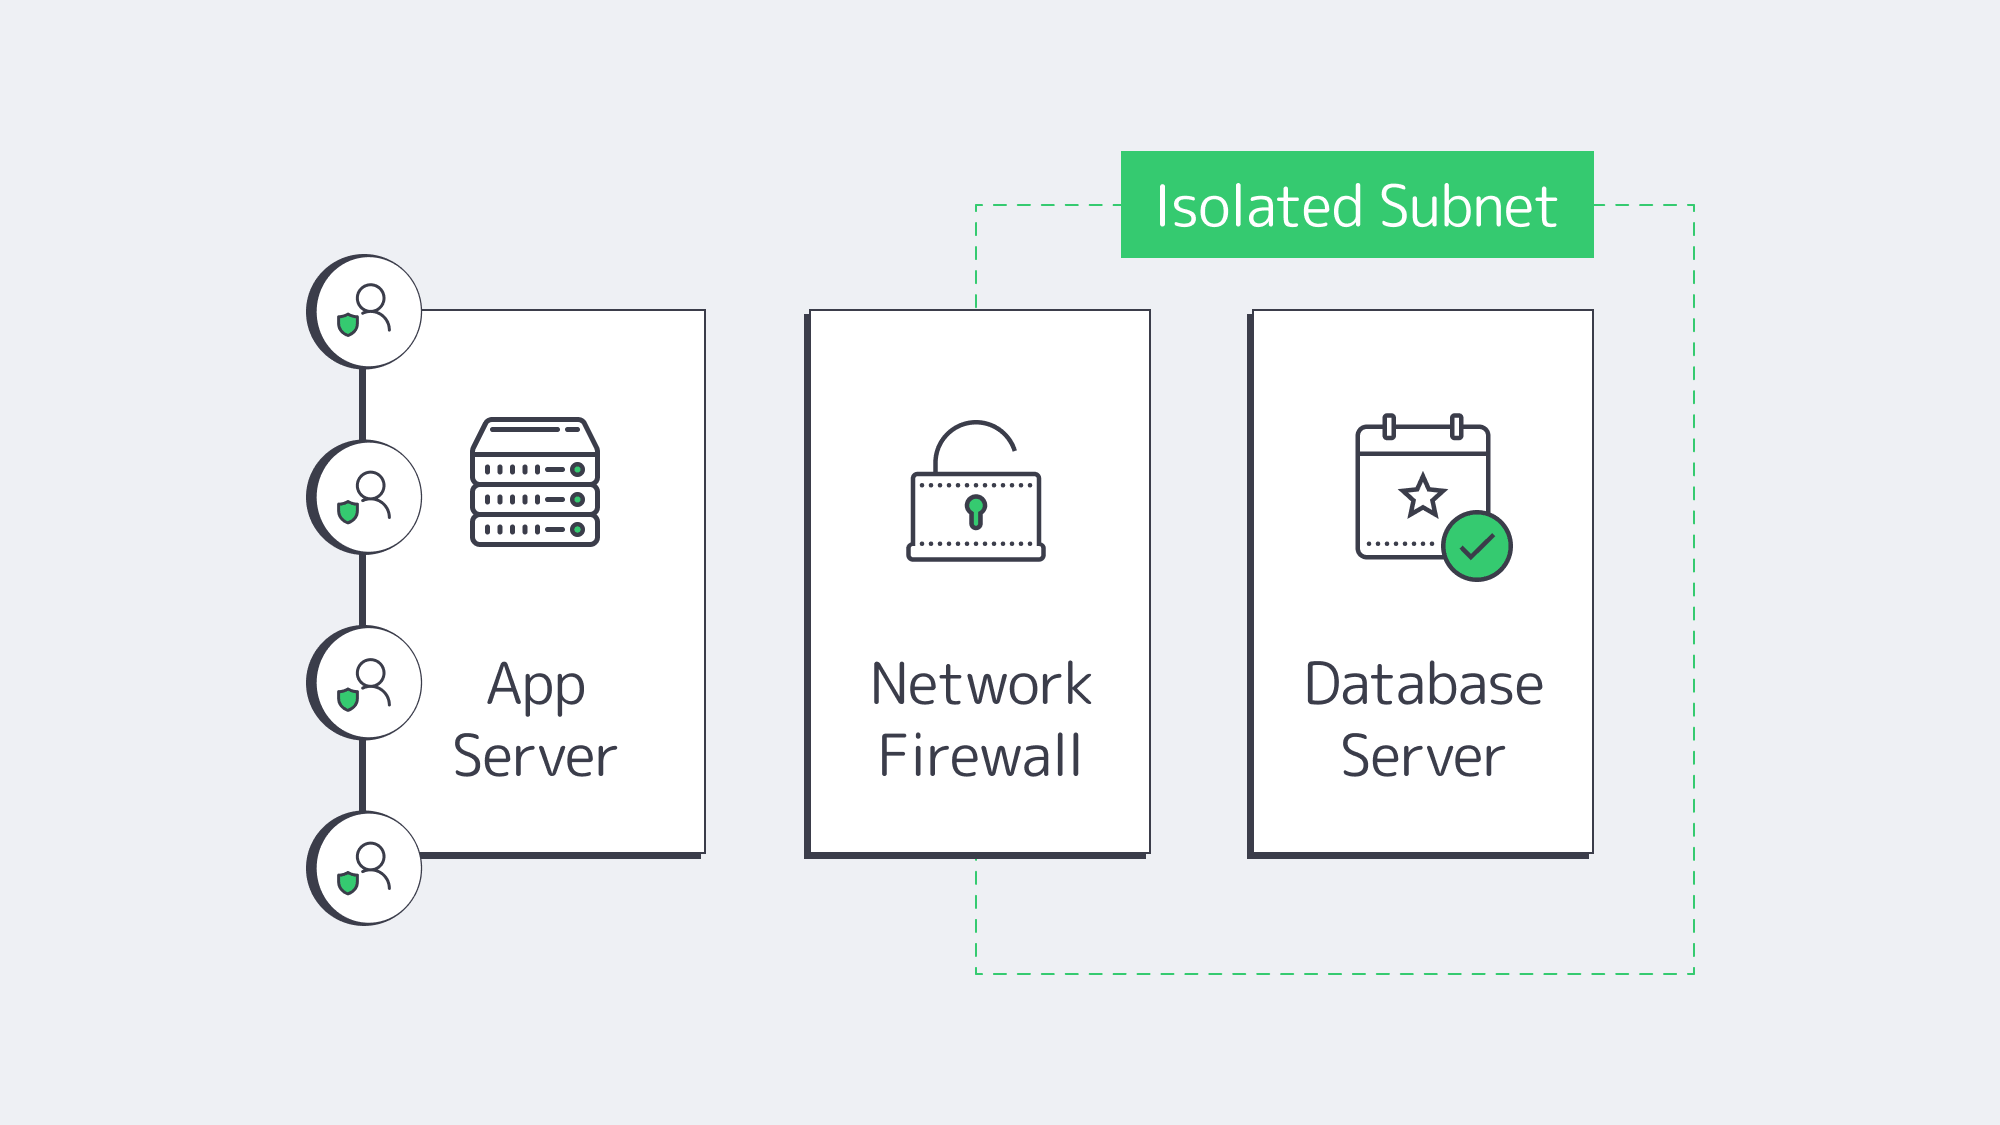
By isolating the network, you essentially place the database within a secure subnet, eliminating direct public exposure.
Network isolation ensures that access to the database management system is given to authorized hosts only. Unrecognized IP addresses are automatically denied entry.
The network can be isolated by tucking the database behind a firewall in an internal subnet. A firewall will typically block anything that isn’t from a fixed range or specified host.
Another option is using a private virtual local area network (VLAN) or security grouping to manage access privileges.
Administrators can also hide the database behind a VPN or jump host to complicate gaining unauthorized access.
Taking a layered approach adds extra hurdles for a would-be attacker to have to bypass before they even reach the stage of credential guessing or cracking.
Step 3: At Rest & In-Transit Encryption
Safeguarding databases relies heavily on strong encryption protocols. With encryption in place, you can ensure that any traffic or stored data intercepted is inaccessible, regardless.
Encryption needs to be implemented both at rest and in transit for full protection. Combining the two helps thwart interception attempts on packets and prevent stolen disks, which are both major threat vectors:
It can be handled at rest, either with OS-level full-disk encryption such as LUKS, via database-level transparent encryption, or by combining the two approaches.
An ideal tool is Transparent Data Encryption (TDE), which automatically encrypts and is supported by commercial versions of MySQL and SQL Server.
For your in-transit needs, enabling TLS (SSL) on the database can help secure client connections. It disables plain text ports and requires strong keys and certificates.
This helps to identify trusted authorities, keeps credentials protected, and prevents the potential sniffing of payloads.
Depending on the environment, compliance rules may demand cryptographic controls. In instances where that is the case, separating keys and data is the best solution.
The keys can be regularly rotated by administrators to further bolster protection. That way, should raw data be obtained, the encryption, working hand in hand with key rotation, renders it unreadable.
Step 4: Strengthen Access with Strict IAM & MFA Controls

While you might have hardened your infrastructure and isolated your network, your database can be further secured by limiting who has access and restricting what each user can do.
Only database admins should have server login; you need to manage user privileges at an OS level with strict Identity and Access Management (IAM).
Using a key where possible provides secure access, whereas password-based SSH is a weaker practice.
Multi-factor authentication (MFA) is important, especially for those with higher-level privileges. Periodic rotation can help strengthen access and reduce potential abuse.
The best rule of thumb is to keep things as restrictive as possible by using tight scoping within the DBMS.
Each application and user role should be separately created to make sure that it grants only what is necessary for specific operations. Be sure to:
- Remove default users
- Rename system accounts
- Lock down roles
An example of a tight-scope user role in MySQL might look something like: SELECT, INSERT, and UPDATE on a subset of tables.
When you limit the majority of user privileges down to the bare minimum, you significantly reduce threat levels. Should the credentials of one user be compromised, this ensures that an attacker can’t escalate or move laterally.
Ultimately, only by combining local or Active Directory permissions with MFA can you reduce and tackle password-based exploitation.
Step 5: Continually Patch for Known Vulnerabilities
More often than not, data breaches are the result of a cybercriminal gaining access through a known software vulnerability.
Developers constantly work to patch these known vulnerabilities, but if you neglect to update frequently, then you make yourself a prime target.
No software is safe from targeting, not even the most widely used trusted DBMSs.
You will find that from time to time, software such as PostgreSQL and MySQL publish urgent security updates to address a recent exploit.
Without these vital patches, you risk exposing your server remotely.
Likewise, operating with older kernels or library versions can give root access as they could harbor flaws.
The strategy for countering this easily avoidable and costly mistake is to put in place a systematic patching regime. This should apply to both the operating system and the database software.
Scheduling frequent hotfix checks or enabling automatic updates helps to make sure you stay one step ahead and have the current protection needed.
Admins can use a staged environment to test patches without jeopardizing production system and stability.
Step 6: Automate Regular Backups
Your next step to a secure database is to implement frequent and automated backups. Scheduling nightly full dumps is a great way to cover yourself should the worst happen.
If your database changes are heavy, then this can be supplemented throughout the day with incremental backups as an extra precaution.
By automating regular backups, you are protecting your organization from catastrophic data loss. Whether the cause is an in-house accident or hardware failure, or at the hands of an attack by a malicious entity.
To make sure your available backups are unaffected by a local incident, they should be stored off-site and encrypted.
The “3-2-1 rule” is a good security strategy when it comes to backups. It promotes the storage of three copies, using two different media types, with one stored offsite in a geographically remote location.
Most security-conscious administrators will have a locally stored backup for quick restoration, one stored on an internal NAS, and a third off-site.
Regularly testing your backup storage solutions and restoration shouldn’t be overlooked.
Testing with dry runs when the situation isn’t dire presents the opportunity to minimize downtime should the worst occur. You don’t want to learn your backup is corrupted when everything is at stake.
| Strategy | Frequency | Recommended Storage Method |
| Full Dump | Nightly | Local + Offsite |
| Incremental Backup | Hourly/More | Encrypted Repository, Such as an Internal NAS |
| Testing-Dry Run | Monthly | Staging Environment |
Remember, backups contain sensitive data and should be treated as high-value targets even though they aren’t in current production. To safeguard them and protect against theft, you should always keep backups encrypted and limit access.
Step 7: Monitor in Real-Time
The steps thus far have been preventative in nature and go a long way to protect, but even with the best measures in place, cybercriminals may outwit systems. If that is the case, then rapid detection and a swift response are needed to minimize the fallout.
Vigilance is key to spotting suspicious activity and tell-tale anomalies that signal something might be wrong.
Real-time monitoring is the best way to stay on the ball. It uses logs and analytics and can quickly identify any suspicious login attempts or abnormal spikes in queries, requests, and SQL commands.
You can use a Security Information and Event Management (SIEM) tool or platform to help with logging all connections in your database and tracking any changes to privileges. These tools are invaluable for flagging anomalies, allowing you to respond quickly and prevent things from escalating.
The threshold setting can be configured to send the security team alerts when it detects one of the following indicators that may signal abuse or exploitation:
- Repeated login failures from unknown IPs
- Excessive data exports during off-hours
- Newly created privileged accounts
The logs can also be analyzed and used to review response plans and are invaluable if you suffer a breach. Regularly reviewing the data can help prevent complacency, which can be the leading reason that real incidents get ignored until it’s too late.
Step 8: Compliance Mapping and Staying Prepared for Audits

Often, external mandates are what truly dictate security controls, but you can make sure each of the measures you have in place aligns with compliance obligations such as those outlined by PCI DSS, GDPR, or HIPAA, with compliance mapping.
Isolation requirements are met by using a dedicated server, and confidentiality rules are handled with the introduction of strong encryption.
Access control mandates are addressed with IAM and MFA, and you manage your vulnerabilities by automating patch updates. By monitoring in real time, you take care of logging and incident response expectations.
The logs and records of each of the above come in handy as evidence to back up the security of your operations during any audits because they will be able to identify personal or cardholder data, confirm encryption, and demonstrate the privileged access in place.
It also helps to prepare for audits if you can leverage infrastructure certifications from your hosting provider. Melbicom operates with Tier III and Tier IV data centers, so we can easily supply evidence to demonstrate the security of our facilities and network reliability.
Secure Database Hosting: Key Takeaways and Next Steps

Co-locating is a risky practice. If you take security seriously, then it’s time to shift to a modern, security-forward approach that prioritizes a layered defense.
The best DBMS practices start with a hardened, dedicated server, operating on an isolated secure network with strict IAM in place.
Strategies such as patch updates and backup automation, as well as monitoring help you stay compliant and give you all the evidence you need to handle an audit confidently.
With the steps outlined in this guide, you now know how to host a database securely enough to handle any threat that a modern organization could face. Building security from the ground up transforms the database from a possible entry point for hackers to a well-guarded vault.
Why Choose Melbicom?
Our worldwide Tier III and Tier IV facilities house advanced, dedicated, secure servers that operate on high-capacity bandwidth. We can provide a fortified database infrastructure with 24/7 support, empowering administrators to maintain security confidently. Establish the secure foundations you deserve.